94
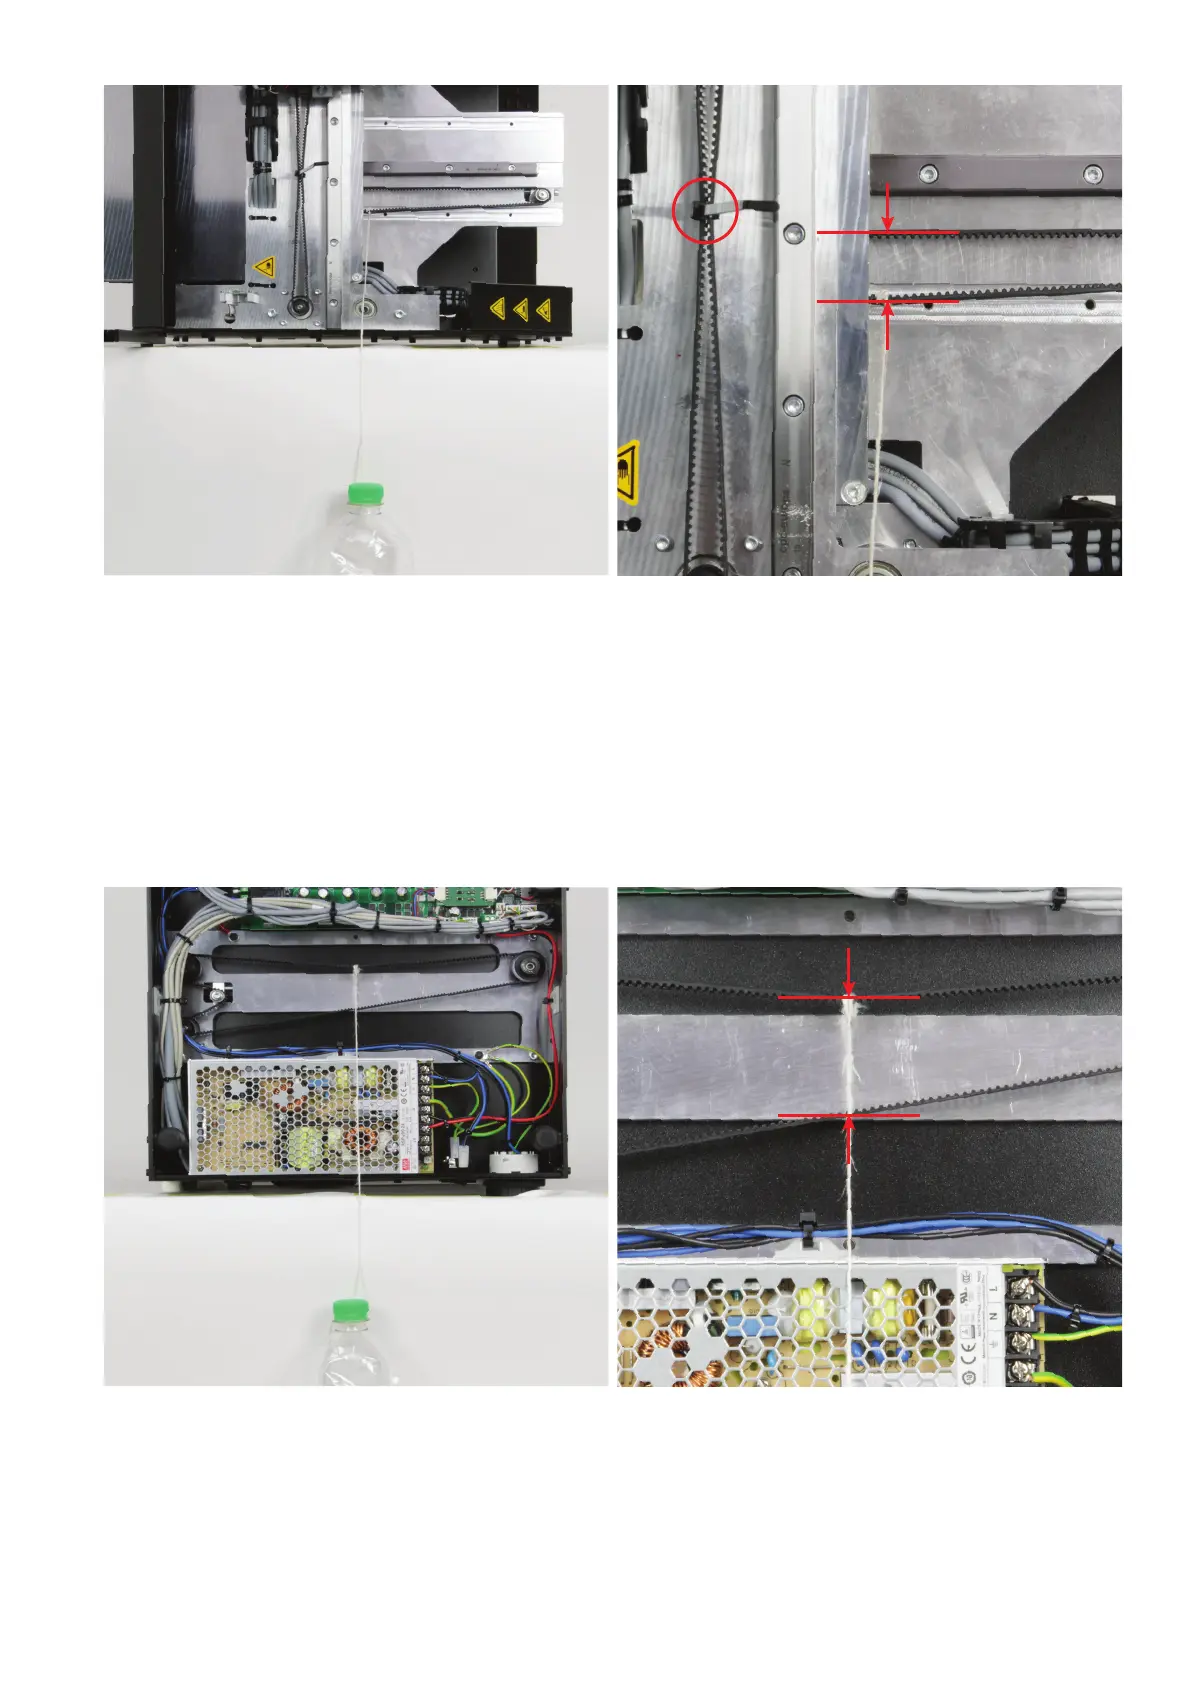
Now tip the printer to the left side near the edge of the table and at-
tachtheweighttothepartofthetoothedbeltfortheY-directionthatis
now at the bottom using the cord.
For the extruder carriage to stay at the top as illustrated, simply bind
the toothed belt together with a cable tie (see circle in the right im-
age).
The weight must be suspended so that it can move freely. The string
may touch the side part on top.
Measure the distance between the two toothed belt halves as illus-
trated. Set a distance of 25 mm with the belt tensioner (measured at
the outside of the toothed belt).
Tip the printer onto its back close to the edge of the table and remove
the bottom sheet. Attach the weight in the middle to the part of the
toothed belt for the Z-direction that is now at the top with the cord.
The weight must be suspended to be freely movable but may touch
the mains unit housing. This is not a problem.
Measure the distance between the two toothed belt halves as illus-
trated. Set a distance of 41 mm with the belt tensioner (measured at
the outside of the toothed belt).
25 mm
41 mm
 Loading...


