42
15.Inserting,removingandchangingthelament
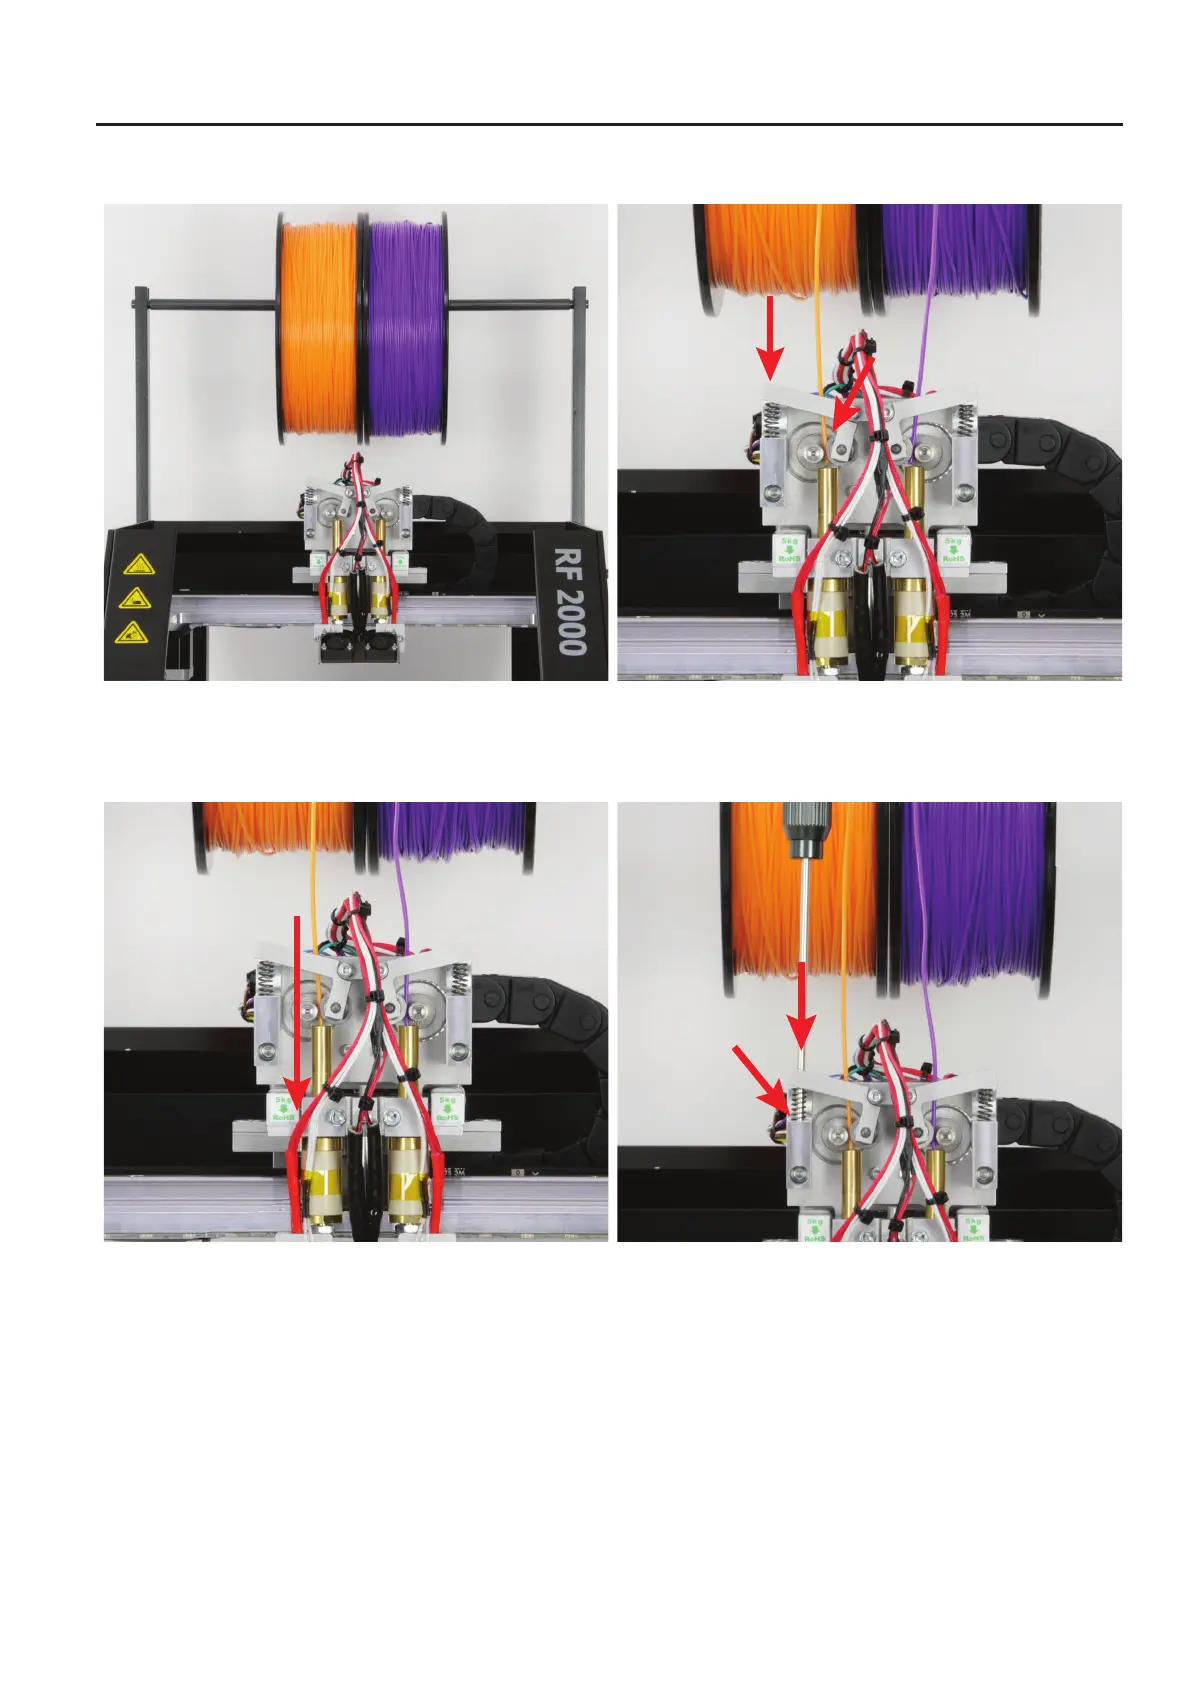
a)Insertingthelament-Mechanicalpart
Pushthelamentrollsontheshaftofthelamentholder.Thelament
rolls must move freely.
Pushtheballbearingholderontheoutsideandinsertthelament
through the ball bearing holder.
Insertthelamentpastthefeedmotorintotheextrudertothestop.
Thelamentmustbeguidedinastraightlinefromthetopbetween
the feed motor and the ball bearing into the bore at the extruder.
It must be possible for the feed motor to turn without slippage or
catchingwhenpullingorpushingatthelament.
To set the application pressure of the ball bearings, guide a hex key
with 3 mm through the outer-most hole of the hall bearing holder and
through the spring into the spring holder.
Turning the screw in the spring holder to the left turns the screw in
farther and the spring relaxes. Turning it to the right will turn out the
screw farther and the spring is tensed more strongly.
Then turn on the printer and move the printing plate with the arrow button "down"(3),manuallyuntilthelamentcanescapewell.