43
b)Insertingthelamentviatheprintermenu
Beforeinserting,removingorchangingthelament,thecorrespondingextrudermustbeheatedupsothatthelamentcanbeinsertedintoor
removed from the extruder cleanly.
Donottouchthehotextruderswheninserting,removingorchangingthelament!Dangerofburns!
Alwayswaitfortheextrudertemperaturetobereachedatlamentchangeandlettheextruderheatforapprox.another
minute.
When heating, there may be slight development of smoke or steam. This is normal. Please ensure the corresponding ven-
tilation.
Left extruder (extruder 0)
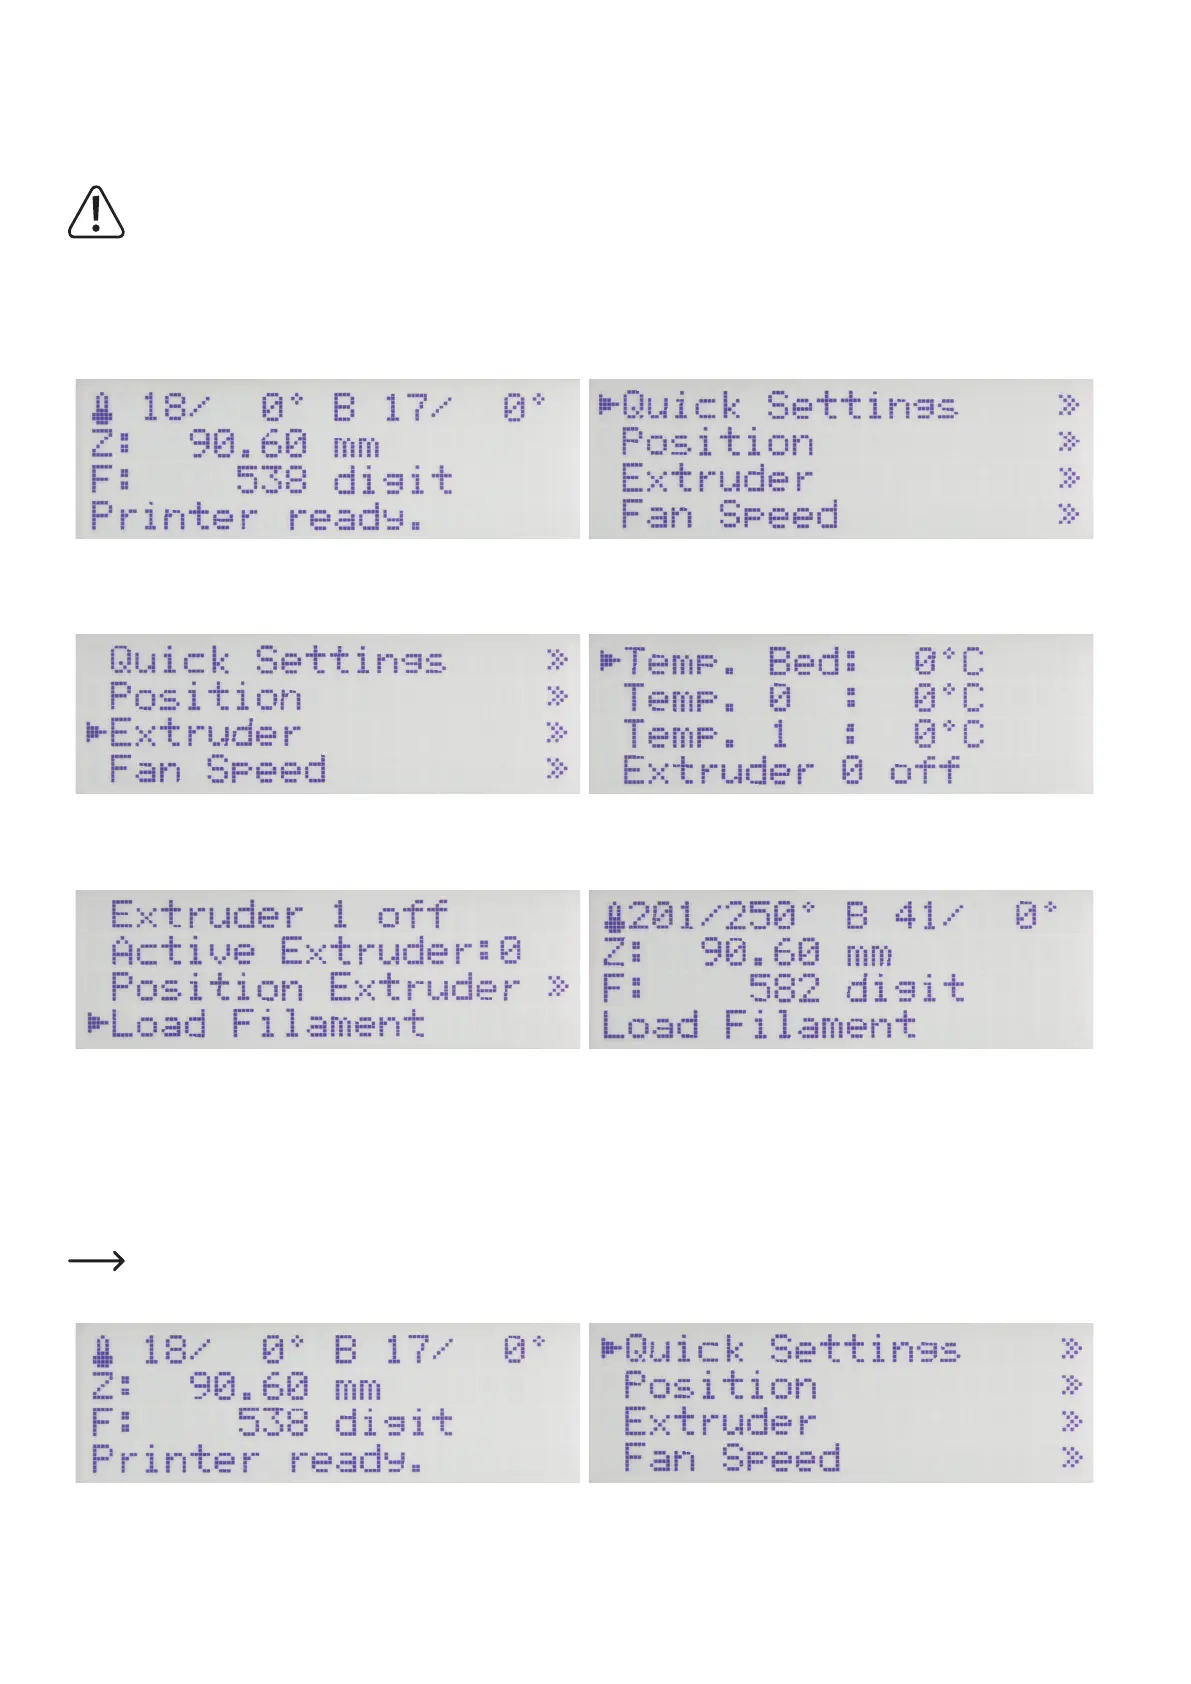
Push OK (2) from the main menu. Use the direction buttons (1) to select "Extruder".
Push OK. Use the direction buttons to navigate to "Load Filament".
Push OK.
Important! The menu item "Active Extruder" must show "0". Only
then is the left extruder chosen as the active one.
The printer will now automatically heat up the active extruder (after
activation, this always is extruder 0, i.e. the left one). When it has
reachedthepre-settargettemperature,thelamentwillbepulledin.
The process is automatically ended after some time and the extruder
heater is switched off.
Right extruder (extruder 1)
Thepathdescribedbelowforinsertingthelamentisanalternativetotheprecedingpath.Ofcourse,youcaninsertthelamentin
both extruders either way.
Push OK from the main menu. Use the direction buttons to select "Extruder".