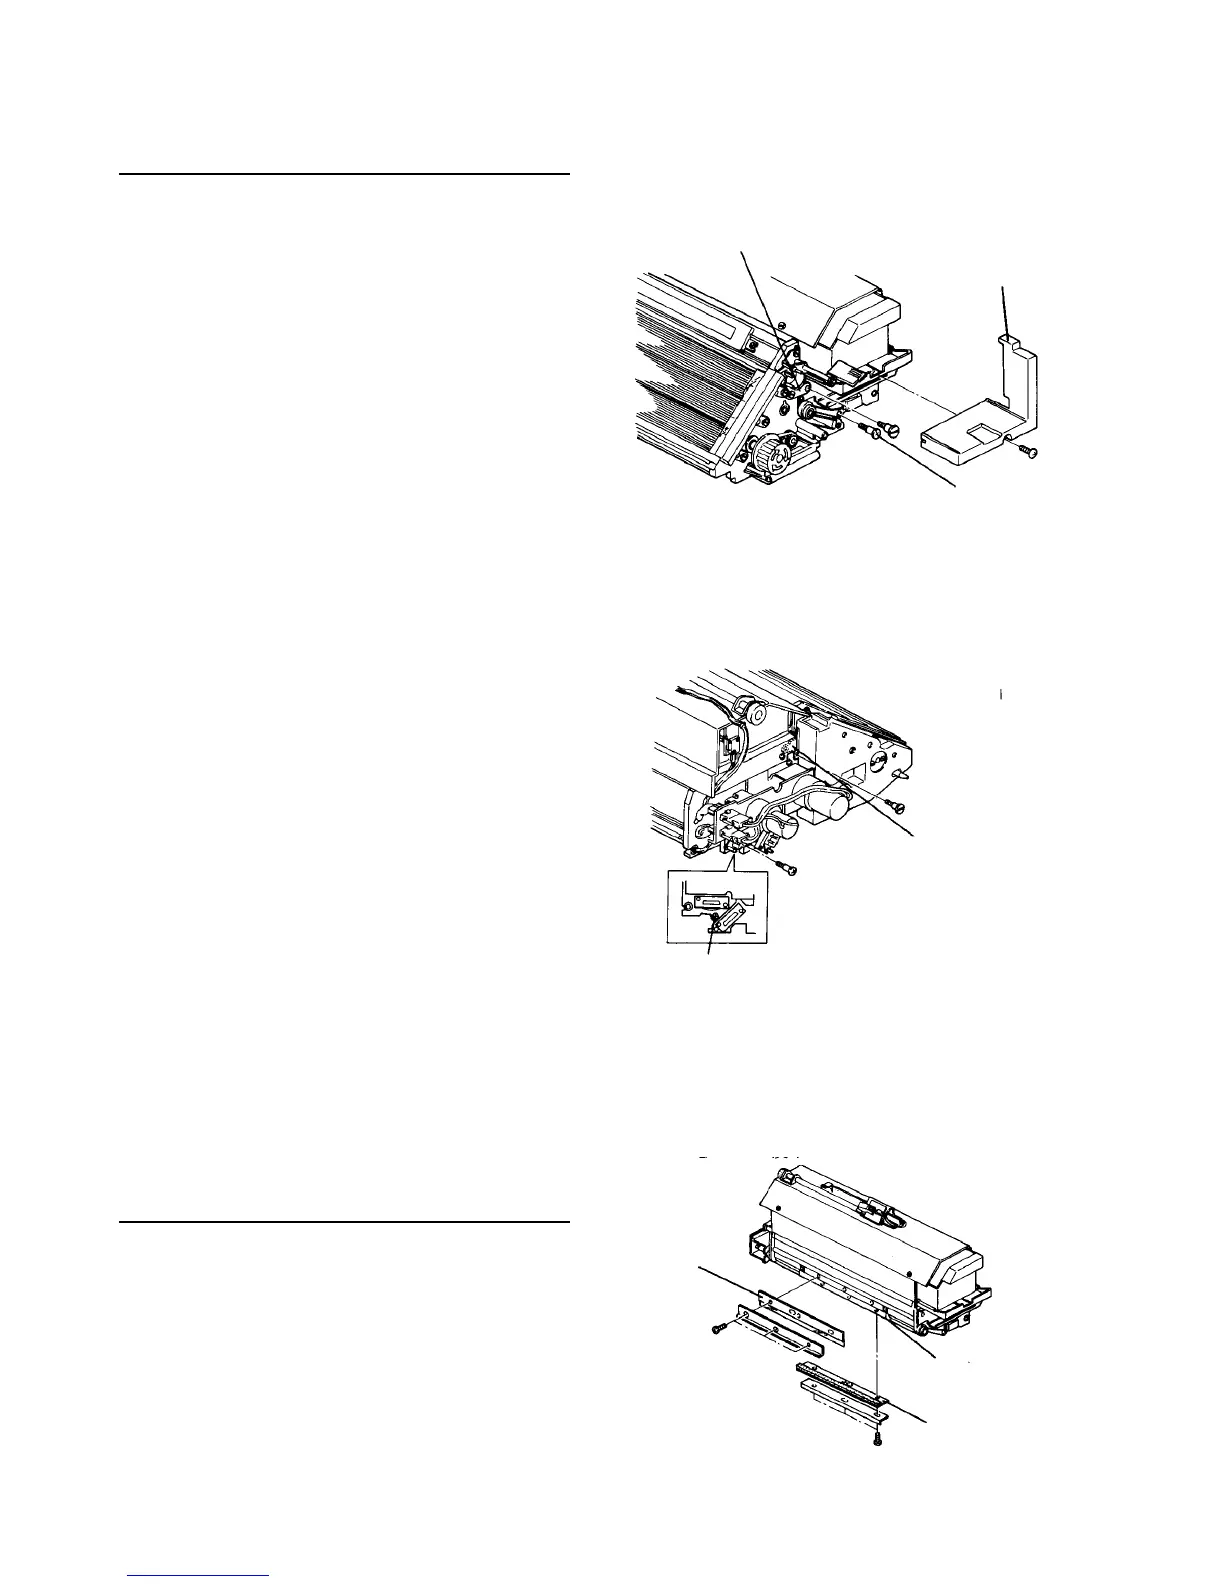
2.8.4 Replacing parts in the toner hopper
Removing the toner hopper
1. Pull out and remove the development unit.
2. Tilt the development unit and bring the developer
near the sleeve 1 (lower one) side.
3. Pull out the toner density control board.
CAUTION
No developer should be allowed to fall on the
toner density control board. Otherwise the
board might be damaged.
4. Remove the toner hopper inner cover (one screw).
5. Remove the one slot head stepped screw on the
toner hopper side from the front toner hopper fixing
plate.
6. Remove one toner hopper fixing stepped screw.
7. Remove two slot head stepped screws on the
toner hopper side from the rear toner fixing plate.
8. Remove one toner hopper fixing stepped screw
from the rear of the unit.
9. Remove the toner hopper.
10. Reassemble in the reverse order.
CAUTION
Pay attention to sealing the toner hopper with
the development unit when the toner hopper is
reinstalled.
NOTE
When tightening the front and rear fixing stepped
screws for the toner hopper, slightly lift the toner
hopper up to make it easier.
Replacing the toner supply mylar
1. Remove the toner hopper.
2. Remove the toner supply mylar with its bracket (3
screws), and replace it.
CAUTION
Confirm that the edge of the mylar and sponge
are in contact with the toner supply roller when
reinstalling them.
Front toner
hopper fixing
plate
Toner hopper
inner cover
Toner hopper fixing
stepped screw
Rear toner
hopper fixing
plate
Toner hopper fixing
stepped screw
Toner supply mylar
Toner supply roller
Sponge blade



 To Next Page