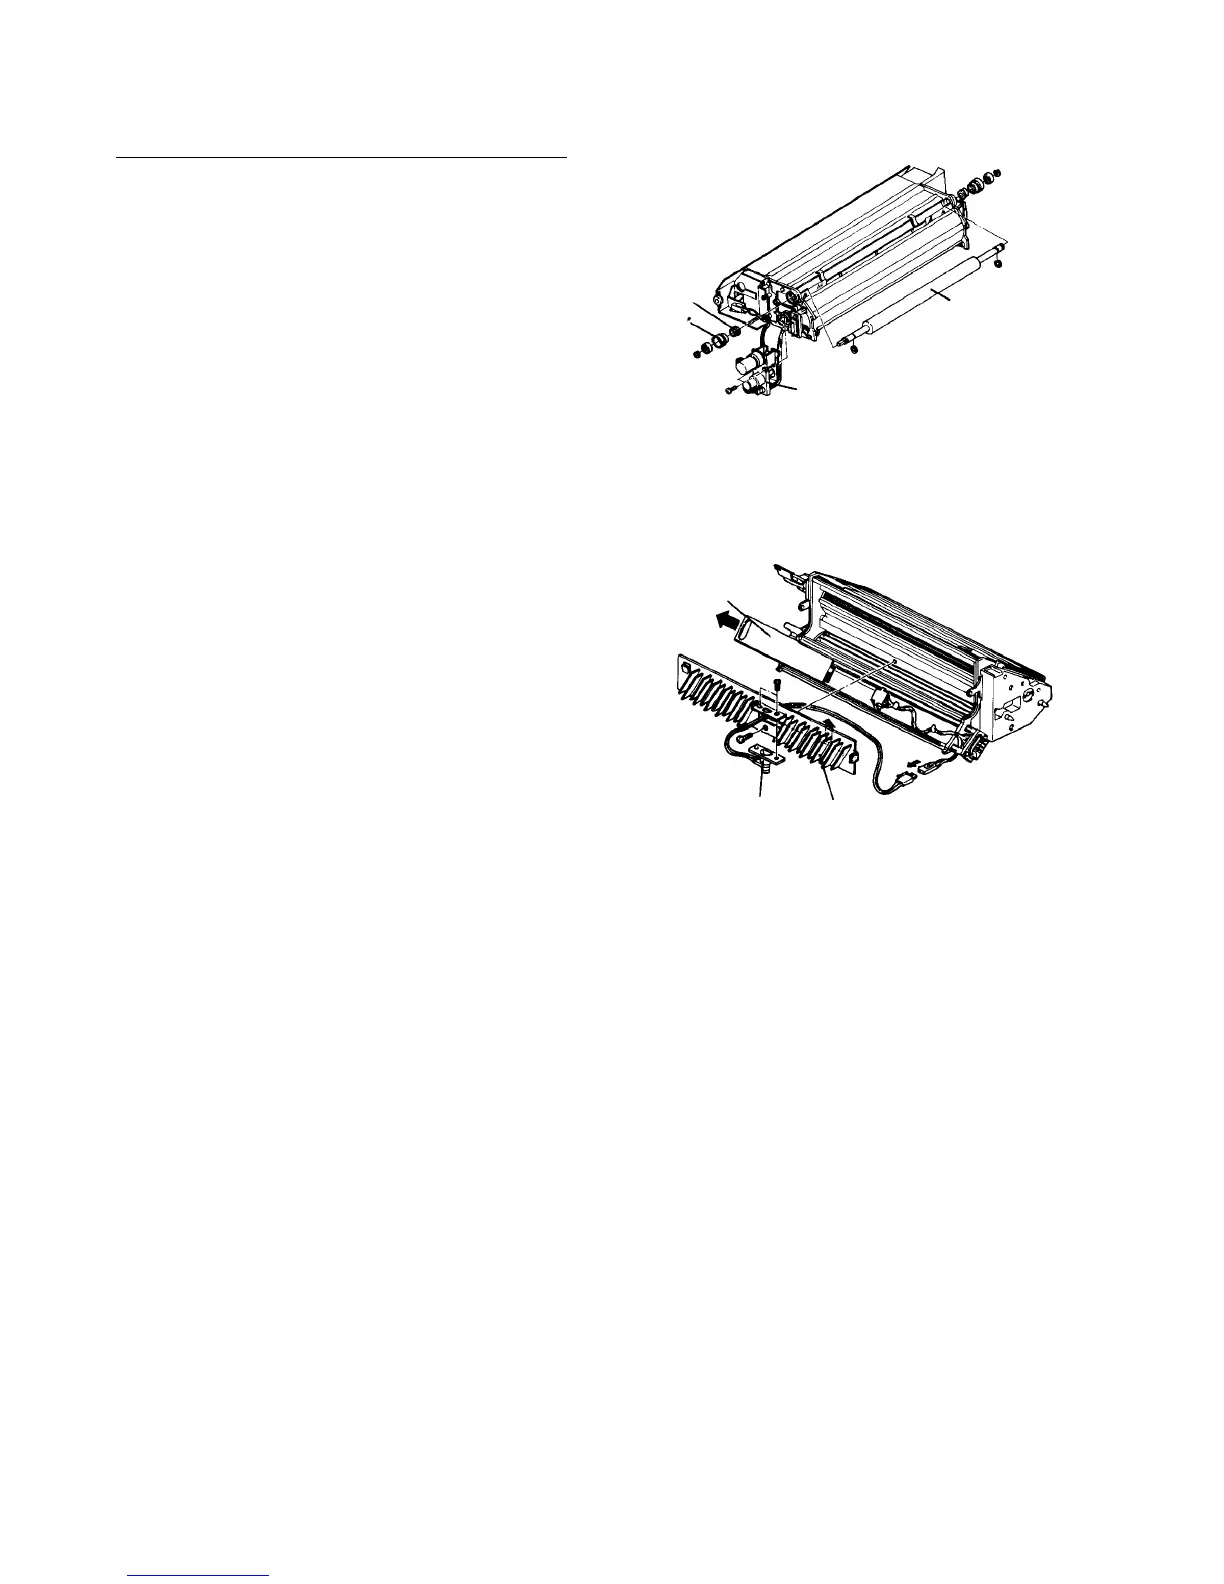
Replacing the toner supply roller
1. Remove the toner hopper.
2. Remove the motor bracket (2 screws).
3. Remove E-rings, bearings, couplings, and V-seals
from front and rear sides of the toner supply roller.
4. Remove the toner supply mylar (2 screws).
5. Replace the toner supply roller.
CAUTION
Set the V-seals in the proper direction to
prevent toner from scattering and jamming the
bearing.
2.8.5 Replacing the toner density sensor
1. Pull out the toner density control board.
2. Remove the toner hopper.
3. Remove the mixing vanes (one stainless steel
screw).
CAUTION
Be careful not to drop the stainless steel screw
in the unit.
4. Remove toner density sensor (two screws). Take
out the harness and pull out the connector to
replace the sensor.
5. Reassemble in the reverse order.
CAUTION
• The developer should not drop on the toner
density control board to avoid damaging it.
• The toner density sensor connection
should be secured with no play when
reinstalling the sensor.
6. Turn on the main switch and wait for the machine
stand-by.
7. Access service tool [4-02] and carry out setting C.
Toner supply roller
Motor bracket
V-seal
Coupling
Toner density
control board
Toner density sensor
Mixing vanes



 To Next Page