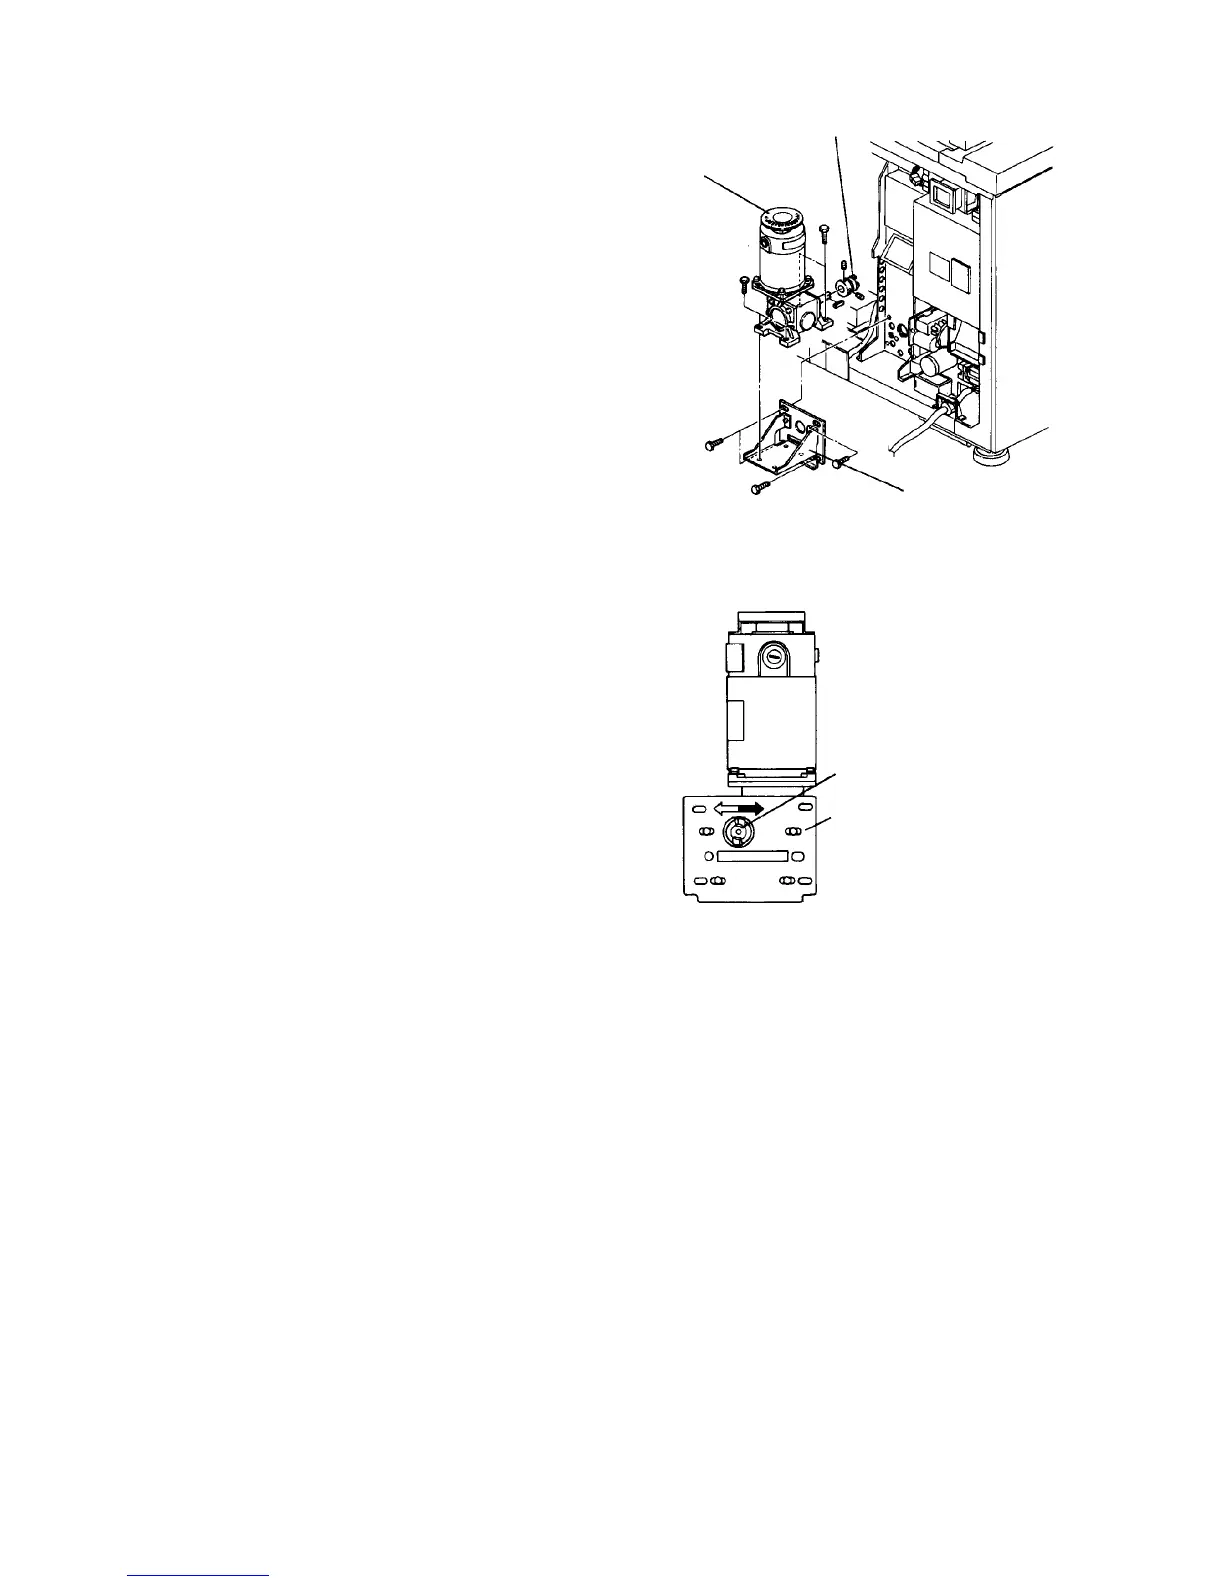
2.8.6 Replacing the development motor
1. Remove the development unit.
2. Remove rear left cove (2 screws).
3. Remove the development motor with its bracket
(four M5 gold screws).
CAUTION
Use a large size screwdriver to loosen the M5
screw.
4. Disconnect the connector of the development
motor and replace the motor.
5. Reassemble in the reverse order.
CAUTION
• If the motor is removed from the bracket,
be sure during reassembling to secure the
motor when the development joint comes to
the center of the development motor
bracket hole.
• Set the development unit and fix the set
screw of the development motor bracket
when the development joint is engaged with
the development unit side.
• If the development motor or development
DC power supply is replaced with a new
one, the sleeve linear speed may change.
This may appear on the copy image, so
check the copy image after the
replacement. Adjust the development motor
speed if necessary. (See Adjusting the
development motor speed in the Replacing
the development sleeve section.)
2.8.7 Replacing the ID (Image Density) sensor
1. Slide out the development unit.
2. Disconnect the connector from the ID sensor
board located on the top of the development unit.
3. Remove the sensor board, and replace it.
4. Reassemble the removed parts.
5. Turn on the main switch and wait for the machine
stand-by.
6. Access service tool [4-02] and carry out setting C.
Development joint
Development motor
Development
motor bracket
Development joint
Development motor bracket



 To Next Page