2.2.2 Replacing the exposure glass
PM cycle: Clean it and check the
resistance at every visit. Wipe with silicon
oil to prevent original misfeeds caused by
static electricity.
WARNING
Working near the xenon lamp is dangerous after
removing the exposure glass. Never work near
the lamp without turning off the main switch and
waiting at least 1 minute for discharge.
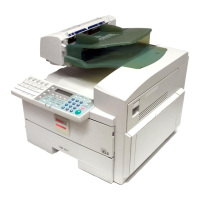
1. Turn off the main switch.
2. Open the ADF unit.
3. Remove the front upper cover (2 screws).
4. Open the copy tray and remove the SADF
transport plate (one stepped screw on the rear and
one plated screw on the front).
5. Loosen two screws of the back upper cover.
6. Remove the exposure glass. Clean it if necessary.
7. Check the resistance of the glass upper surface
using the beckman multimeter. Replace the
exposure glass if necessary.
Exposure glass surface resistance
standard: 55 KΩ or less.
8. When the machine is in the stand-by condition,
access service tool [4-03]. Using the PC-1 chart,
check the AID reference voltage. Perform setting A
if the value is not correct.
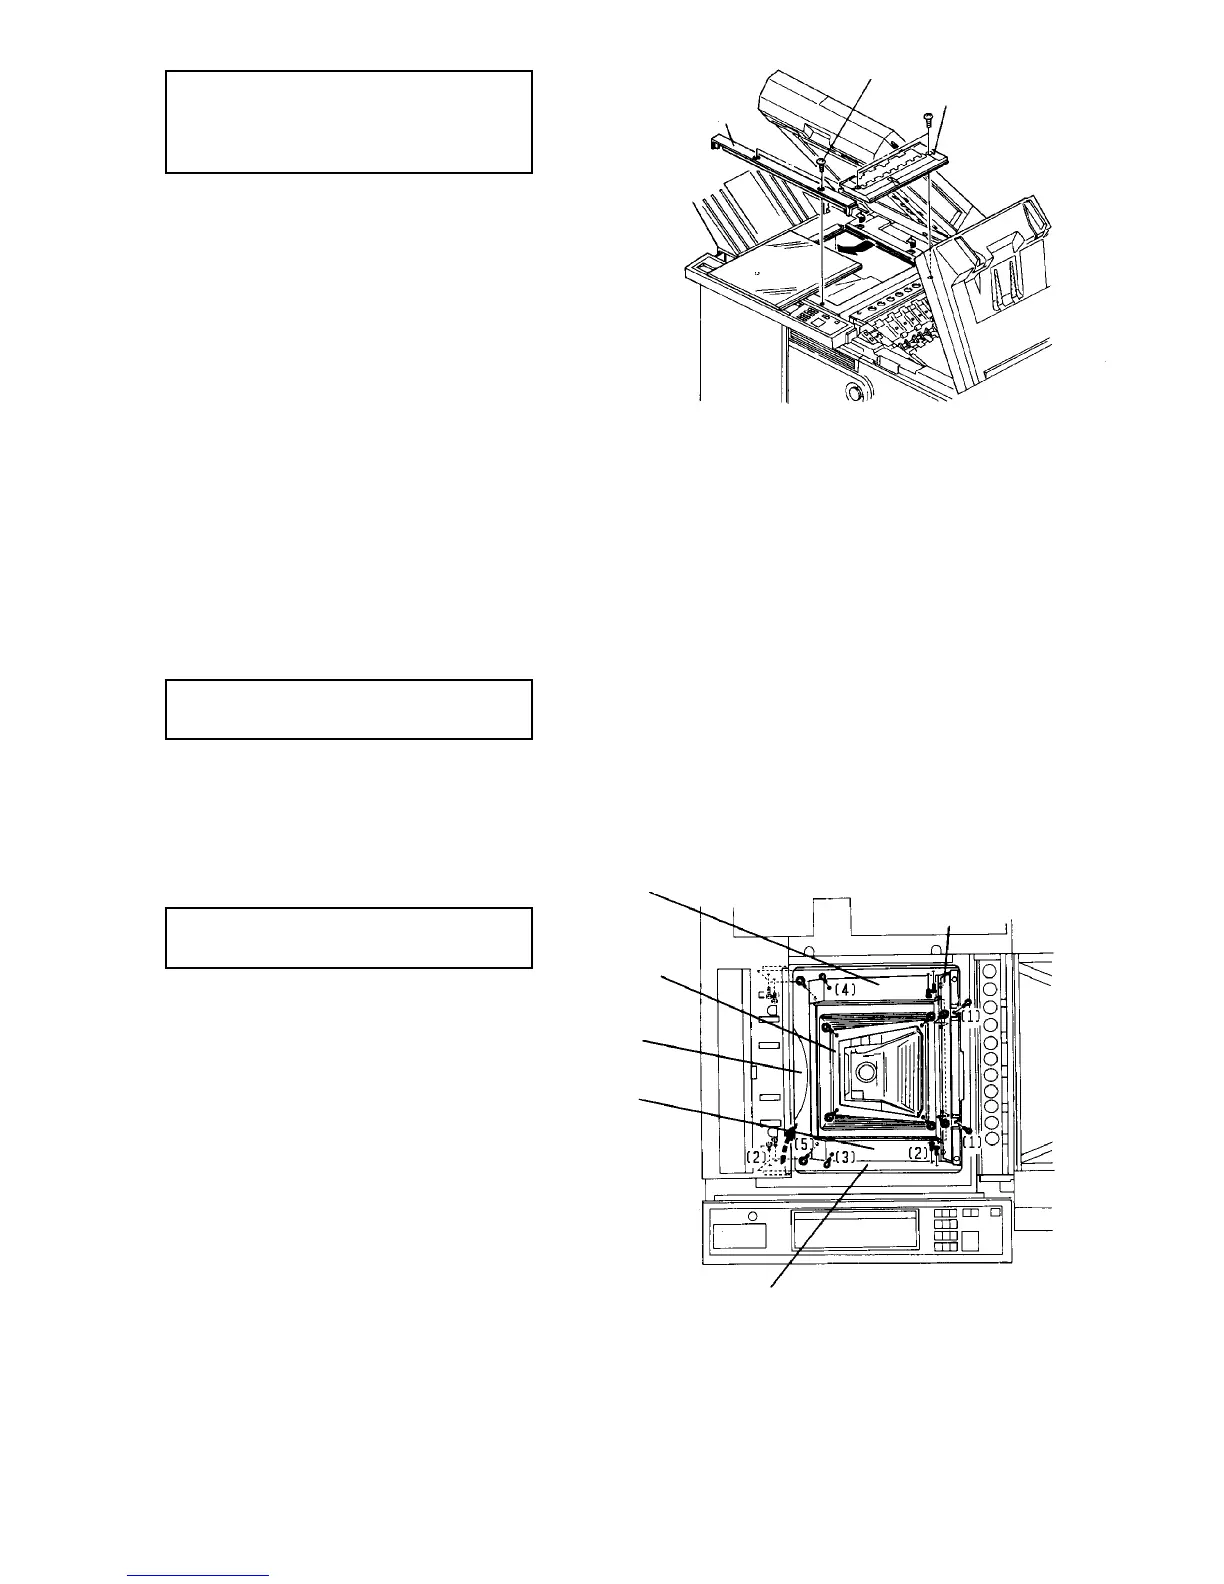
2.2.3 Replacing the mirror/lens motor
PM cycle: Lubrticate the motor worm
gear every 1,200K
1. Remove the exposure glass.
2. Loosen two screws (1) to remove the opposite
reflector. Clean the reflector as required.
3. Remove four screws (2) to remove the front
reflector. Also, remove the rear reflector.
CAUTION
Be careful not to scratch the lamp reflector
when removing the front and rear reflectors.
After removing screws, pull out the reflector
with the left side first.
4. Remove one screw (3) to remove the front shield
cover.
5. Remove one screw (4) to remove the back shield
cover.
6. Remove 8 fixing screws (5) to remove the 1st
mirror shield unit. Remove the unit upwards while
raising the inside plate.
SADF transport plate
Front upper cover
Back shield cover
1st mirror
shield unit
Lamp reflector
Front
shield
cover
Front reflector
Opposite
reflector
2-17