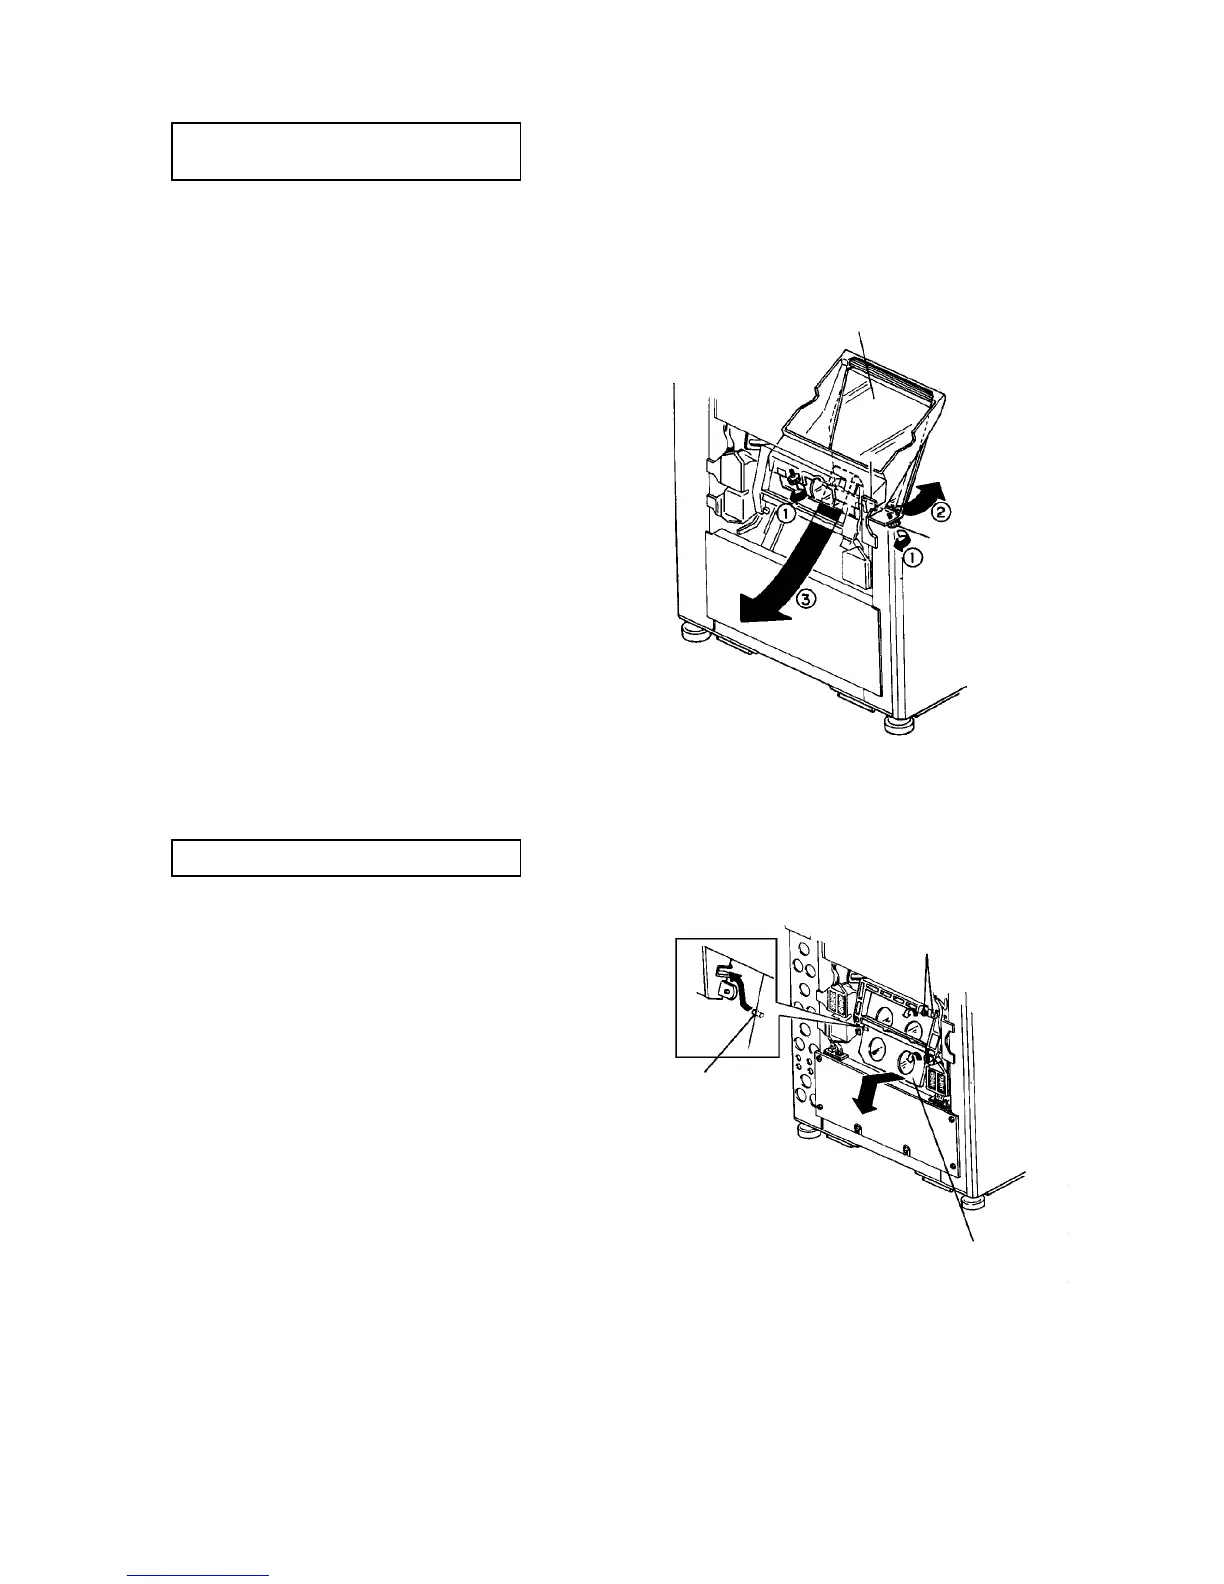
2.2.4 Replacing the first mirror
PM cycle: Clean the 1st mirror every
200K
NOTE
To clean the 1st mirror, it does not need to be
removed. Just remove the exposure glass to clean.
1. Remove the 2nd mirror according to the
instructions described below.
2. Remove the two set screws from the underside of
the 1st mirror.
3. Hold the underside of the mirror and slide it down
to remove it.
CAUTION
Take care not to drop the mirror.
4. Reinstall the mirror after cleaning.
5. When the machine is in the stand-by condition,
access service tool [4-03]. Using the PC-1 chart,
check the AID reference voltage. Perform setting A
if the value is not correct.
2.2.5 Replacing and cleaning the 2nd mirror
PM cycle: Clean as necessary at PM
1. Turn off the main switch.
2. Remove the left cover (2 screws).
3. Remove two set screws from the 2nd mirror.
CAUTION
Hold the 2nd mirror with one hand so it does not
fall.
4. Move the 2nd mirror to the left (outside) to avoid
the DC power source, pulling it out then down.
5. After cleaning, reinstall it in the reverse order.
CAUTION
Set the locating pin first to install the 2nd mirror
unit. (See illustration.)
6. When the machine is in the stand-by condition,
access service tool [4-03]. Using the PC-1 chart,
check the AID reference voltage. Perform setting A
if the value is not correct.
1st mirror
Set screw
Locating pin
Set screw
2nd mirror



 To Next Page