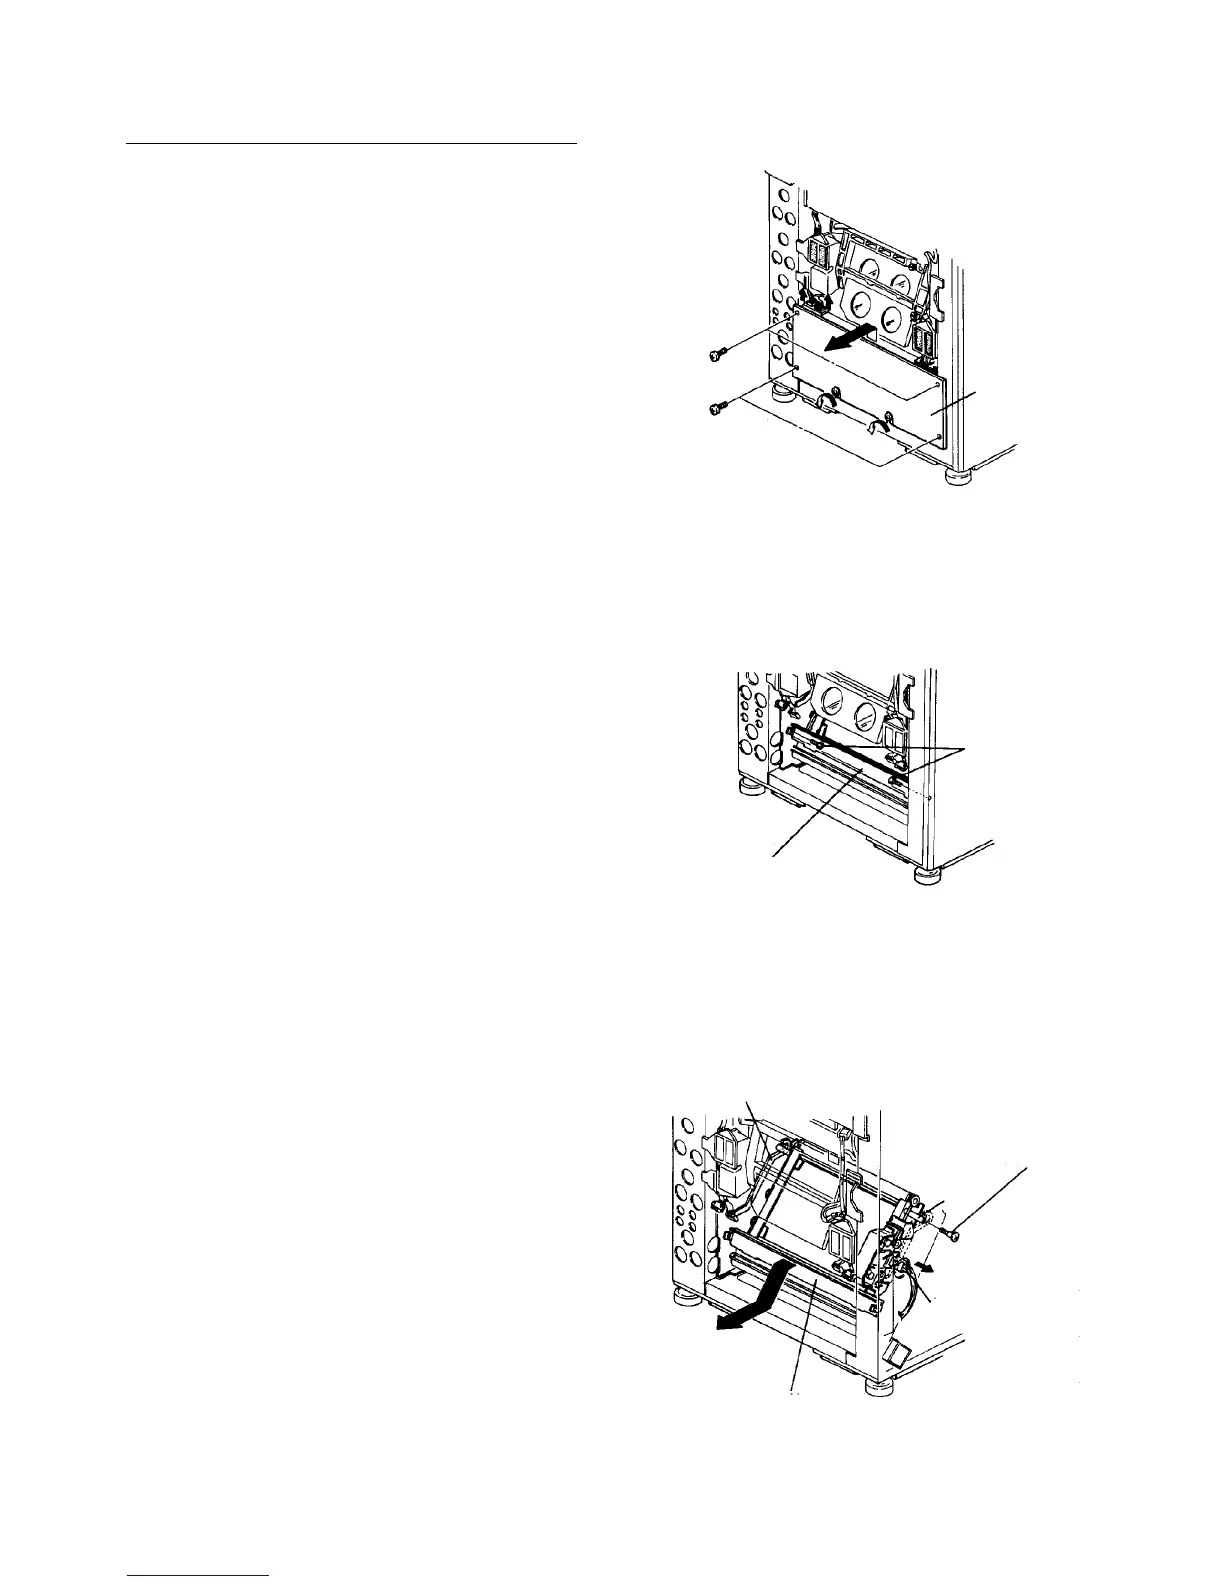
2.2.6 Replacing parts in the shield unit
Removing the shield unit
1. Turn off the main switch.
2. Remove the left cover (2 screws).
3. Open the front door and remove two screws to
allow it to open further.
4. Remove the inner cover (2 screws and one
connector).
5. Remove the four connectors of the DC power
source.
6. Remove four fixing screws and loosen the lower
side screws to remove the DC power source.
7. Remove the two screws fixing the shield unit from
the left.
8. Disconnect the connector for the shield unit from
the front.
9. Remove the shield unit fixing screws (M6).
10. Pull out the shield unit to the left along the rail.
CAUTION
• Hold the front and back side plates, not the
shield screen to pull out the shield unit.
• Press the upper stays of the shield unit
against the far side of the front and rear
rails, and fix the shield unit.
DC power
source
Shield unit
fixing screw
Shield unit
Rail
Stay
Shield unit
fixing screw
Connector for
shield unit
Shield unit



 To Next Page