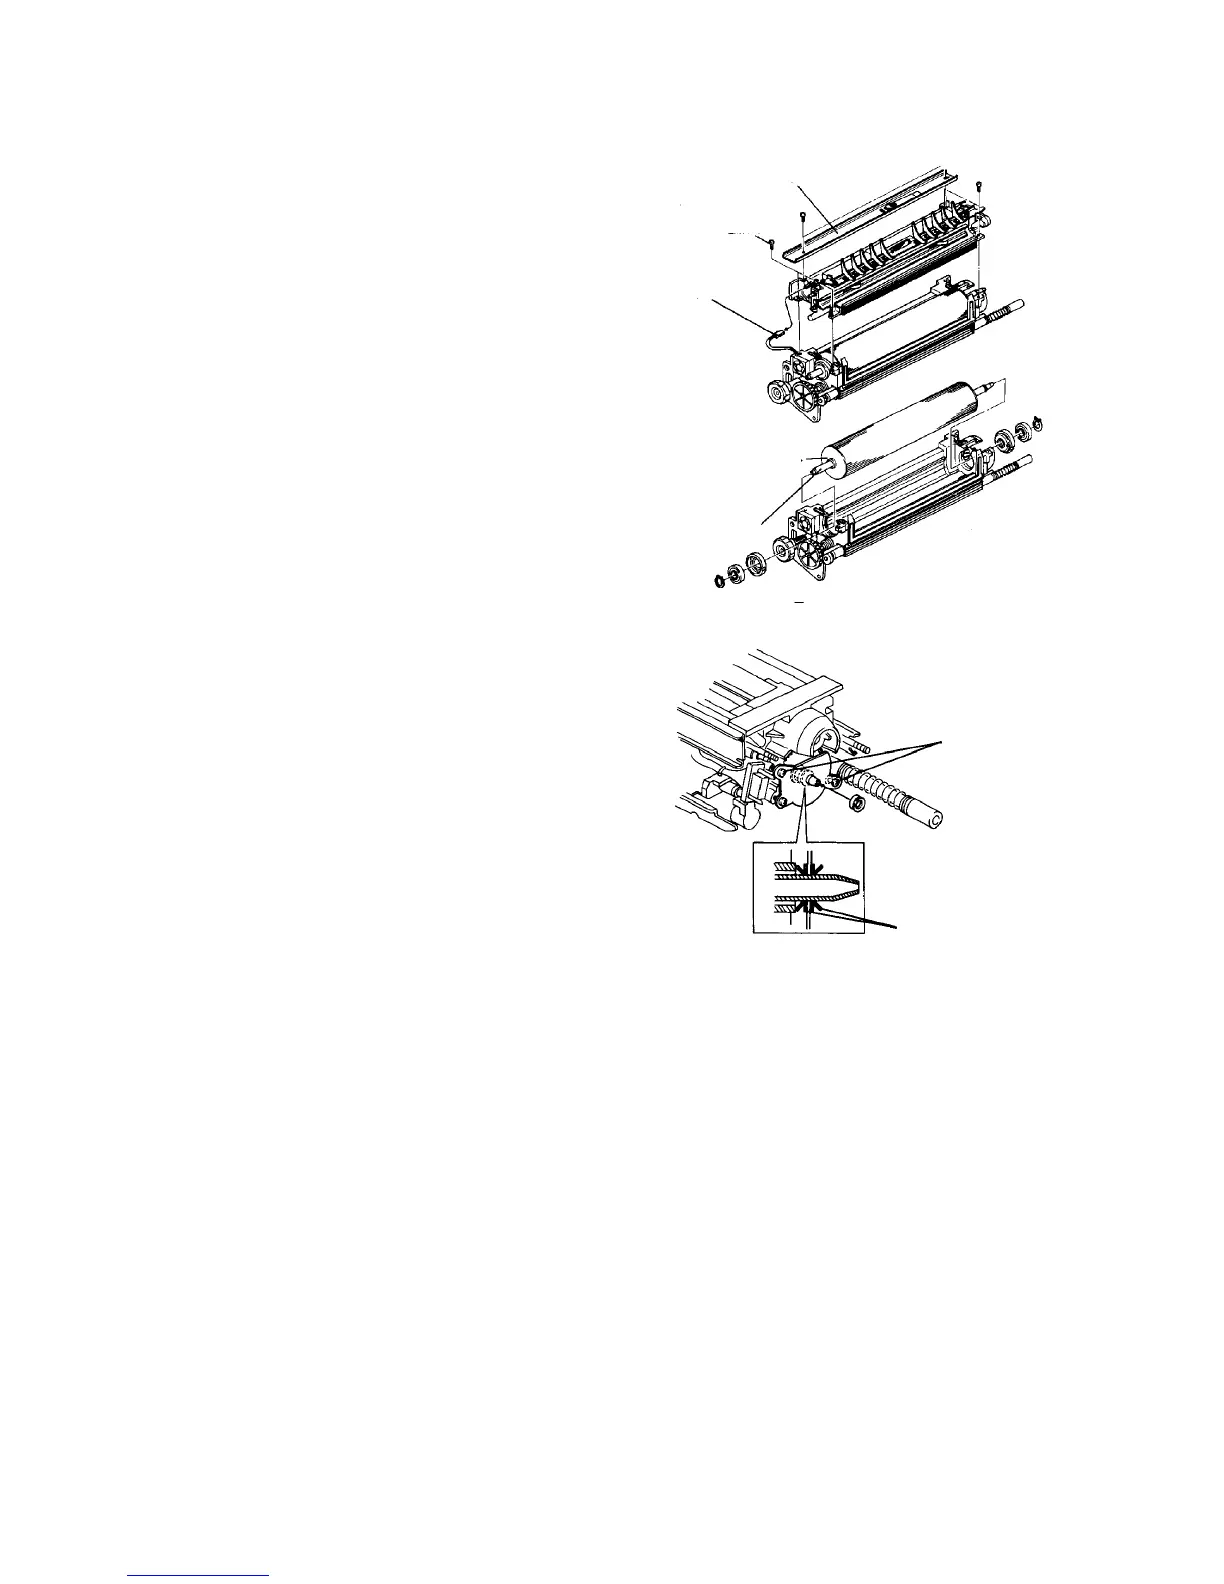
6. Tilt the unit 90
o
so that the cleaning roller moves to
the top.
7. Disconnect the PCC power pack connector.
8. Remove the drawing rail (2 screw).
9. Divide the cleaning unit into two parts (4 screws).
10. Remove the front and rear bearings and bearing
cases (one C-ring each front and rear).
11. Remove the cleaning roller, and replace it.
12. Reassemble in the reverse order.
CAUTION
• Use a dry cloth to wipe and clean the inside.
• Confirm that the bias terminal board is in
close contact with the bearing case.
• Because the cleaning roller shaft moves, fit
the rear magnet holder bracket after the
front magnet holder bracket is fitted.
• Take care that the two V-seals have the
different setting direction as shown.
• Use three M4 x 14 screws to fit the rear
magnet holder bracket. Gradually, tighten
the three screws so that the inside V-seal
just fits the cleaning roller shaft.
2.6.8 Replacing the slide guide
1. Remove the cleaning unit from the slide guides.
2. Remove the stepped screw from the front side and
replace the slide guide on the main body side.
3. Replace the guides as a pair on the main body
side, and on the cleaning unit side in the same
way as the slide guide of the OPC unit. This is
because the roller bearing inside the rail may
come out of place when the unit is set.
Drawing rail
Connecting screw
PCC power
pack connector
Cleaning roller
Shaft
M4 x 14 (3)
V-seal



 To Next Page