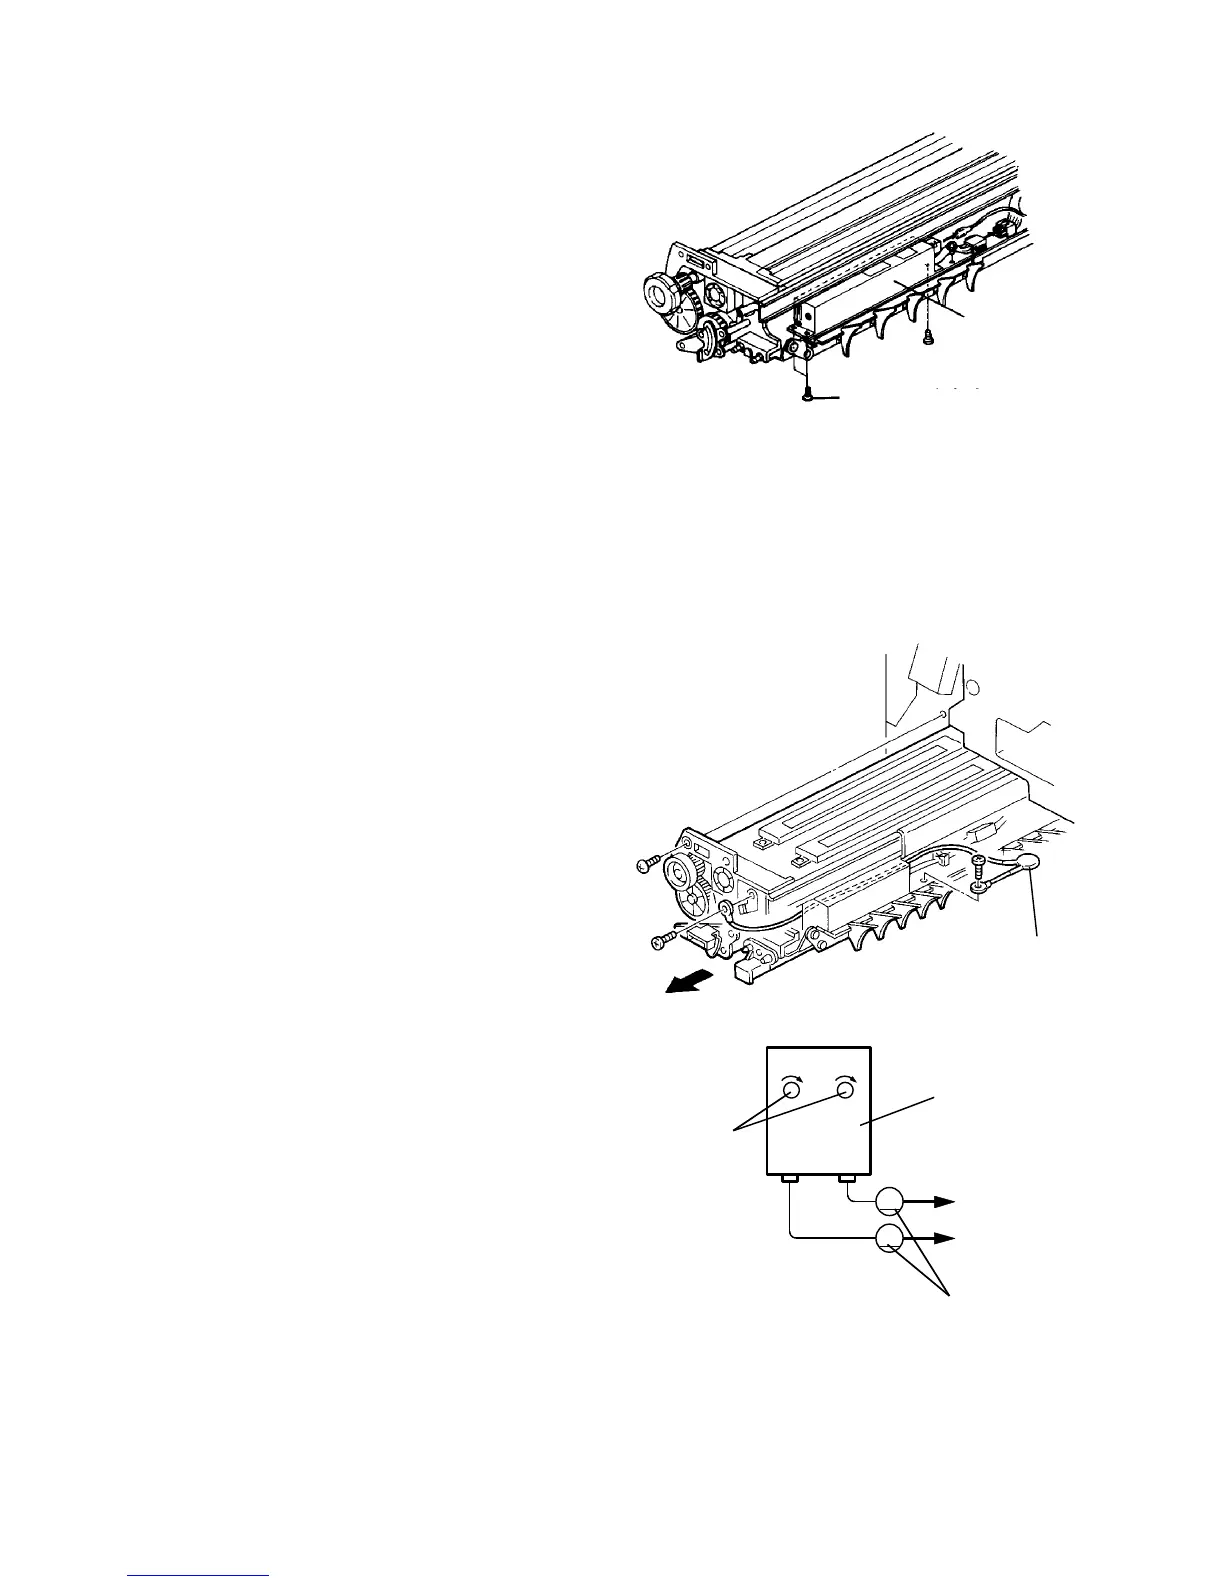
2.6.9 Replacing the PCC power pack
1. Pull out the cleaning unit.
2. Take off the two power pack fitting screws.
3. Remove ground wire fixing screw, and disconnect
the connector and harness.
2.6.10 Checking the cleaning and scavenging bias
1. Pull out the cleaning unit.
2. Remove the varistor.
NOTE
Although the cleaning power pack is a constant
current type, the varistor makes the bias voltage to
the cleaning roller constant. Removing the varistor
allows for adjusting the amperage.
3. Remove the rear left cover and set an ammeter to
the cleaning power pack as shown.
NOTE
To measure the cleaning roller side, disconnect the
wire from the "CL" terminal (indicated on the power
pack). Then, set an ammeter between the wire
connector and terminal. To measure the
scavenging roller side, use the "S" terminal.
WARNING
When the main switch is ON, never touch
anything inside the rear left cover to avoid
possible injuries.
4. Turn on the main switch. After the copier enters
the stand-by condition, access the service tools.
5. Select [5-04] "I/O Test". Press the "Motor" key,
then press the "Main" and "OPC" keys. Press the
"Lamp/Sol" key, then press the "QL" key.
NOTE
This procedure is necessary to avoid OPC
deterioration.
PCC power pack
Power pack fitting screw
Varistor
A
A
CL S
Cleaning power
pack
Ammeter
VR



 To Next Page