C2 User Manual, Release 1.0.0
1. Make sure your smart device is connected to the same wifi network as your Robo C2
2. In the ‘dashboard’ screen of the Robo App, tap ‘+Add a Printer’ in the middle of the screen
3. Select ‘Scan for Printer Name/IP’
4. A pop up will appear with all of the printers on the same network as your smart device, go ahead and select
which printer you would like to add (your printer has a unique name, example - Curious Tesla, or Brilliant
Einstein). (You may look on the back of your printer and find out which name your printer has been given).
5. Now you will need to scan the QR code on your screen to fully connect the 3d printer to your smart device.
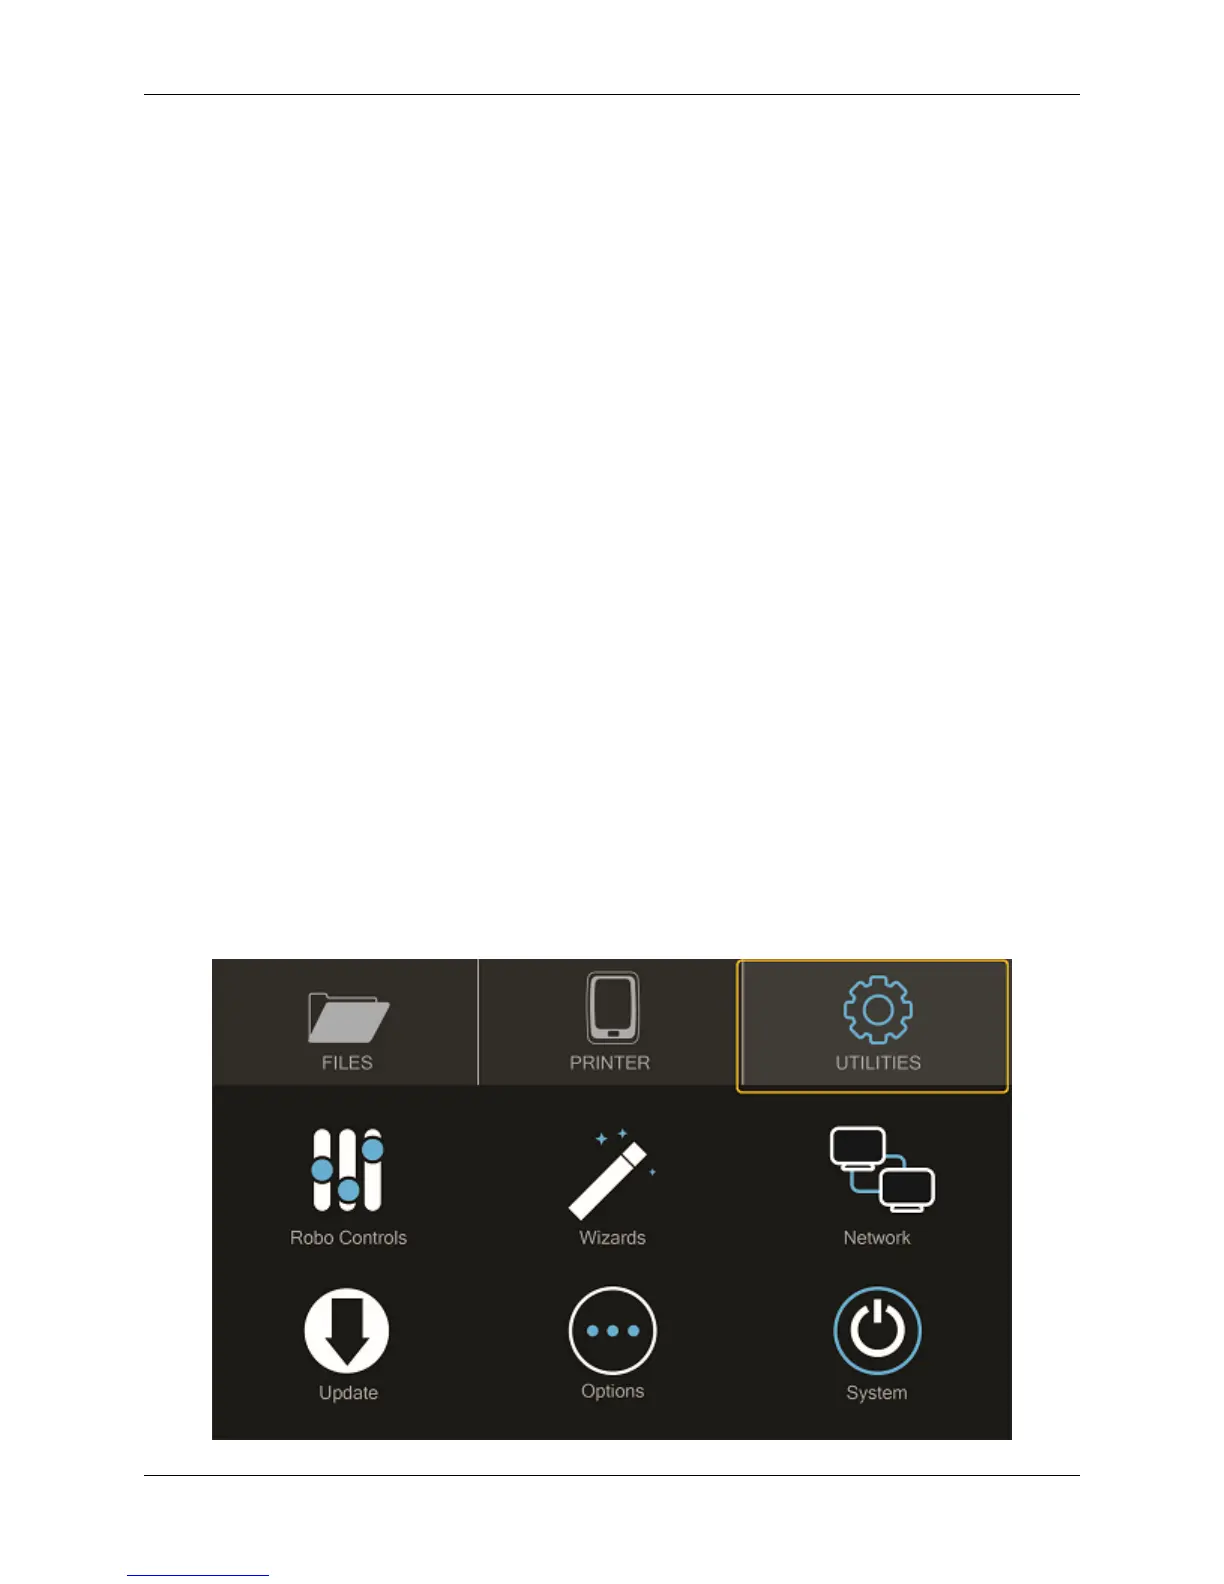
• On the screen of your machine, select ‘Utilities’
• Select ‘network’
• Select ‘QR Code’
6. Tap on ‘Scan Printer Barcode for Key’
7. Point your camera at the barcode and wait for the app to recognize the 3d printer
8. Tap ‘add printer’ at the bottom of the screen
9. Congratulations, you have now added your Robo C2 to your app
10. note that you can add multiple machines to the same app, and control each one independently
Connecting via Hotspot Mode
1. Make sure that you are connected to the wifi signal that the machine is emitting
2. Follow steps in the previous section to successfully connect your printer to the app
2.11 Updating Your Printer
Make sure to update your printer to grab the benefits of all the latest Robo has to offer, as well as making sure your
Robo C2 performs to the best of its ability.
• Select “Utilities’ from the main screen
26 Chapter 2. Operation