C2 User Manual, Release 1.0.0
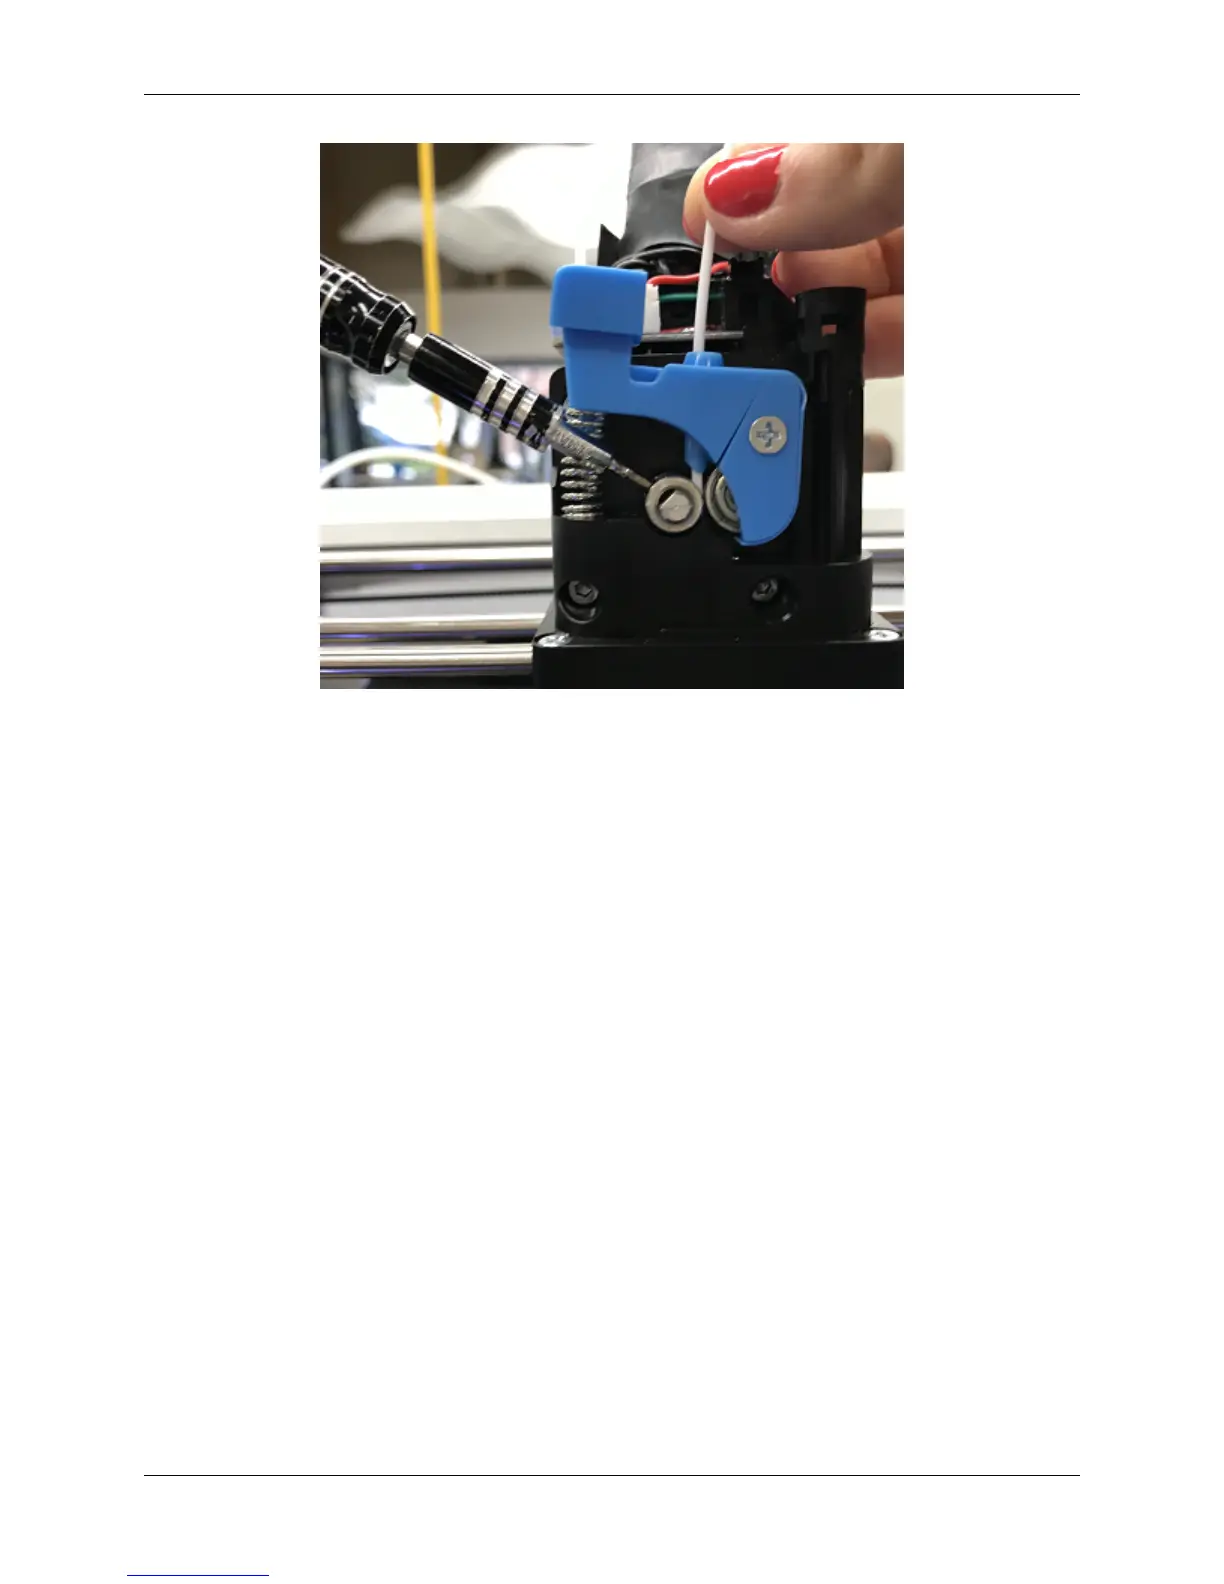
4. Now we are going to align and tighten your drive gear. Grab a small length of filament to help you through this.
5. Apply pressure to the filament lever arm and insert the filament through the filament feed hole.
6. Push and pull the filament, while making sure it is centered with the drive gears grooves, until the drive gear is
in position (it will self align when the filament starts passing through it).
7. Align the set screw with the flat surface of the motor shaft. Visually check to make sure the groove on the drive
gear is aligned with the hole going down to the hotend.
8. Tighten the set screw on the flat surface of the motor shaft.
9. Replace your extruder cover and you are all set.
4.8 Screens Goes White or Doesn’t Work
If the screen is not working there is a few steps that need to be taken to solve the issue.
1. Loose Wiring
• First, remove the black bezel (which is the black plastic holding the screen) by gently pulling inward from the
inside edge of the plastic. From here you will be able to see the electronics of the printer.
• Next, raise your bed by manually turning the long threaded z screw until the bed is mostly all the way up. Now
remove the internal lid under the bed that says Robo on it for better access to the electronics.
48 Chapter 4. Troubleshooting