C2 User Manual, Release 1.0.0
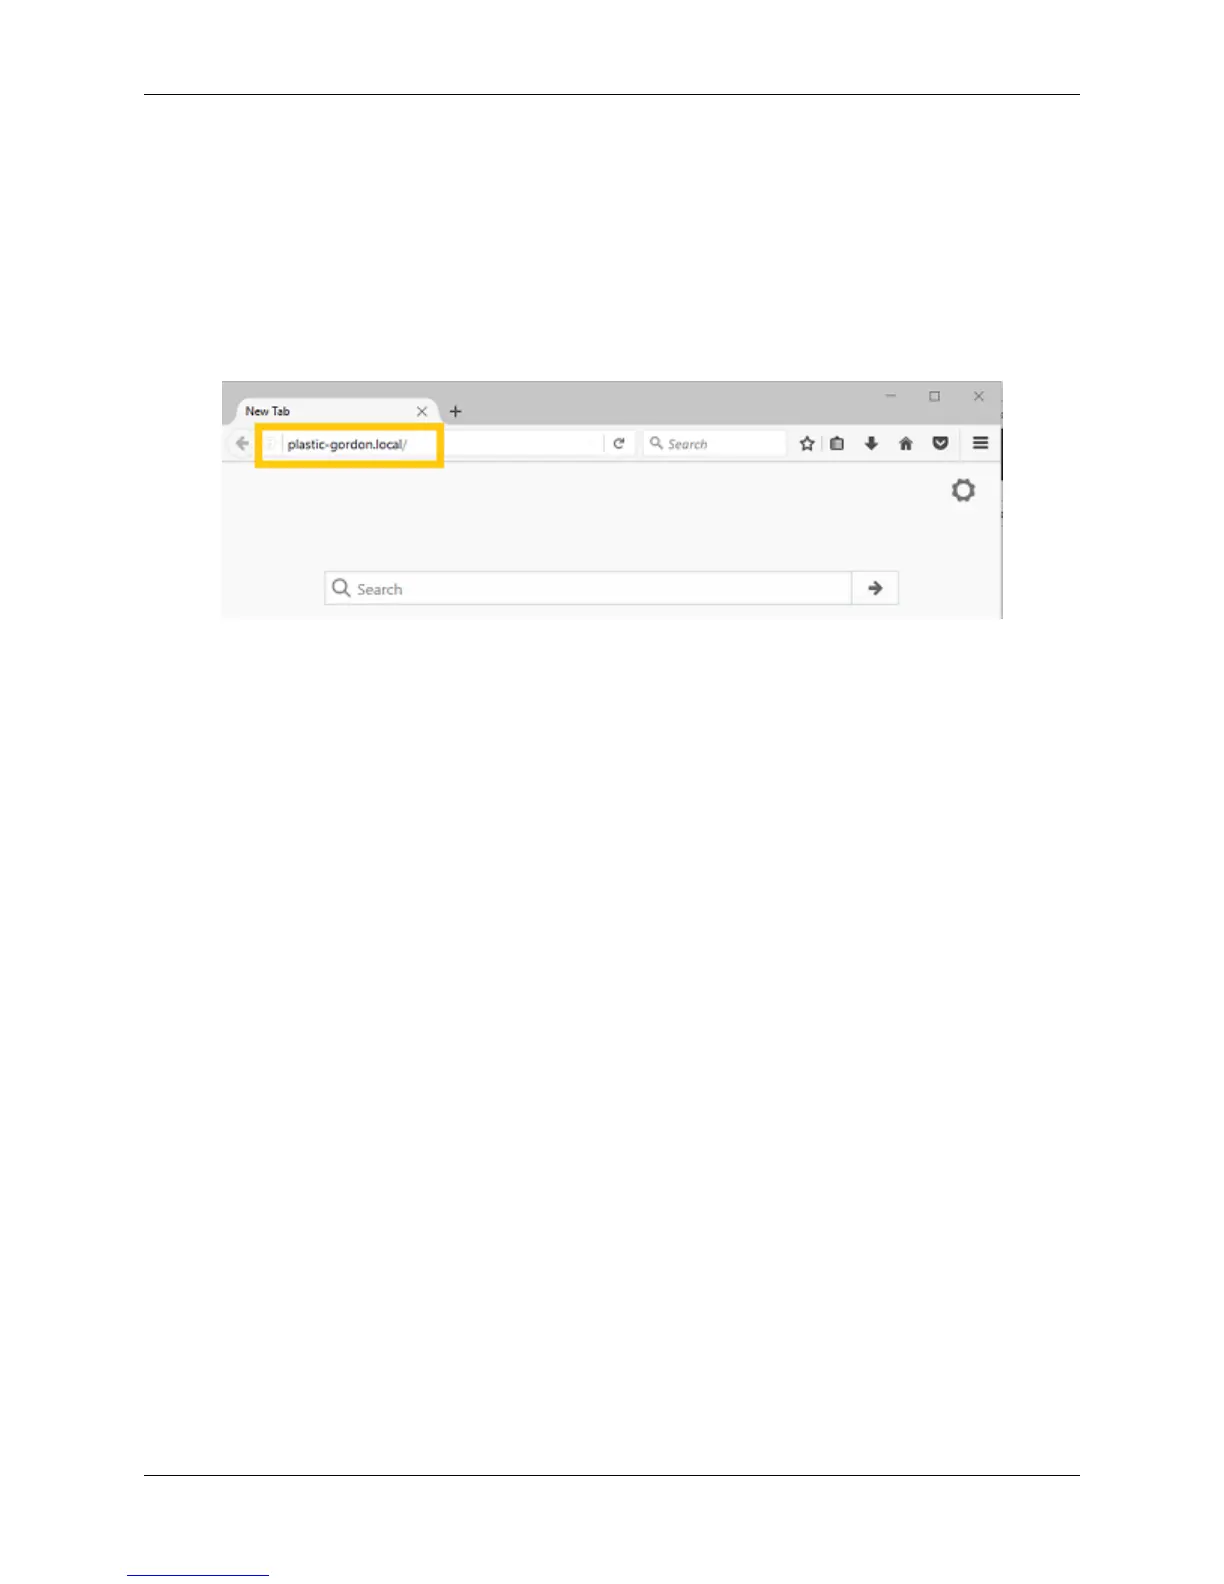
• First, locate the printer name. There are three places this is shown; On the back of the printer, on the screen
under Utilities> Network> Network Status, and on the bar code sticker that came on original box
• With this name known, go to your web browser and type the name into the web browser address bar followed
by a .local/ (examples below).
• Example - Printer Name: plastic-gordon, you would enter plastic-gordon.local/ into your web browser address
bar.
• Example - Printer Name: compassionate-shirley, you would enter compassionate-shirley.local/ into your web
browser address bar.
2. Windows and others
• In order to use bonjour to connect to your printer on a browser via it’s name, you will need to install the bonjour
extension in order for your computer to recognize names as IP address’. Download here
• Once installed follow the steps used for Mac and iOS users above.
Hotspot Mode
1. To use hotspot mode, select hotspot mode on your printer via Utilities> Network> Start WiFi Hotspot
2. Now look for your IP address under Utilities> Network> Network Status
3. Next, go to your computer and make sure to connect to the printers wifi hotspot.
4. Now, type the IP address into your web browsers web address bar and the dashboard should pop up.
6.3 Uploading gcode Files
If you have already sliced your file via Cura for Robo, or another slicer program, there are two main ways to upload
gcode files to your printer. By the ‘Upload’ button, as well as a ‘drag-and-drop’ approach.
1. The ‘Upload’ Button is located where the file list is towards the bottom of the list.
6.3. Uploading gcode Files 83