Shifting the Timing Slightly (Shift Clock)
Using this operation, the timing of the musical data in
a pattern can be shifted forward or backward in time,
in units of a single clock. Use this when you wish to
slightly shift the overall timing.
* Data which would otherwise be moved earlier than the
beginning of the music data will be placed at the begin-
ning. In the case of data which would be moved later than
the end of the music data, the necessary number of mea-
sures will be added. However if the data would otherwise
be moved beyond the end of the pattern, it will be placed
at the end.
* It is not possible to specify the range of measures that will
have their timing shifted.
* 24 clocks correspond to the length of one 16th note.
fig.9-38TEXT (=MC fig.11-32)
1. Select the pattern whose timing you wish
to shift.
2. Press [EDIT].
The indicator will light, and the edit page will appear
in the display.
3.
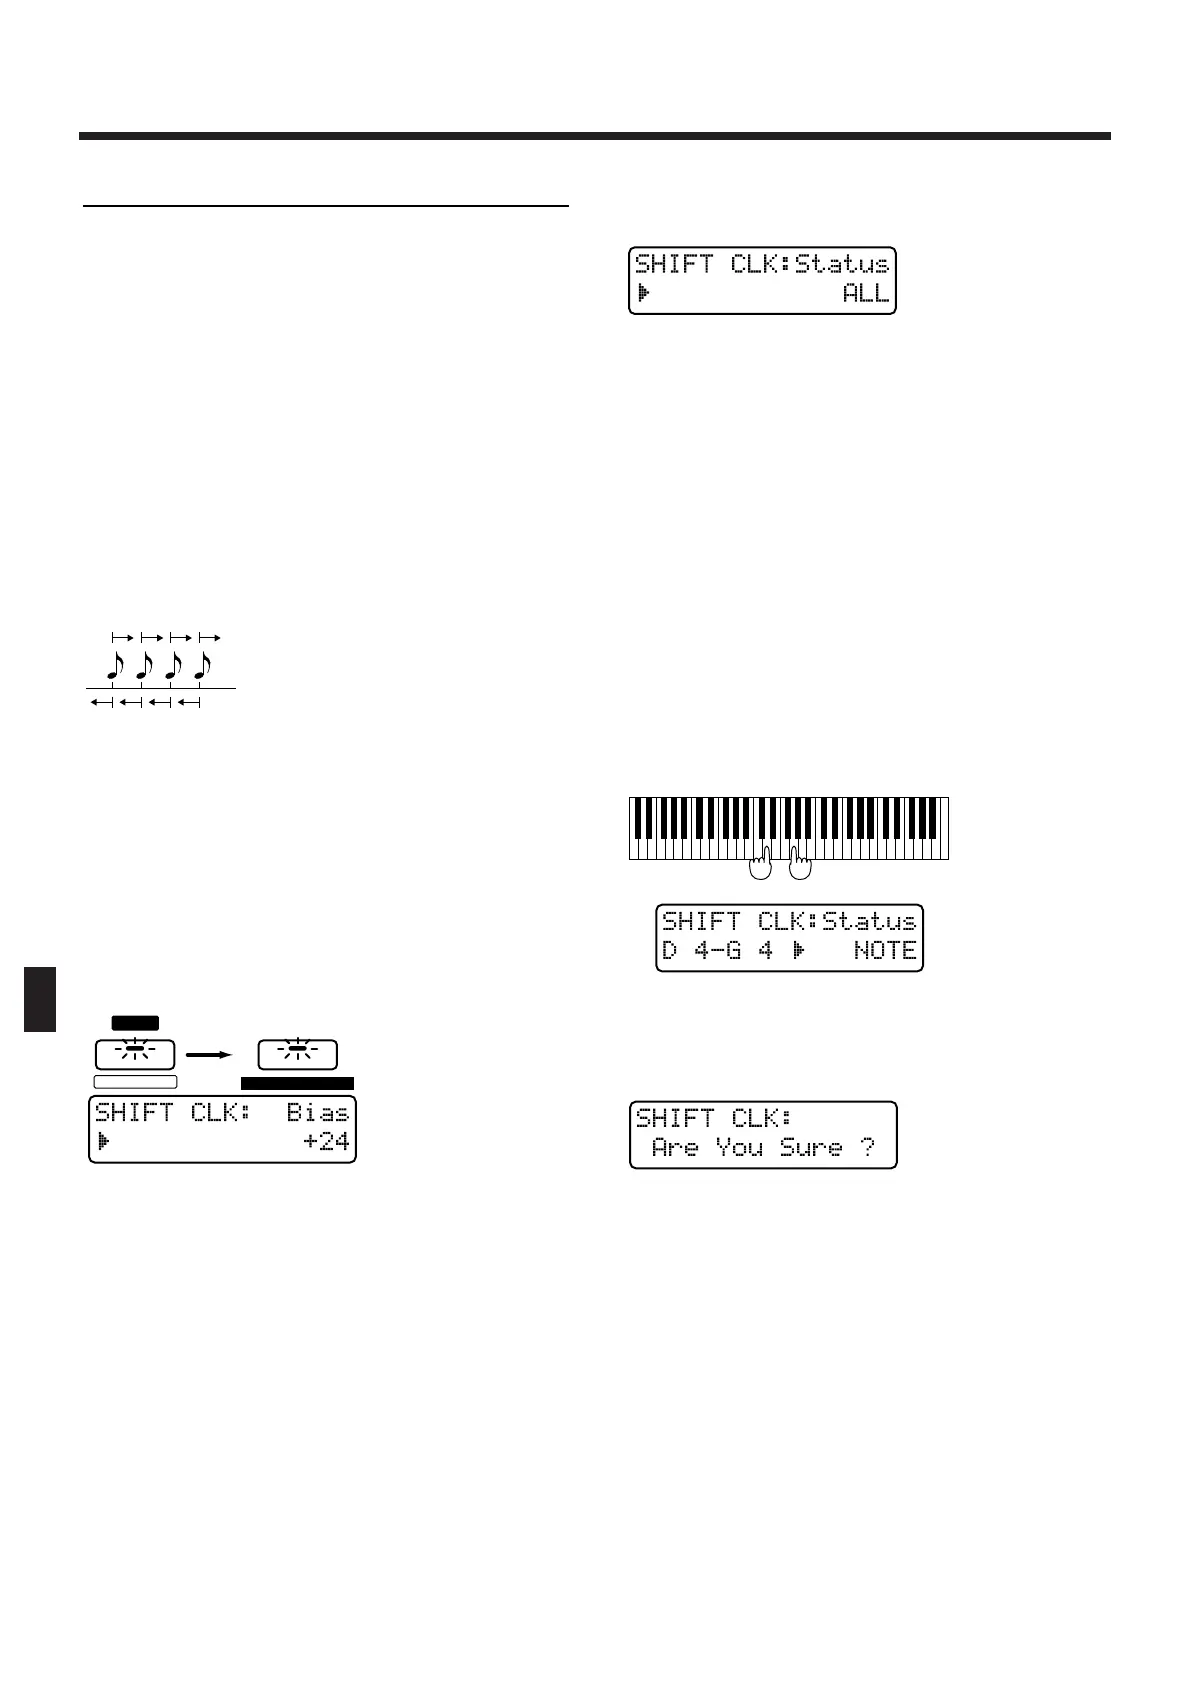
Press NUMBER [6] (CHG EVENT), and then
press PAGE [>] several times to select the
“SHIFT CLK” setting page.
fig.9-39 (=MC fig.11-33)
4. Select the part whose timing you wish to
shift.
* You may select more than one part.
5. Specify the number of clocks that you wish
to shift the data.
Range: -99–+99
Specify a negative (-) setting if you wish to shift the
data toward the beginning. Specify a positive (+) set-
ting if you wish to shift the data toward the end.
If this is set to “0” the data will not be shifted.
6. Press [ENTER].
The display will indicate the type of musical data that
will be shifted.
7. Select the type of musical data that you
wish to shift.
fig.9-40 (#MC fig.11-34)
Range:
ALL: All musical data
NOTE: Note
PC: Program change
CC: Control change
BEND: Pitch bend
P-AFT: Polyphonic aftertouch
C-AFT: Channel aftertouch
SYS-EX: System exclusive
TEMPO: Tempo
MUTE: Mute
●●●●●●●●●●●●●●●●●●●●●●●●●●●●●●●●●●●●●●●●●●●●●●●●●●●●●●●●●●●●●●●●●●●●●●●●●●●●●●●●●●●●●●●●●●●●●●●●●●●●
NOTE is selected as the type of musical data, and if
you wish to shift only a specific range of notes, use the
keyboard to specify the desired range. If you do not
specify a range of notes, all notes will be shifted.
fig.9-41
●●●●●●●●●●●●●●●●●●●●●●●●●●●●●●●●●●●●●●●●●●●●●●●●●●●●●●●●●●●●●●●●●●●●●●●●●●●●●●●●●●●●●●●●●●●●●●●●●●●●
8. Press [ENTER].
The confirmation screen will appear in the display.
fig.9-42 (#MC fig.11-35)
9. Press [ENTER] once again.
The Shift Clock operation will be carried out, and the
normal display will reappear.

 Loading...