104
Reference Manual
00809-0100-4803, Rev GA
Operation and Maintenance
September 2017
Operation and Maintenance
Note
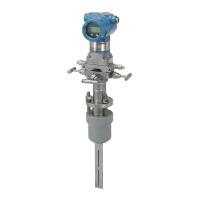
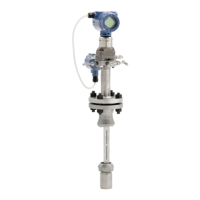
If the installation uses a manifold, see “Manifold operation” on page 81.
3. Inspect the SuperModule PTFE O-rings. If the O-rings are undamaged, they may be reused. Emerson
recommends reusing O-rings if possible. If the O-rings show any signs of damage, such as nicks or
cuts, they should be replaced (part number 03151-9042-0001 for glass-filled PTFE and part number
03151-9042-0002 for graphite-filled PTFE).
Note
If replacing the O-rings, be careful not to scratch or deface the O-ring grooves or the surface of the
isolating diaphragm when removing the damaged O-rings.
4. Install the process flange on the SuperModule process connection. To hold the process flange in
place, install the two alignment cap screws finger tight (these screws are not pressure retaining). Do
not overtighten; this will affect module-to-flange alignment.
5. Install the appropriate flange bolts.
a. If the installation requires a
1
/4–18 NPT connection(s), use four 1.75-in. flange bolts.
Finger tighten the bolts. Go to Step d.
b. If the installation requires a
1
/2–14 NPT connection(s), use flange adapters and four 2.88-in.
process flange/adapter bolts.
c. Hold the flange adapters and adapter O-rings in place while finger-tightening the bolts.
d. Tighten the bolts to the initial torque value using a crossed pattern. See Tab le 4 -1 for appropriate
torque values.
e. Tighten the bolts to the final torque value using a crossed pattern. See Tab le 4 -1 for appropriate
torque values. When fully tightened, the bolts should extend through the top of the module
housing.
f. Torque alignment screws to 30 in-lb (3.4 N-m). If the installation uses a conventional manifold,
then install flange adapters on the process end of the manifold using the 1.75-in. flange bolts
supplied with the transmitter.
6. If the SuperModule PTFE O-rings are replaced, re-torque the flange bolts and alignment cap screws
after installation to compensate for seating of the PTFE O-ring.
7. Install the drain/vent valve.
a. Apply sealing tape to the threads on the seat. Starting at the base of the valve with the threaded
end pointing toward the installer, apply two clockwise turns of sealing tape.
b. Take care to place the opening on the valve so that process fluid will drain toward the ground and
away from human contact when the valve is opened.
c. Tighten the drain/vent valve to 250 in-lb (28.25 N-m).
d. Tighten the stem to 70 in-lb (8 N-m).
Table 4-1. Bolt Installation Torque Values
Bolt material Initial torque value Final torque value
CS-ASTM-A449 Standard 300 in-lb (34 N-m) 650 in-lb (73 N-m)
316 SST—Option L4 150 in-lb (17 N-m) 300 in-lb (34 N-m)
ASTM-A-193-B7M—Option L5 300 in-l (34 N-m) 650 in-lb (73 N-m)
Alloy K-500—Option L6 300 in-lb (34 N-m) 650 in-lb (73 N-m)
ASTM-A-453-660—Option L7 150 in-lb (17 N-m) 300 in-lb (34 N-m)
ASTM-A-193-B8M—Option L8 150 in-lb (17 N-m) 300 in-lb (34 N-m)
 Loading...