BRP-Rotax
MAINTENANCE MANUAL
NNOOTTEE
Due to limited tolerances, it may be difficult to push the drive gear onto the end of
the crankshaft. If necessary, push it on in another position.
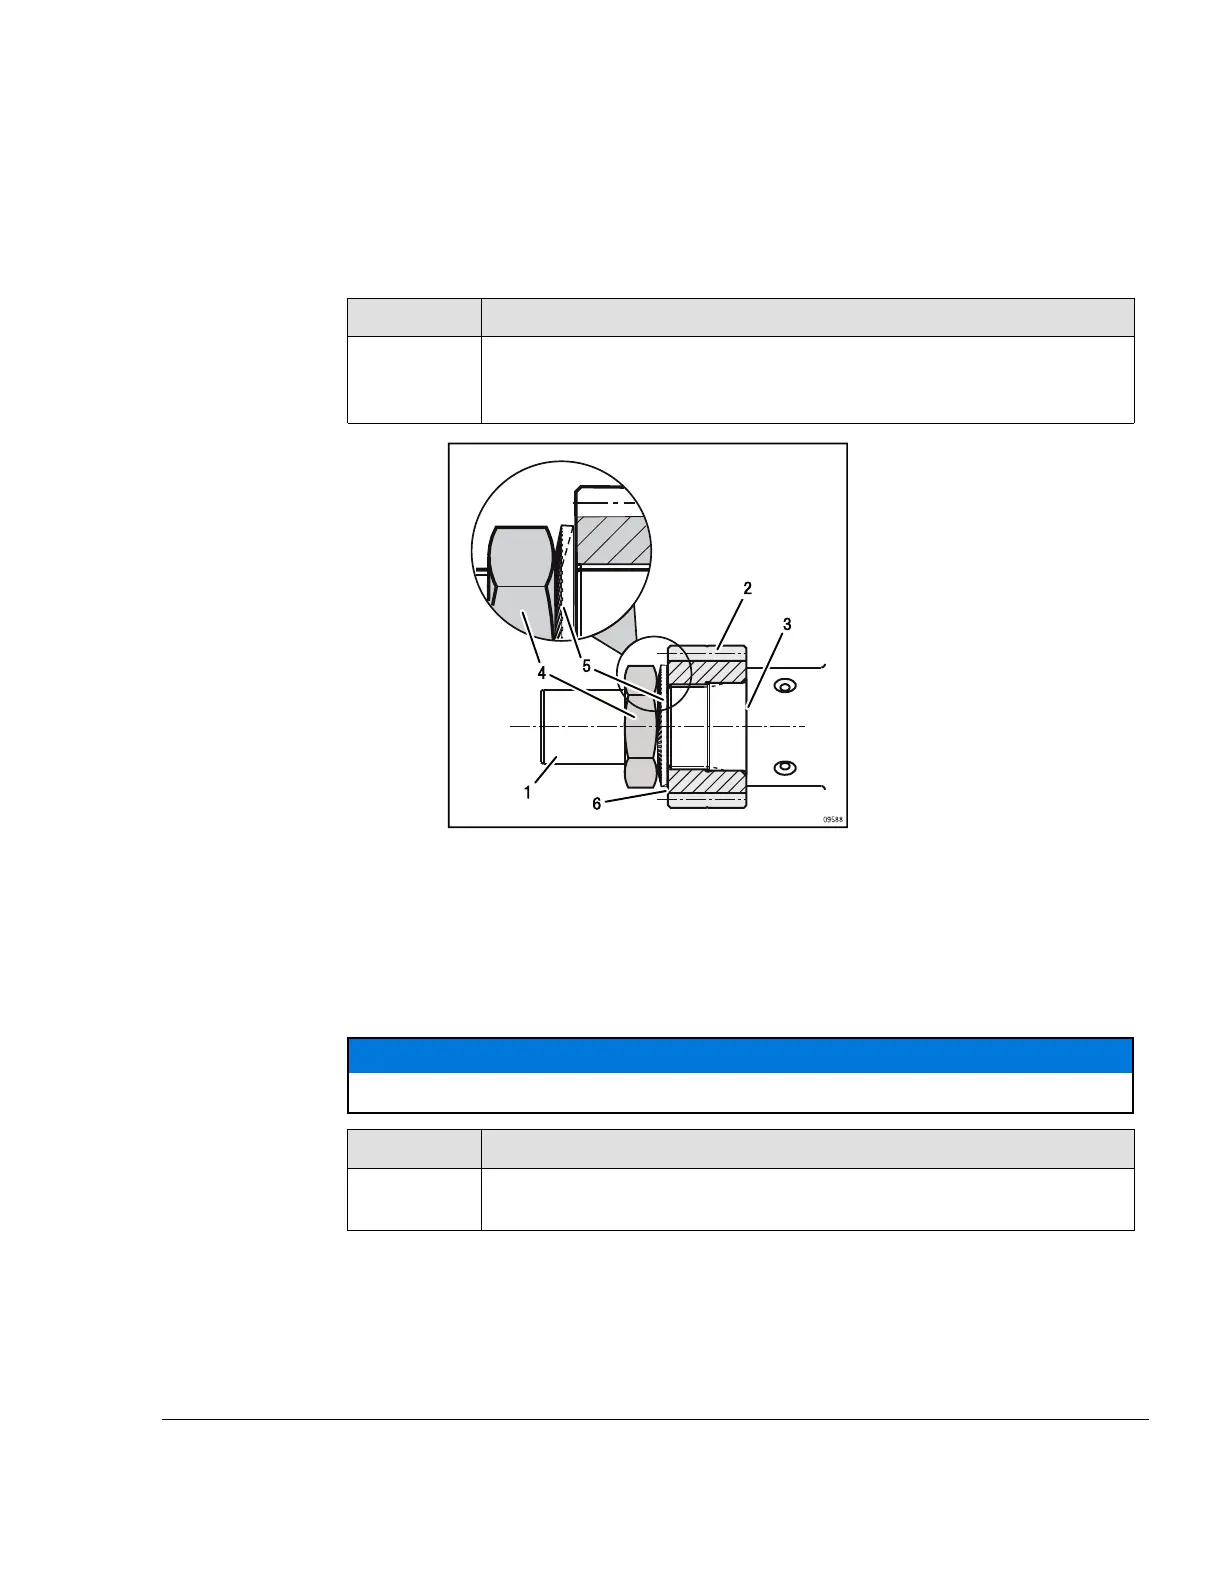
Step
Procedure
2 Secure the Hex. nut M30x1,5 with LOCTITE 648 and screw it onto the
crankshaft along with the friction washer VS-30. Tightening torque 300
Nm (221 ft.lb.).
Figure 5.7
1
Crankshaft (power take off side)
2
Drive gear
3 Crankshaft 4 Hex. nut
5 VS-30 friction washer 6 Serial number
ATTENTION
The sealing surface must be free from dirt and oil.
Step
Procedure
3
Inspect the run-out. See also Chapter 72-10-00 section Wear limits.
(CS24)
NNOOTTEE
If there is slight vertical run-out, replace the nut and repeat the measurement.
Effectivity: 915 i A Series
Edition 0/Rev. 0
05–50–00
Page 9
December 01 2017

 Loading...


