TS4240 User’s Guide 42
Printing the Program Confirmation Report
Deleting a PLU
You can delete a PLU if you no longer want to use it. Before you delete a
PLU, make sure you select the correct PLU to delete. After you delete a
PLU, you cannot change it. If you delete the wrong PLU, you must
reprogram the PLU to get it back.
Before you a delete PLU, you must clear the PLU Z reports. For more
information about clearing Z reports, see About Z Reports on page 85.
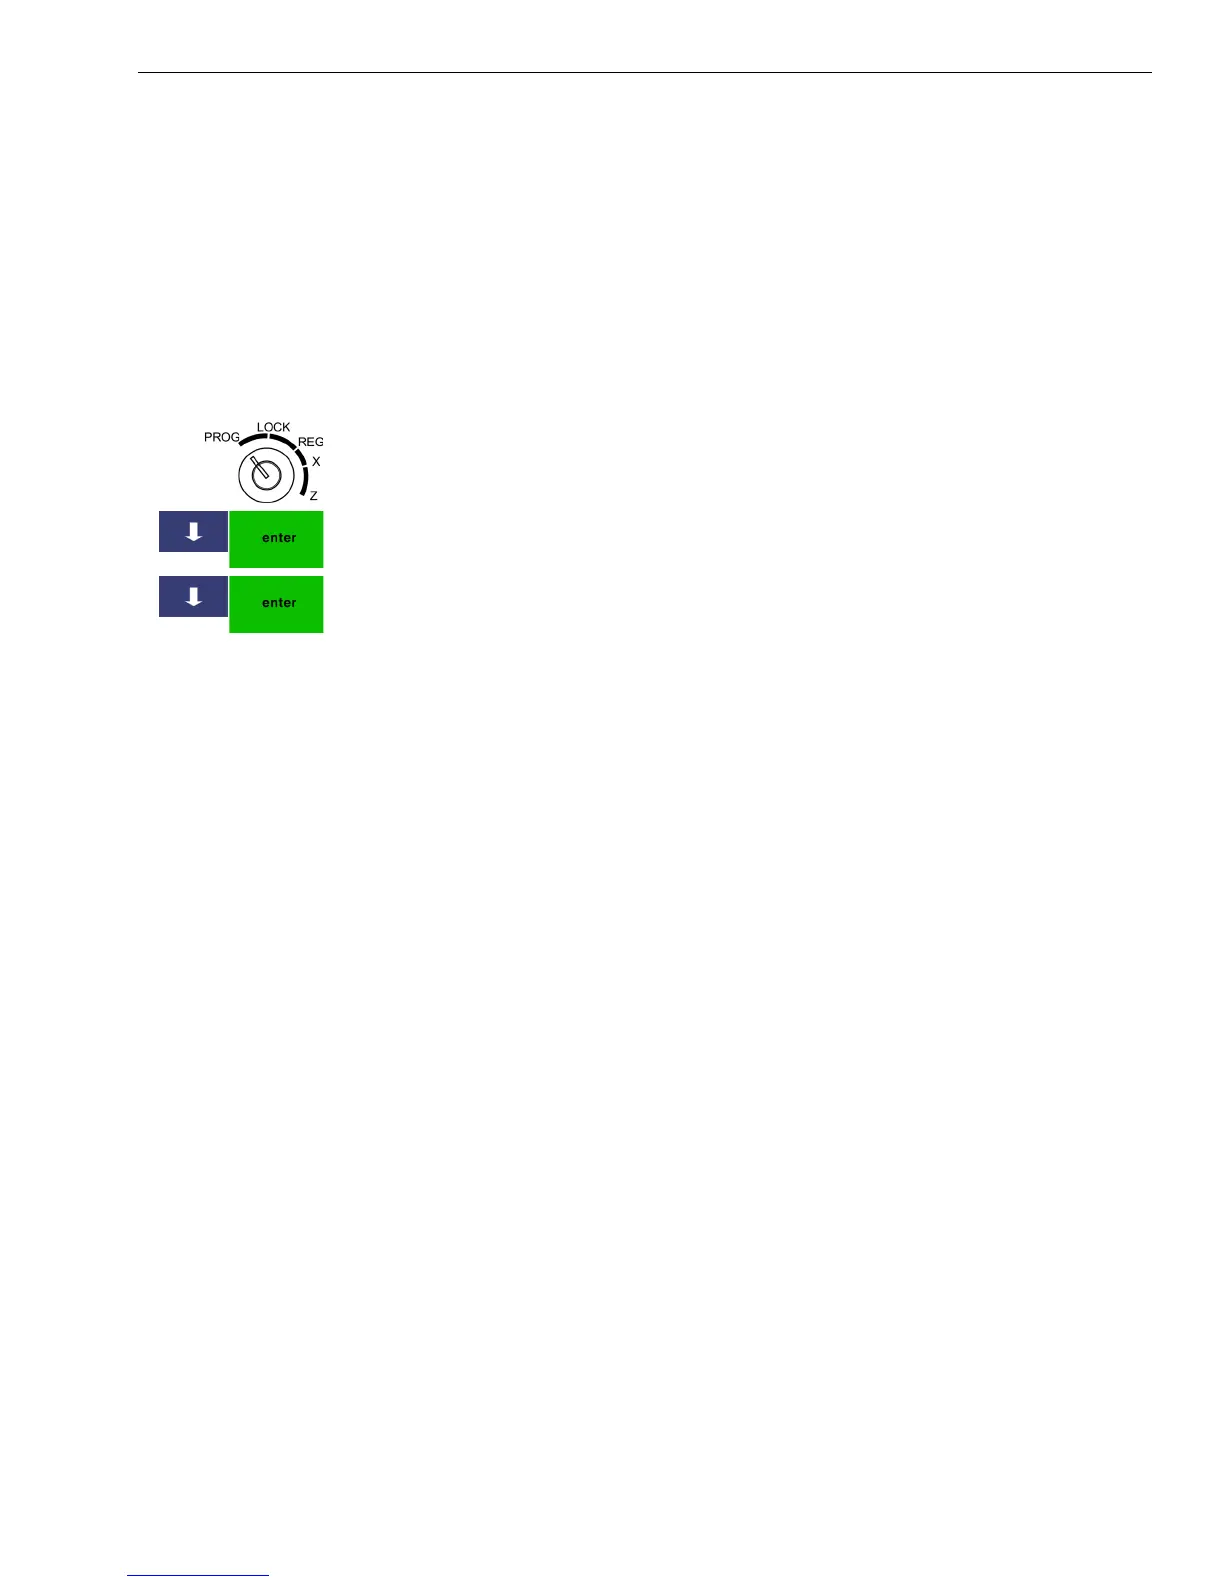
To delete a PLU
402 -- PLU Setting
1 Put the MGR key in the Mode key slot and turn it to the PROG position.
If prompted, enter the Manager passcode and press Enter.
2 Press the Arrow Down key to select PLU Setting. Press Enter.
3 Press the Arrow Down key to select Delete a PLU. Press Enter.
4 Do one of the following:
• Using the Number keys, enter the PLU number you want to delete and
press Enter.
• Using the barcode reader, scan the barcode you want delete.
5 At the prompt, press the Ye s key.
Printing the Program Confirmation Report
Now that basic programming is complete, check your results with a
Program Confirmation Report.
If you made a mistake during programming, repeat only the step you
made the mistake in. For example, if only the tax rate is incorrect, just
re-program the tax—you do not need to re-set the time, date, and so on.
There are 4 types of confirmation reports:
• Dept All the department programming. See Running the
Department Confirmation Report on page 82.
• PLUs All PLU programming. See Running the PLU
Confirmation Report on page 82.
• Clerks All clerks. See Running the Clerk Confirmation Report
on page 82.
• Options All the parameters for setting the register, including
header, footer, tax rates and so on. See Running the
Options Dump Report on page 43.