NexU
connected
(no matter if it is made in BUS IN or BUS OUT connector)
4. RS232 Port:
Allows peripheral devices connections
5. USB Port:
Allows peripheral devices connections
6. iButton Reader:
7.
Power Connector: IEC Power Socket for 240 VAC or 110 VAC
this connector
must be 3 x 1.5 mm2 minimum.
8.
RFID reader: Allows identification via RFID card.
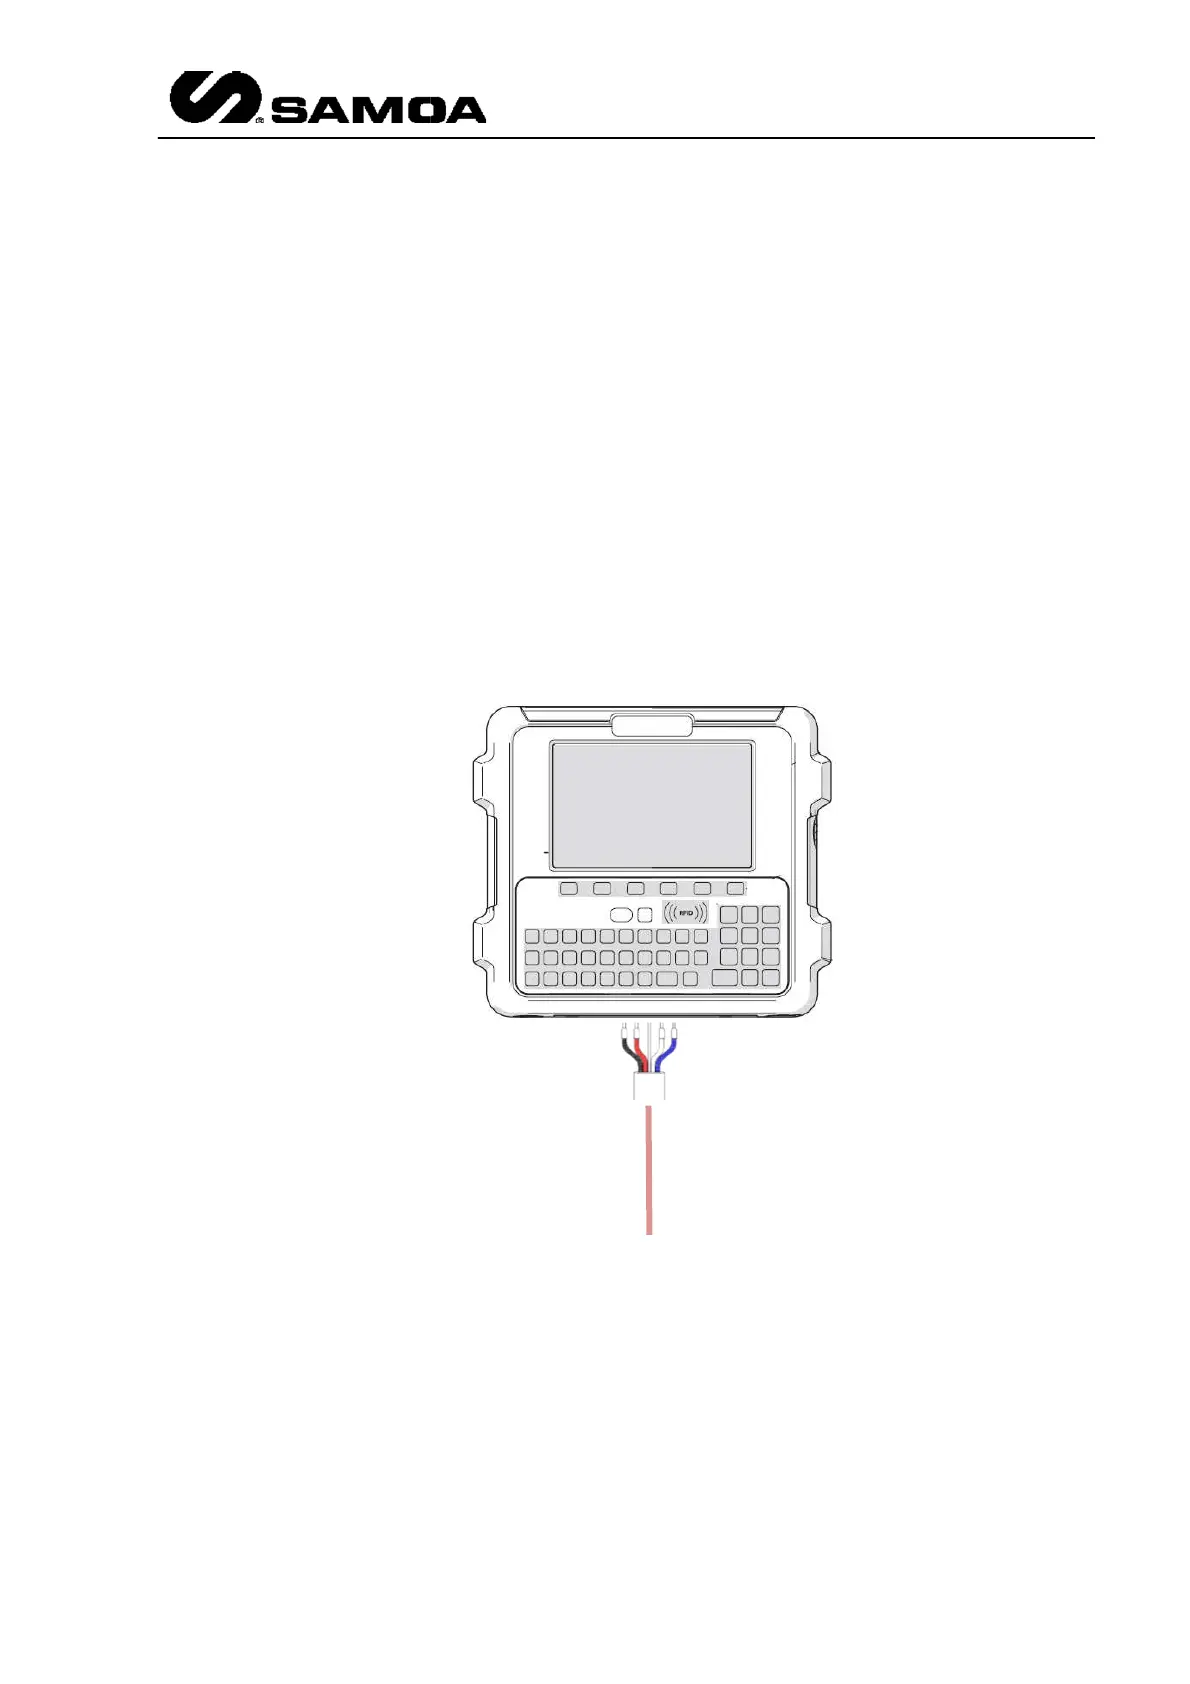
Wiring for UDat and UDat+ is as
Be aware that this is the standard way of connecting. Please check chapter 3.3 for
wiring.
communications then only SCREEN/WHITE/BLUE have
(no matter if it is made in BUS IN or BUS OUT connector)
Allows peripheral devices connections
.
Allows peripheral devices connections
via iButton® key
Power Connector: IEC Power Socket for 240 VAC or 110 VAC
must be 3 x 1.5 mm2 minimum.
RFID reader: Allows identification via RFID card.
Wiring for UDat and UDat+ is as
follow.
Be aware that this is the standard way of connecting. Please check chapter 3.3 for
Rev 3 (XXXX 2019)
15
communications then only SCREEN/WHITE/BLUE have
to be
(no matter if it is made in BUS IN or BUS OUT connector)
and updating.
. Wiring for
Be aware that this is the standard way of connecting. Please check chapter 3.3 for
particular