SECTION IV
MAINTENANCE / SERVICE
(6) Depending on which seat cylinder is being
removed, remove locknut (1, Figure 4-23 ), and
washer (2) from side of lateral tilt cylinder that is
on same side of seat cylinder being removed.
Swing cylinder up, out of way.
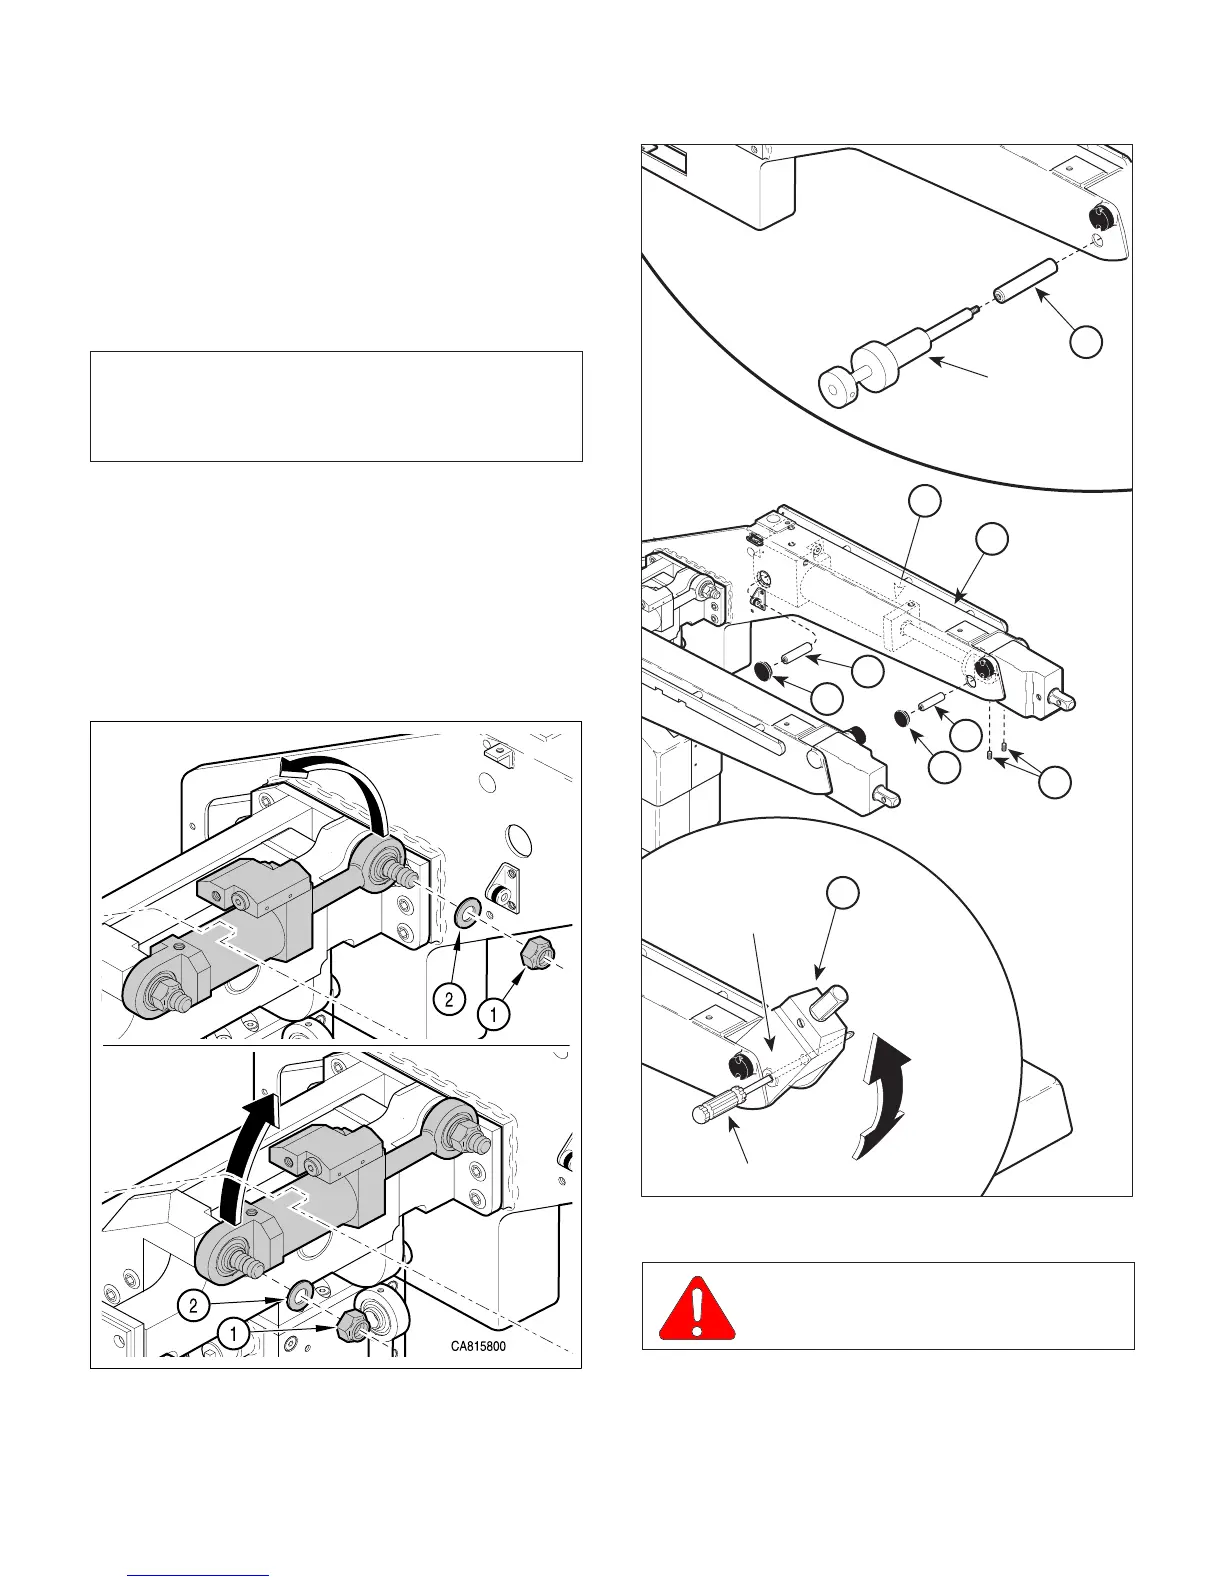
(7) Remove one hole plug (1, Figure 4-24) from side
weldment (2).
NOTE
If the seat function cannot be moved, disconnect
hydraulic lines to allow manual extension of the
cylinders.
(8) Using hand control or emergency override panel,
run SEAT UP function until connecting pins (3)
can be accessed.
(9) Loosen two setscrews (4) in side weldment (2).
(10) Using pin extractor, pull connecting pin (3) out
of side weldment (2). Refer to Table 1-2 for
special tool.
Page 4-22Printed in U.S.A.
Figure 4-24. Seat Cylinder
Disconnection / Connection
CA807600
8
PIN
EXTRACTOR
6
7
3
1
4
2
3
PIN
HOLE
SCREWDRIVER
CRAFTSMAN
5
Figure 4-23. Seat Cylinder
Disconnection / Connection
WARNING
Do not use small or weak screwdrivers
to hold up seat spar weldment.
(11) Raise seat spar weldment (5) up by hand and
insert a screwdriver thru pin hole to hold in
position.
© Schaerer Mayfield USA, Inc. 2004