SECTION IV
MAINTENANCE / SERVICE
NOTE
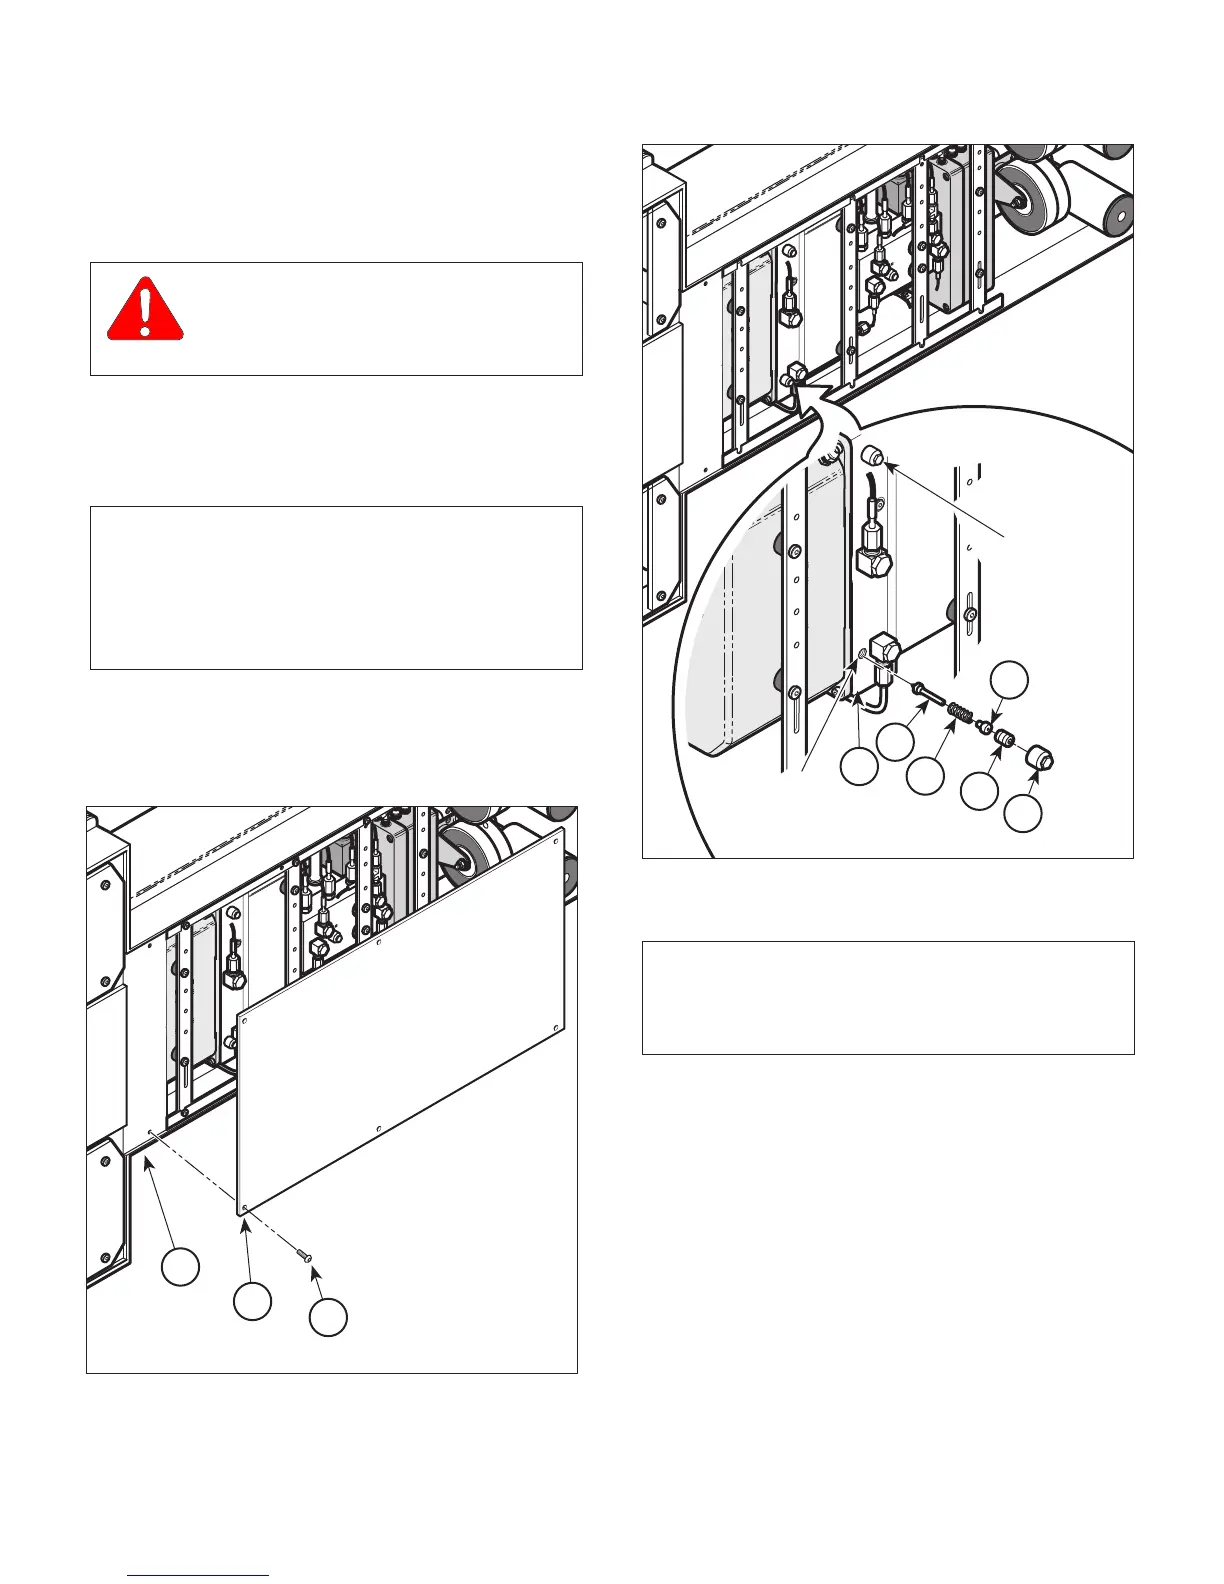
Oil will run out of port when adjusting screw is
removed. Plug port with clean rag or reinstall adjust-
ing screw temporarily.
(5) Remove adjusting screw (2), spring seat (3),
spring (4), and check valve (5) from mani-
fold (6).
B. Installation
(1) Install spring (4, Figure 4-51) and check valve
(5) on spring seat (3).
(2) Install assembled spring seat (3) in manifold (6)
and secure with adjusting screw (2). Tighten
adjusting screw (2) only 1 to 1-1/2 turns.
(3) Disconnect tube (1, Figure 4-52) from swivel
fitting (2).
Page 4-48Printed in U.S.A.
4.29 Motor Pump Pressure Relief Valve
Removal / Installation
A. Removal
DANGER
Table is very heavy. Use an assistant
to lay table onto its side. Failure to do
so could result in serious personal injury.
(1) Lay table onto its left side.
(2) Remove six screws (1, Figure 4-50) and main
cover (2) from base weldment (3).
NOTE
There are two pressure relief valves; one for motor
pump #1 and one for motor pump #2. The procedure
for removing pressure relief valves is the same.
Procedure for installation is slightly different and is
explained in the text.
(3) Remove cap (1, Figure 4-51) from adjusting
screw (2).
(4) Place a rag under port.
Figure 4-50. Motor Pump Access
Figure 4-51. Motor Pump Pressure Relief
Valve Removal / Installation
3
2
4
5
6
1
PRESSURE
RELIEF
VALVE FOR
PUMP #2
PRESSURE
RELIEF
VALVE FOR
PUMP #1
CA818200
CA818000
3
2
1
© Schaerer Mayfield USA, Inc. 2004