SECTION IV
MAINTENANCE / SERVICE
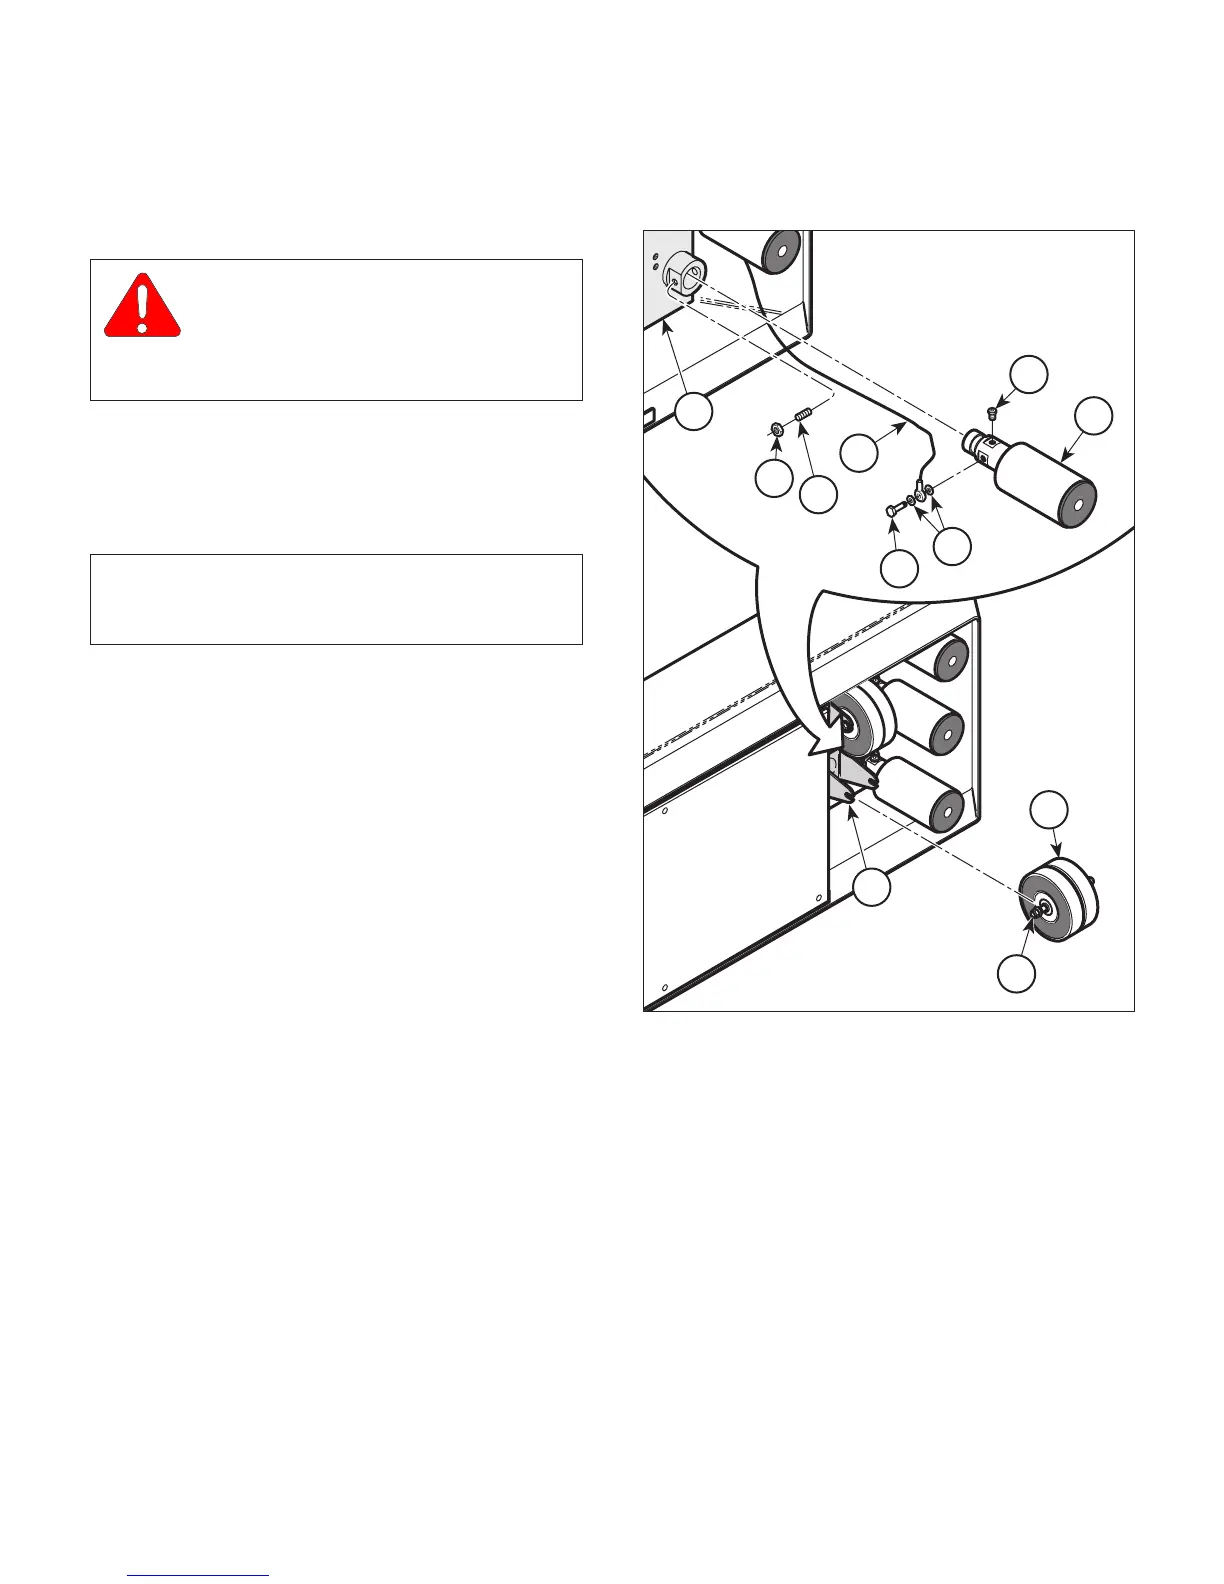
4.25 Main Floor Lock or Outrigger Floor
Lock Cylinder Removal / Installation
A. Removal
CAUTION
If floor locks are not unlocked (retracted),
there will be oil inside floor lock cylinders.
Then, when hoses are disconnected, spring in floor
lock will contract, spraying oil out of hose port.
(1) Using hand control or emergency override panel,
run UNLOCK function to unlock (retract) floor
lock cylinders.
(2) Lay table onto its left side.
NOTE
Removal of one floor lock cylinder is shown. Re-
moval of other floor lock cylinders are similar.
(3) Loosen two locknuts (1, Figure 4-41) and then
remove caster (2) from caster fork (3).
(4) Remove jam nut (4).
(5) Remove setscrew (5) and pull floor lock cylinder
(6) out of base weldment (7).
(6) Remove fitting connector (8), two fitting seals
(9), and hose (10) from floor lock cylinder (6)
and then remove floor lock cylinder from table.
(7) Remove plug (11) from floor lock cylinder (6).
B. Installation
(1) Install plug (11) in floor lock cylinder (6).
(2) Coat o-rings of two fitting seals (9) with oil.
(3) Connect hose (10) to floor lock cylinder (6) and
secure with two fitting seals (9) and fitting
connector (8).
(4) Install floor lock cylinder (6) in base weldment
(7) and secure with setscrew (5).
(5) Secure setscrew (5) in place with jam nut (4).
(6) Install caster (2) on caster fork (3) and secure
by tightening two locknuts (1).
Page 4-41Printed in U.S.A.
(7) Raise table to its upright position.
(8) Add oil to reservoir (Refer to para 4.2).
HA-5490-00
1
2
3
4
5
7
6
9
11
8
10
Figure 4-41. Floor Lock Cylinder
Removal / Installation
© Schaerer Mayfield USA, Inc. 2004