SECTION IV
MAINTENANCE / SERVICE
Page 4-68Printed in U.S.A.
4.43 Head Section Gas Spring
Removal / Installation / Adjustment
A. Removal
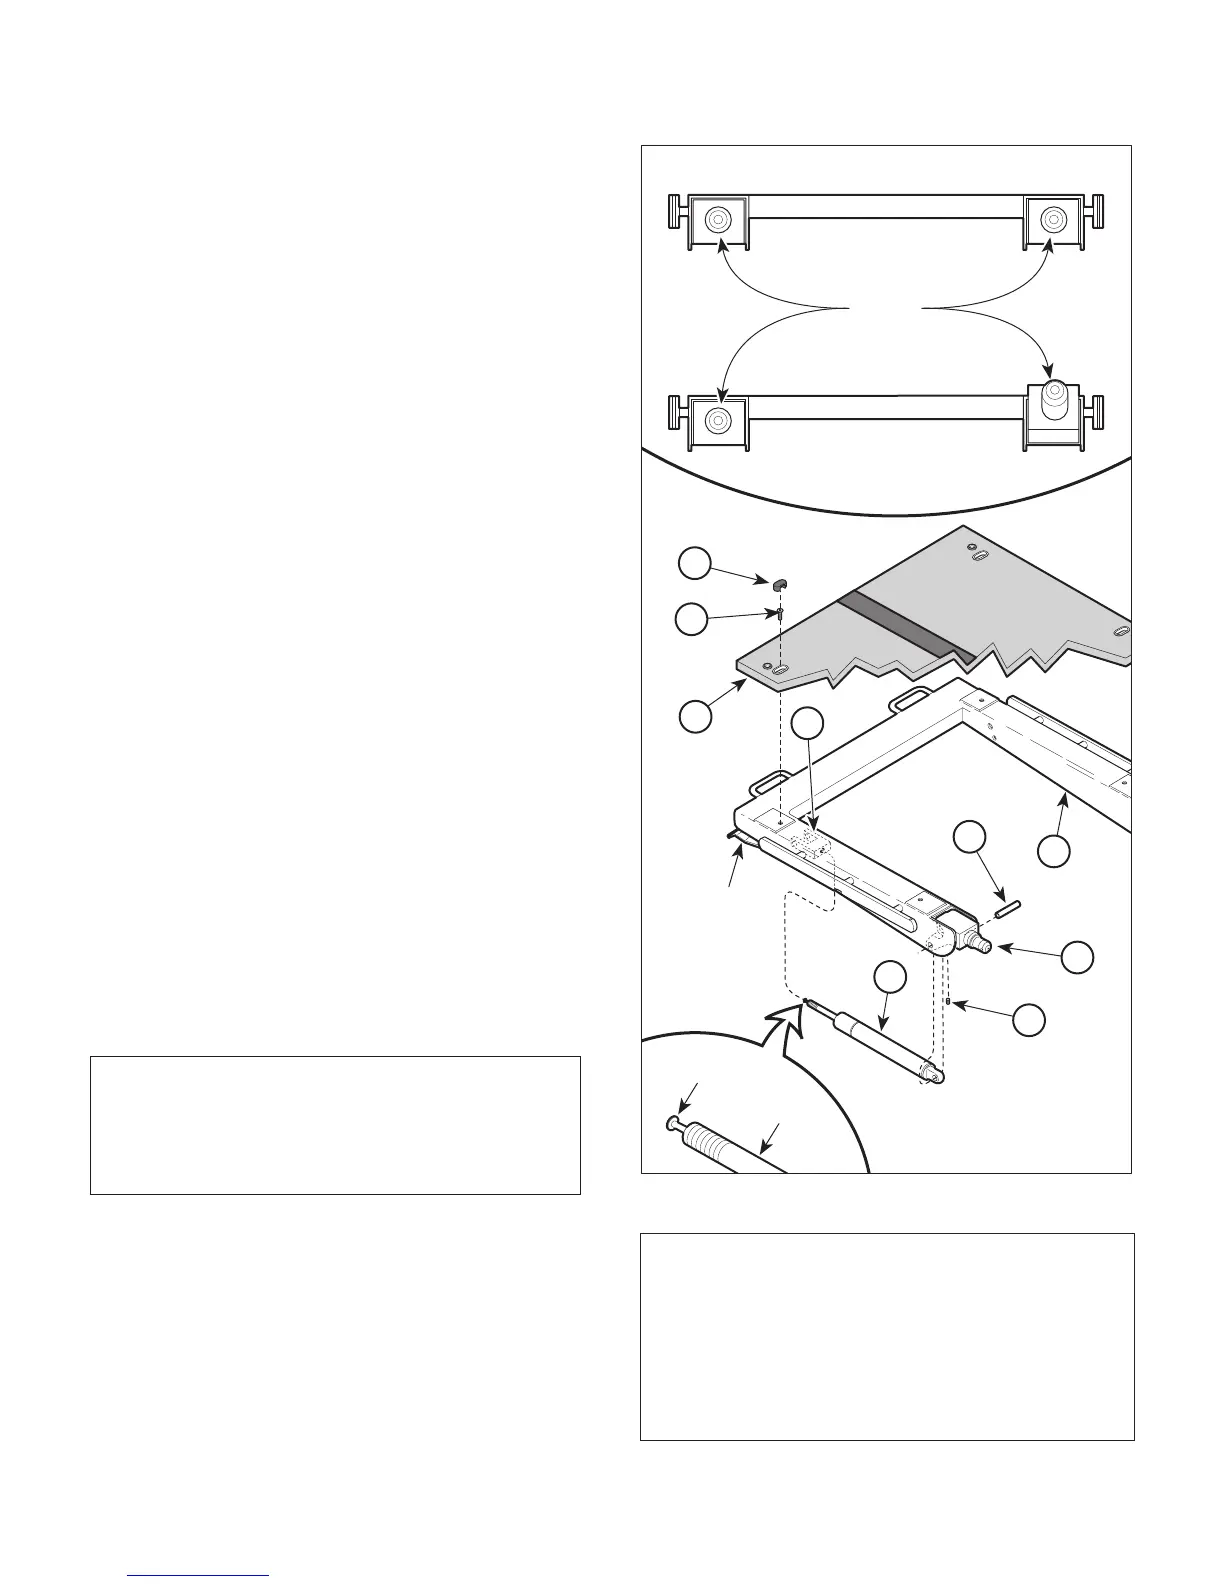
(1) If installed, remove head section from table.
(2) Remove four plugs (1, Figure 4-72), screws (2),
and head section board (3) from head section
weldment (4).
(3) Loosen setscrew (5).
(4) Using pin extractor, remove pivot pin (6) from
head section weldment (4).
(5) Tilt pivot block (7) up out of way.
(6) While counting number of turns, unscrew gas
spring (8) from clevis (9).
B. Installation
(1) Depress release pin of gas spring (8) against
ground and allow rod of gas spring to extend
fully.
(2) Screw gas spring (8) into clevis (9) the same
number of turns as it took to remove gas spring
during removal.
(3) Position pivot block (7) on gas spring (8) and
secure with pivot pin (6), making sure flat edge
of pivot pin (6) is facing toward set screw (5).
(4) Secure pivot pin (6) in place by tightening set
screw (5).
NOTE
If posts are too far out of synchronization to allow
head section to be installed on table, press release
lever; this will allow both gas springs to extend fully,
temporarily synchronizing posts.
(5) Install head section on table.
(6) Depress release lever and move head section to
a level position.
(7) Remove head section from table and check two
posts. The posts should be synchronized in
same position.
Figure 4-72. Gas Spring Removal / Installation
CA7684
1
2
3
5
6
7
8
RELEASE
PIN
ROD
4
SYNCHRONIZATION
POST
SYNCHRONIZED
NOT SYNCHRONIZED
9
RELEASE
LEVER
NOTE
Turning base of gas spring in a clockwise direction
(as viewed from base of gas spring) will cause the
post to move sooner / farther than it had previously.
Turning base of gas spring in a counterclockwise
direction (as viewed from base of gas spring) will
cause the post to move later / not as far as it had
previously.
© Schaerer Mayfield USA, Inc. 2004