Section 09 ELECTRICAL SYSTEM
Subsection 05 (INSTRUMENTS AND ACCESSORIES)
09-05-2 SMR2000-063_09_05A.FM
All Models
Speed Sensor
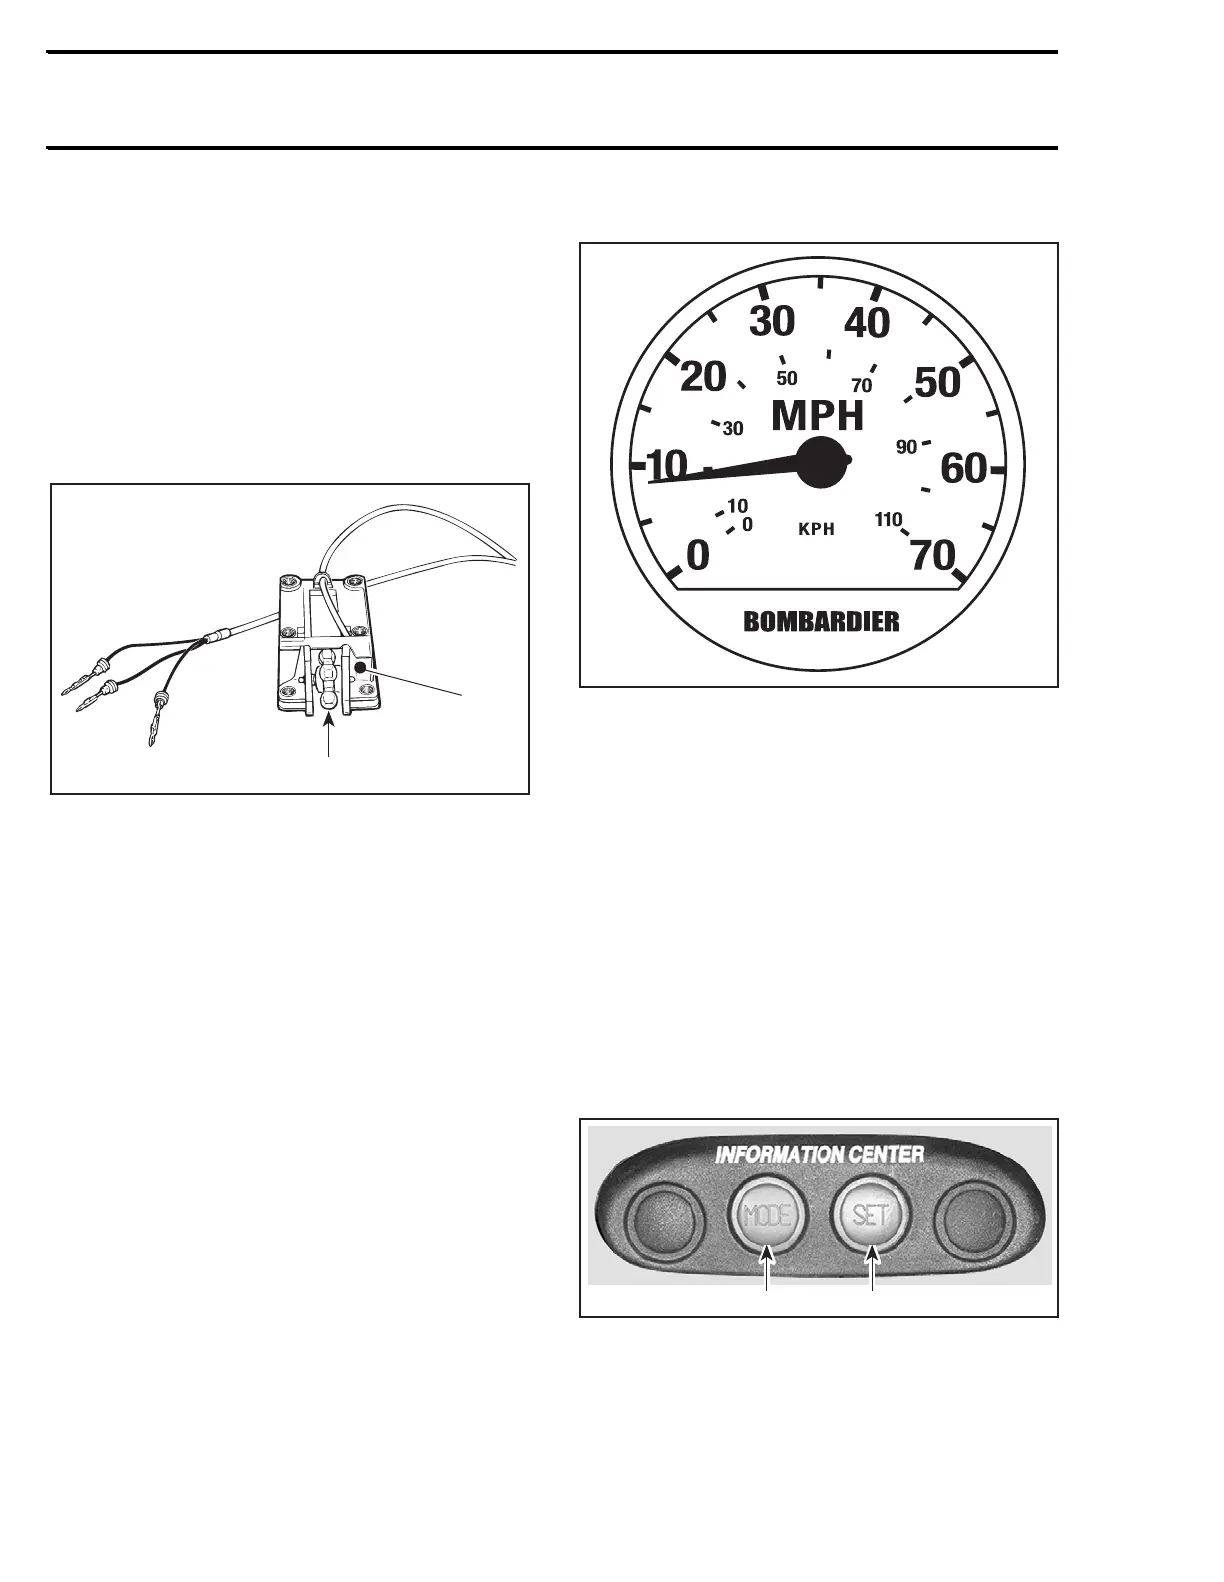
The speedometer gives a reading through a speed
sensor. Speed sensor is installed on riding plate. It
works with the water flow which turns a magnetic
paddle wheel that triggers an electronic pick-up
that in turn sends a speed signal to the speedom-
eter.
The paddle wheel is protected by the pick-up
housing.
1. Pick-up housing
2. Paddle wheel
To check if the speed sensor is operational, dis-
connect the speed sensor connector housing
from inside bilge.
Using an appropriate terminal remover (Snap-on
TT600-4), remove the PURPLE/YELLOW and
BLACK/ORANGE wires from the tab housing of
the speed sensor.
Reconnect the PURPLE/YELLOW and BLACK/
ORANGE wires in the receptacle housing.
Connect the positive probe of a multimeter to
speed sensor PURPLE/YELLOW wire and the
negative probe to speed sensor BLACK/ORANGE
wire.
With the safety lanyard removed, depress the start/
stop button to activate the MPEM timer.
Slowly rotate the paddle wheel. Every 1/8 turn, the
observed voltage should fluctuate between 5.5
and 8.5 Vdc.
Speedometer (90 mm)
TYPICAL
The PURPLE wire is the 12 Vdc power source of
the speedometer.
The BLACK wire is the ground.
The PURPLE/YELLOW wire is the pulse signal
from the speed sensor.
Information Center
NOTE: With the safety lanyard disconnected, in-
formation center can be activated for approxi-
mately 33 seconds by depressing the engine
start/stop button.
This is a LCD multifunction gauge. Different dis-
plays and functions can be activated using 2 but-
tons — MODE and SET — following specific se-
quences as described below.
1. To change display mode
2. To set or reset a function
Resetting a Function
To reset a function (such as the chronometer, peak
speed, distance, etc.,) press and hold the SET but-
ton for 2 seconds while in the appropriate mode.
F07H0LA
F00L2BA
1 2




 To Next Page