Navigation
●
Starts plotting the route.
The offroad markers can be recorded by in-
dicating a manual waypoint.
●
In the Offroad Navigation menu, press the
ADD WAYPOINT function button. The tour way-
points defined manually are shown on the
map by a marker.
Ending recording
●
Press the STOP RECORDING function button
in the main Offroad Navigation menu.
Managing stored Offroad tours
3
Only available for the model: Navi System Plus
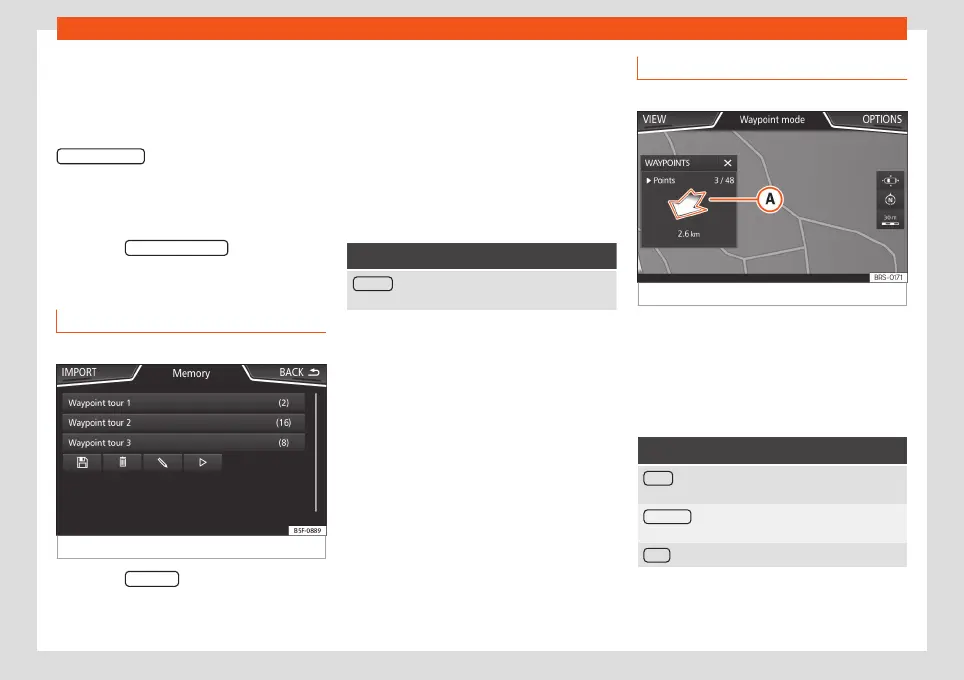
Fig. 56
Offroad Navigation menu, stored tours
●
Press the MEMORY function button in the
Offroad Navigation menu.
●
A list of stored Offroad tours opens, if there
are any.
When a tour is selected, the following icons
will appear
›››
Fig. 56:
Export the tour to an SD card.
Edit the name of the tour.
Delete the tour.
Load tour
Function button: function
IMPORT : allows the import of an Offroad route in
“.GPX” format.
Loading an Offroad tour
When the Offroad tour is selected, press Play
and the selected tour will be loaded onto
the Navigation system.
Creating an Offroad tour
3 Only available for the model: Navi System Plus
Fig. 57
Offroad route guidance mode
Start route guidance
●
Loads the stored Offroad tour.
●
Starting off in a stored route is not detected
by the system automatically.
Setup
Function button: function
Invert : Reverses the direction of the stored Offroad
tour.
Next point : Starts the Offroad tour from the nearest
point.
Start : Starts the complete Offroad tour.
When route guidance starts, the system
switches to the map view.
72