SmartMedia Card
Features
SmartMedia Card Features
Recording
71
Card Recording
It is possible to take a still picture in the same
way as you do with a standard camera and
record that image on the SmartMedia card.
4 Hold down the Lock button and set the
Power switch to CAMERA.
• The picture from the lens is now
displayed in the viewfinder.
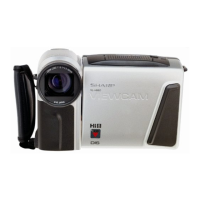
REC START/STOP button
Power Zoom buttons
STILL button
Media Selection switch
Lock button
AUTO
CARD
6
/
40
Number of shots remaining
1 Insert a SmartMedia card in the
camcorder.
2 Remove the lens cap. Pull out the
viewfinder horizontally with your finger.
3 Set the Media Selection
switch to CARD.
Number of shots taken
6 Press the STILL button.
• A still image of the subject
is displayed.
• To cancel the displayed
image, press the STILL
button again.
7 Press the REC START/STOP button to
begin recording.
• The
indicator flashes red while data is
being recorded on the SmartMedia card,
and returns to white when recording
completes.
Notes:
• Recording under insufficient lighting may result
in blurred images. We recommend that you use
a tripod to record insufficiently illuminated
subjects.
• Recording under the light of a fluorescent,
mercury, or sodium lamp may cause flickering in
the image and, depending on the timing of the
shot, may result in changes to colour hue in the
image.
• “RECORDING TO MEMORY CARD” or
“RECORDING TO TAPE” will be displayed during
the recording of still images. This display
indicates whether the still image is being
recorded to a SmartMedia card or to tape. Set
the MEDIA DISP menu item to “OFF” in Card
Recording or Tape Recording mode if you do not
want this to be displayed.
Power
switch
5 Press the Power Zoom buttons to frame
the subject as you desire.
AUTO
6/
40
RE C ORD I NG TO
MEMORY CARD
RECORDING TO
MEMORY CARD
CARD
Caution:
• Do not turn the power off while the
indicator is
flashing in step 7.
VL-PD6H/070-074 01.4.24, 0:58 PM71
Downloaded from: http://www.usersmanualguide.com/