2 - 2
Installation
To install the MME-3 or MLE-6 backbox:
Slip the front door off the hinges of
the box and put it to one side
temporarily.
Remove the knockouts in the
backbox where field wiring is re-
quired.
Hold the empty enclosure against
the wall at a height that provides
easy access.
Mark drill points on the wall in the
center of the two slots on the upper
rear of the backbox.
Drill the two holes and screw in
the top bolts, leaving a small gap
between the wall and each top bolt.
Mount the backbox on the two bolts
and then install the bottom bolts in
the two holes provided.
Tighten all bolts securely against the
back wall of the enclosure.
Slip the front door back on the
hinges of the backbox.
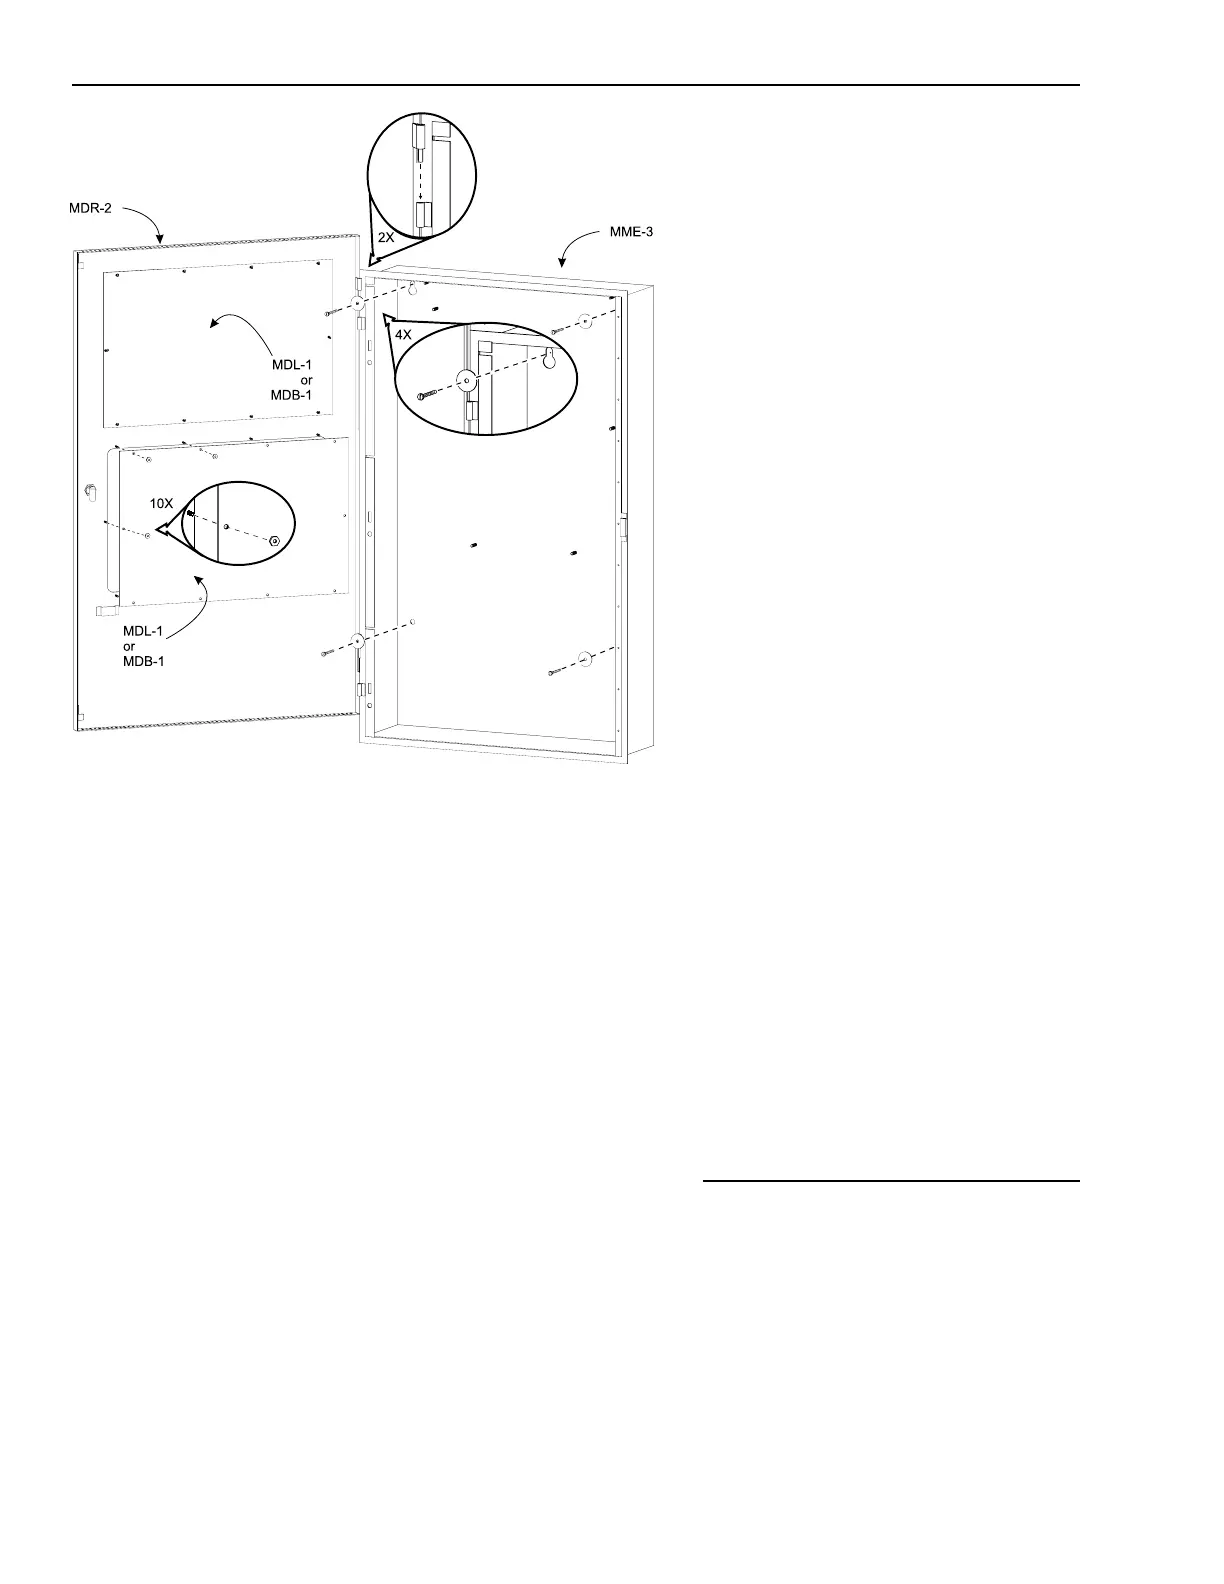
Front Door
The front door is the main outer door
for the MME-3 or MLE-6 enclosure.
The door is supplied without filler
plates for the two large openings. To
select the appropriate filler plates for
the two openings, follow the informa-
tion below.
When visual indication of system
operation (LCD, LED, or printer) is
required, install clear panels, the
MDL-1 lens, behind the appropriate
door openings.
When visual indication of the
system operation is not required,
install plain blank panels, MDB-1s,
behind the appropriate door openings.
When audio amplifiers such as
the EL-410C/D or ZAC-30 are used,
install the MDG-1 (MXL Door Vent-
ing Grill) behind the appropriate door
openings.
After determining which filler plates
are required, insert the appropriate
plates in the front door using the
hardware supplied.
Pull all field wiring into the backbox.
Pull all field wiring into the backbox
and dress the wiring to the approxi-
mate location to which it will go. For
information about power limited
wiring, refer to Appendix L - Power
Limited Wiring.
Installing the Backbox, Front Door and Filler Plates
Technical Manuals Online! - http://www.tech-man.com

 Loading...