2 - 15
Installation
Wiring the ACM-1
NOTE: Remember that all cables that
connect to the ACM-1 are polarized
and connect in one way only. Do not
force them. The location of pin 1 on
connectors is indicated by marks on
the pin or by color traces on the wires.
Be sure the black tracer wire is close
to the 1.
Connect the long 15-conductor ribbon
cable (P/N 555-192238) from the
MMB-1/-2, P8 (or from the PSR-1, P5)
to P5 on the ACM-1.
Connect the short 15-conductor ribbon
cable (P/N 555-192242) from ANN-1,
P1 to P4 on the ACM-1.
Connect the 50-ribbon cable (P/N
555-192201) from TBM-2, P3 to P2
on the ACM-1.
Connect the 5-wire cable (P/N 600-
190220) from TBM-2, P2 to P3 on
the ACM-1.
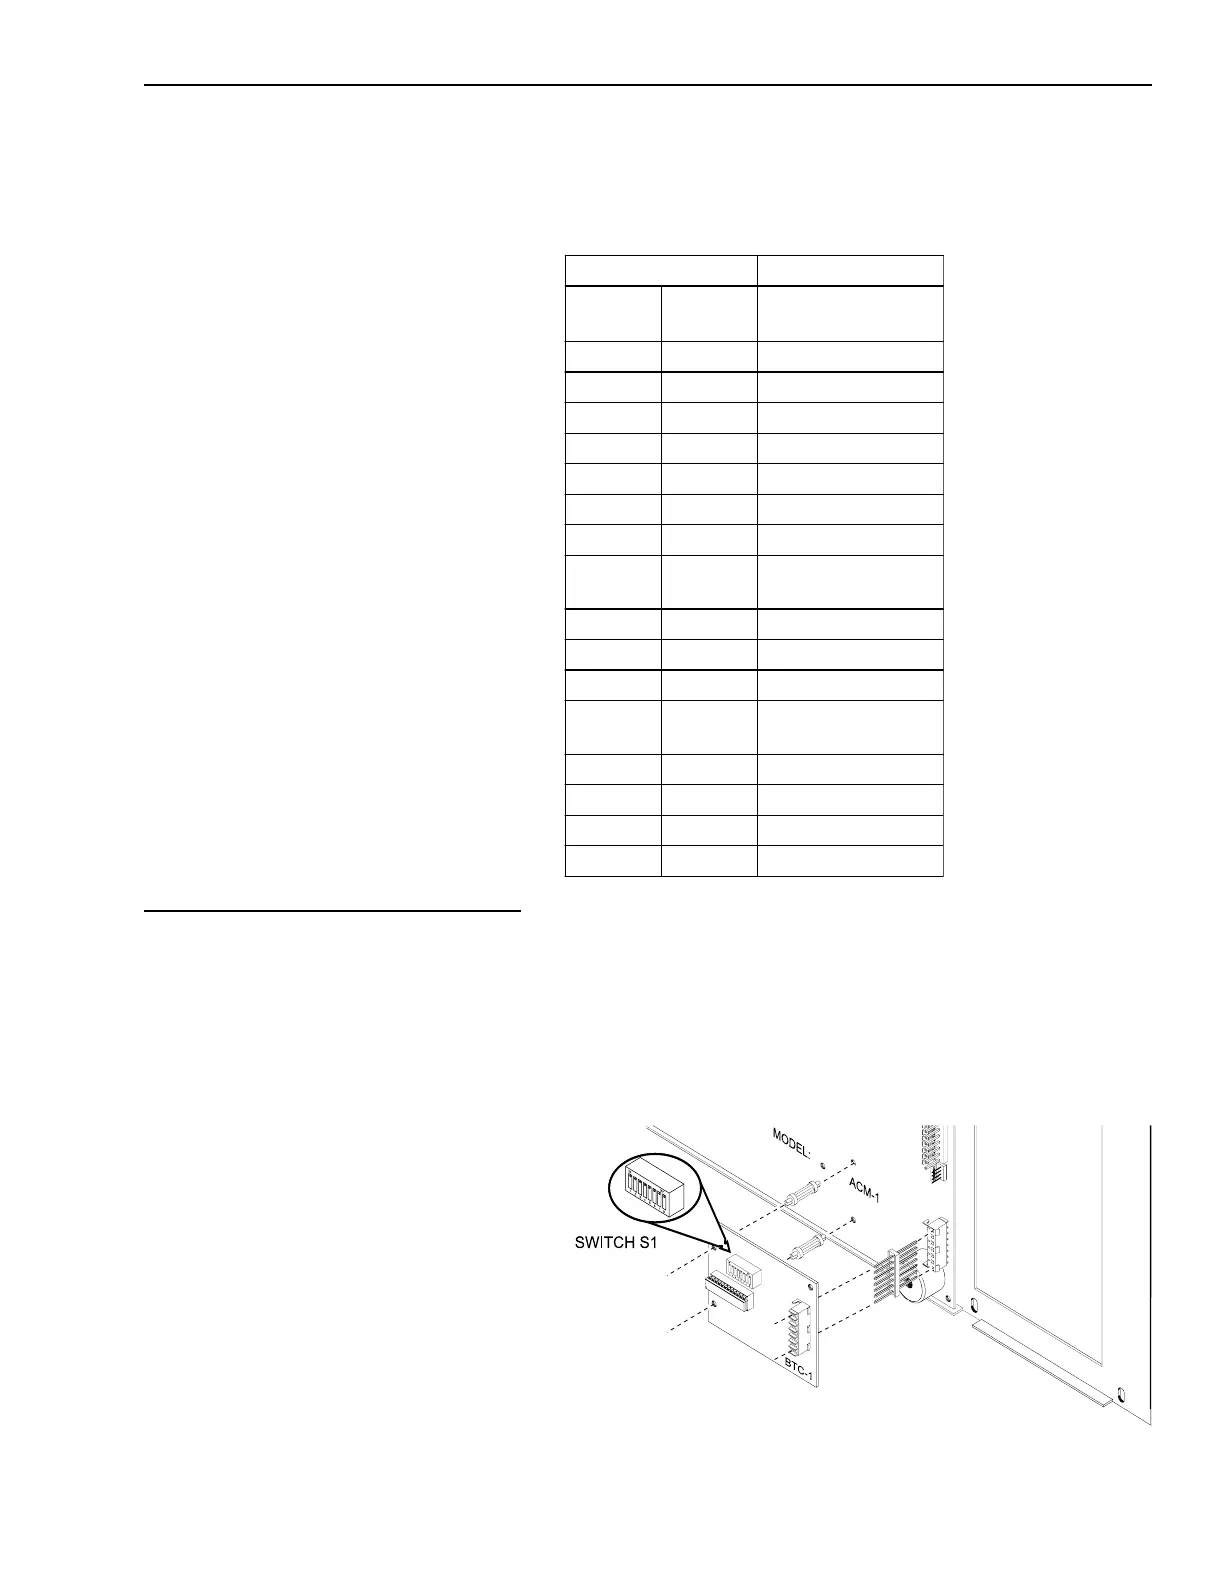
Installing the BTC-1 on the ACM-1
(MXLV Only)
The BTC-1 mounts on either the ACM-1
on P6 (to provide backup of the two
primary tones) or the OCC-1 (to pro-
vide a default tone in degrade mode)
with two snap-in type standoffs and a
comb-like connector.
Setting the Tones
Before installing the BTC-1 on the
OCC-1, set the desired tones on switch
S1 using DIP switches SW1-SW4 for the
first tone selection and DIP switches
SW5-SW8 for the second tone selection.
Refer to the function section of the
CSG-M configuration printout for the
tones to be configured.
Installing the BTC-1 on the ACM-1
Mounting the BTC-1
Install the standoffs and comb
connector in the component side of
the ACM-1.
BTC-1 TONE SWITCH SETTINGS
Setting Tone
ALERT
8 7 6 5
EVAC
4 3 2 1
O O O O O O O O DO NOT USE
O O O X O O O X Chime
O O X O O O X O 2000 Hz
O O X X O O X X Slow Whoop
O X O O O X O O Yelp
O X O X O X O X Wail
O X X O O X X O California Code
O X X X O X X X
900 Hz Pulsed at 120
Pulses Per Minute
X O O O X O O O DO NOT USE
X O O X X O O X Horn
X O X O X O X O Temporal Code 3
X O X X X O X X
900 Hz Pulsed at 30
Pulses Per Minute
X X O O X X O O Yeow
X X O X X X O X High/Low
X X X O X X X O DO NOT USE
X X X X X X X X 900 Hz Tone
X=Closed or ON O=Open or OFF
Technical Manuals Online! - http://www.tech-man.com

 Loading...