4
Using the Pick/Install Xdcr Menu
z Press the <Down> arrow to select Pick/Install Xdcr if it is not displayed, then press the
<Right> arrow. The meter will display only the transducers that are suitable for the
entered tube diameter.
The prompt line will display the recommended transducer part number based on the
entered wall thickness as indicated in Table 2 on page 9 of this addendum.
z Press the <Right> arrow and scroll to desired transducer P/N (e.g., P/N 1011AP-16S2-B).
z Press the <ENT> key to register your selection.
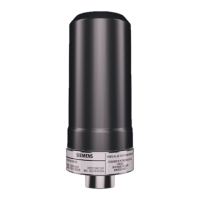
3. AEROSPACE TRANSDUCER INSTALLATION
Transducer Mounting Procedure
To install the Aerospace Transducer, refer to Installation Drawing 1011AP-8 in this adden-
dum and proceed as follows:
z Apply a thin bead of Super Lube (CC128) to the active area of the transducer.
z Press the transducer onto the tube and snap it into place. Check to make sure that the
transducer makes positive contact with the tube.
Connecting Transducer Cables
NOTE: The 1010 Aerospace Transducer is a bi-directional device. The upstream and
downstream transducer cabling can be interchanged depending on which di-
rection of flow is desired to be positive or negative.
z Connect one end of the BNC transducer cable to the upstream transducer connector
(UP).
z Connect the other end of the flow transducer cable to the UP connector on flowmeter.
z Connect one end of another BNC transducer cable to the downstream transducer connec-
tor (DN).
z Connect the other end of the flow transducer cable to the DN connector on flowmeter.
Siemens Site [1] SITE1
Pick/Install Xdcr
Transducer P/N *1011AP-16S2-B
Install Completed? 1011AP-16S3-B
Empty Pipe Set 1010AP-16S4-B
Zero Flow Adjust Chan Not Setup
Recommended Xdcr: 1011AP-16S2-B

 Loading...


