Commissioning SMA Solar Technology AG
38 SWebBox-TEN101232 Technical Description
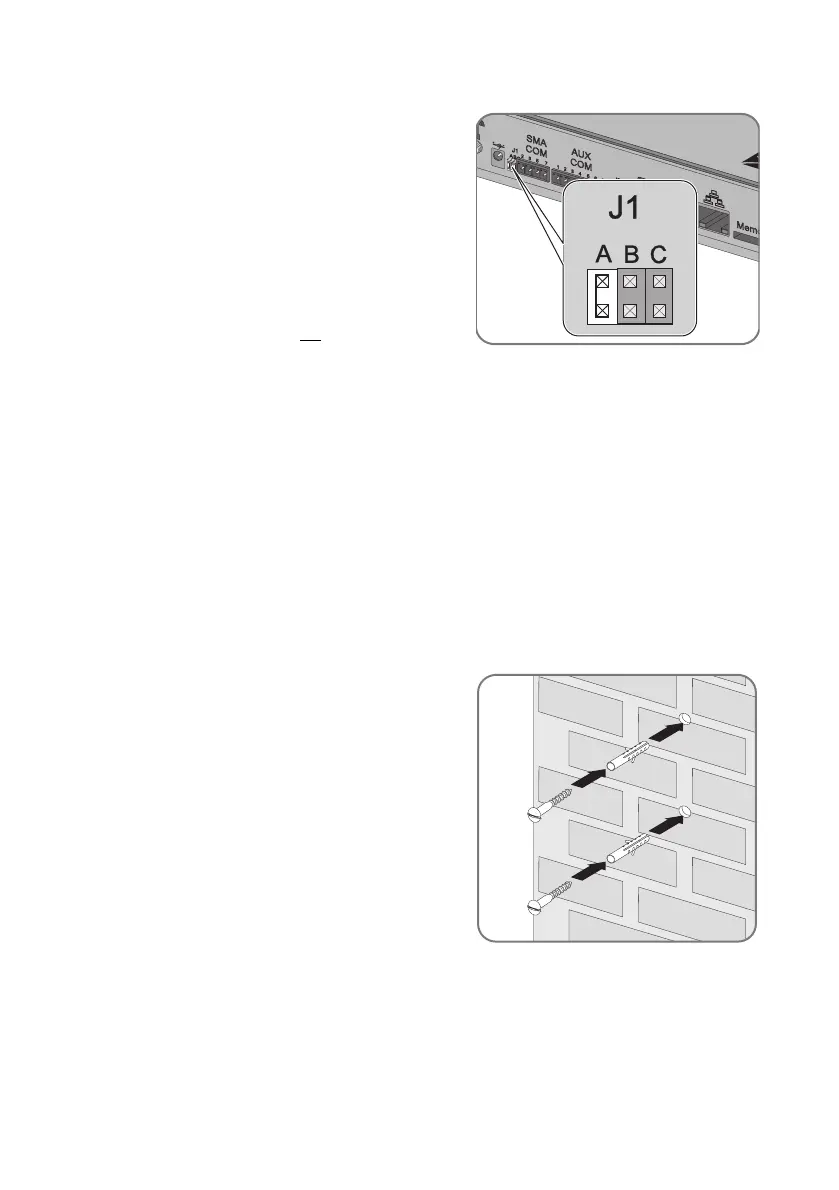
11. Whether the Sunny WebBox is located at one of
the two ends of the RS485 communication bus
determines whether or not a jumper must be
inserted in "J1A" of the "SMA COM" connection.
The jumper is mounted on delivery.
– If the Sunny WebBox is located at one of the
two ends of the RS485 communication bus, a
jumper must be inserted in "J1A". If a jumper is
not mounted, connect a jumper.
–If the Sunny WebBox is not located at one of the
two ends of the RS485 communication bus, no
jumper may be inserted in "J1A". Remove jumper on "J1A".
☑ The Sunny WebBox is now connected to the RS485 communication bus.
6.9 Mounting the Sunny WebBox (wall or top-hat rail)
This section describes how to mount the Sunny WebBox in the following ways:
• Mounting the Sunny WebBox onto the wall
• Mounting the Sunny WebBox on the top-hat rail
Mounting the Sunny WebBox onto the wall
1. Determine the mounting location taking into consideration the mounting / installation location
requirements.
2. Use the supplied drilling template to determine the
position of the Sunny WebBox on the wall and to
mark the drilling holes with a pen.
3. Drill holes with 6 mm diameter at the marked points
and insert wall anchors.
4. Screw in the screws and leave about a 6 mm
clearance between the screw head and the wall.

 Loading...


