We recommend that you type your text as quickly as you can and edit it later. In
this
way, you
can attain your fastest speed and not interrupt your typing to make corrections.
At
times,
however, you may want to make some corrections as you type.
How to Make Corrections as you Type
Just as if you were making corrections on your typewriter, you can use your
CORRECT KEY
or
WordEraser™
KEY
to erase errors you've just made on your
SCREEN.
Try
it.
Tap the CORRECT
KEY
once and the last character you typed disappears. Tap the WordEraser
KEY
once and the last
word you typed disappears. Tap them each a couple of times and deletions continue. Then
type new text to replace the text you erased. You c an also Backspace and type a correct
character over an incorrect character.
NOTE:
The Tab Key
is
the only Key that will not type over another character.
It
will position the
CURSOR at the next tab position.
In SECTION
III
(Editing) you will learn to make corrections after your text has been typed.
How
to
Print Your
Text
Once you've completed typing your text you'll want to print it.
• To Print Text:
1.
Insert paper in your typewriter.
2.
Depress the
MENU KEY
on the
KEYPAD
to return to the list of action choices.
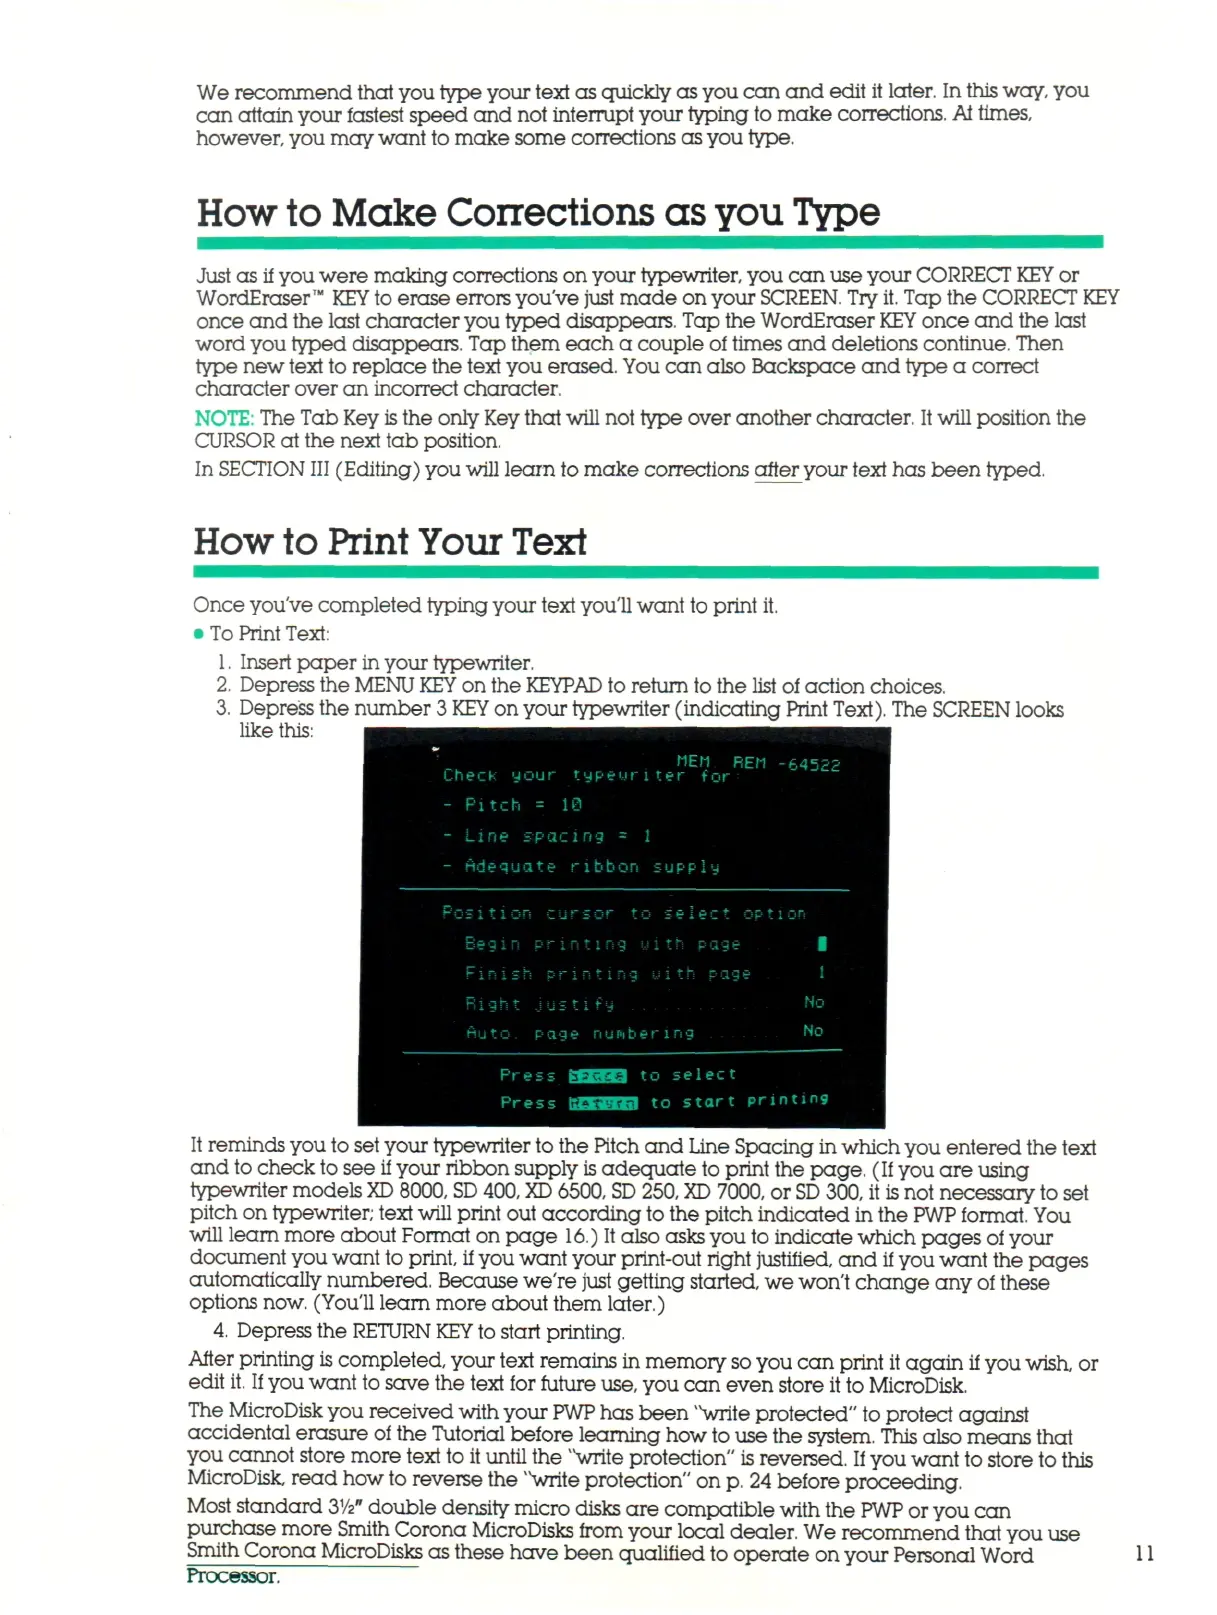
3.
Depress the number 3
KEY
on your typewriter (indicating Print
Text).
The SCREEN looks
like this:
It reminds you to set your typewriter to the Pitch and Line Spacing in which you entered the text
and to check to see if your ribbon supply
is
adequate to print the page. (If you are using
typewriter models
XD
8000,
SD
400,
XD
6500,
SD
250,
XD
7000, or
SD
300, it is not necessary to set
pitch on typewriter; text will print out according to the pitch indicated in the
PWP
format. You
will learn more about Format on page 16.) It also asks you to indicate which pages of your
document you want to print, if you want your print-out right justified, and if you want the pages
automatically numbered. Because we're just getting started, we won't change any of these
options now. (You'll learn more about them later.)
4,
Depress the RETURN
KEY
to start printing.
After printing
is
completed, your text remains in memory so you can print it a gai n if you
wish,
or
edit
it.
If
you want to save the text for future use, you can even store it to MicroDisk.
The MicroDisk you received with your
PWP
has been
vv
write protected" to protect against
accidental erasure of the Tutorial before learning how
to
use the system. This also means that
you cannot store more text to it until the 'Vrite protection" is reversed.
If
you want to store to this
MicroDisk, read how to reverse the
>v
write protection" on
p.
24 before proceeding.
Most standard
2>Vz"
double density micro disks are compatible with the
PWP
or you can
purchase more Smith Corona MicroDisks from your local dealer. We recommend that you use
Smith Corona MicroDisks as these have been qualified to operate on your Personal Word 11
Processor.