More about Printing
As
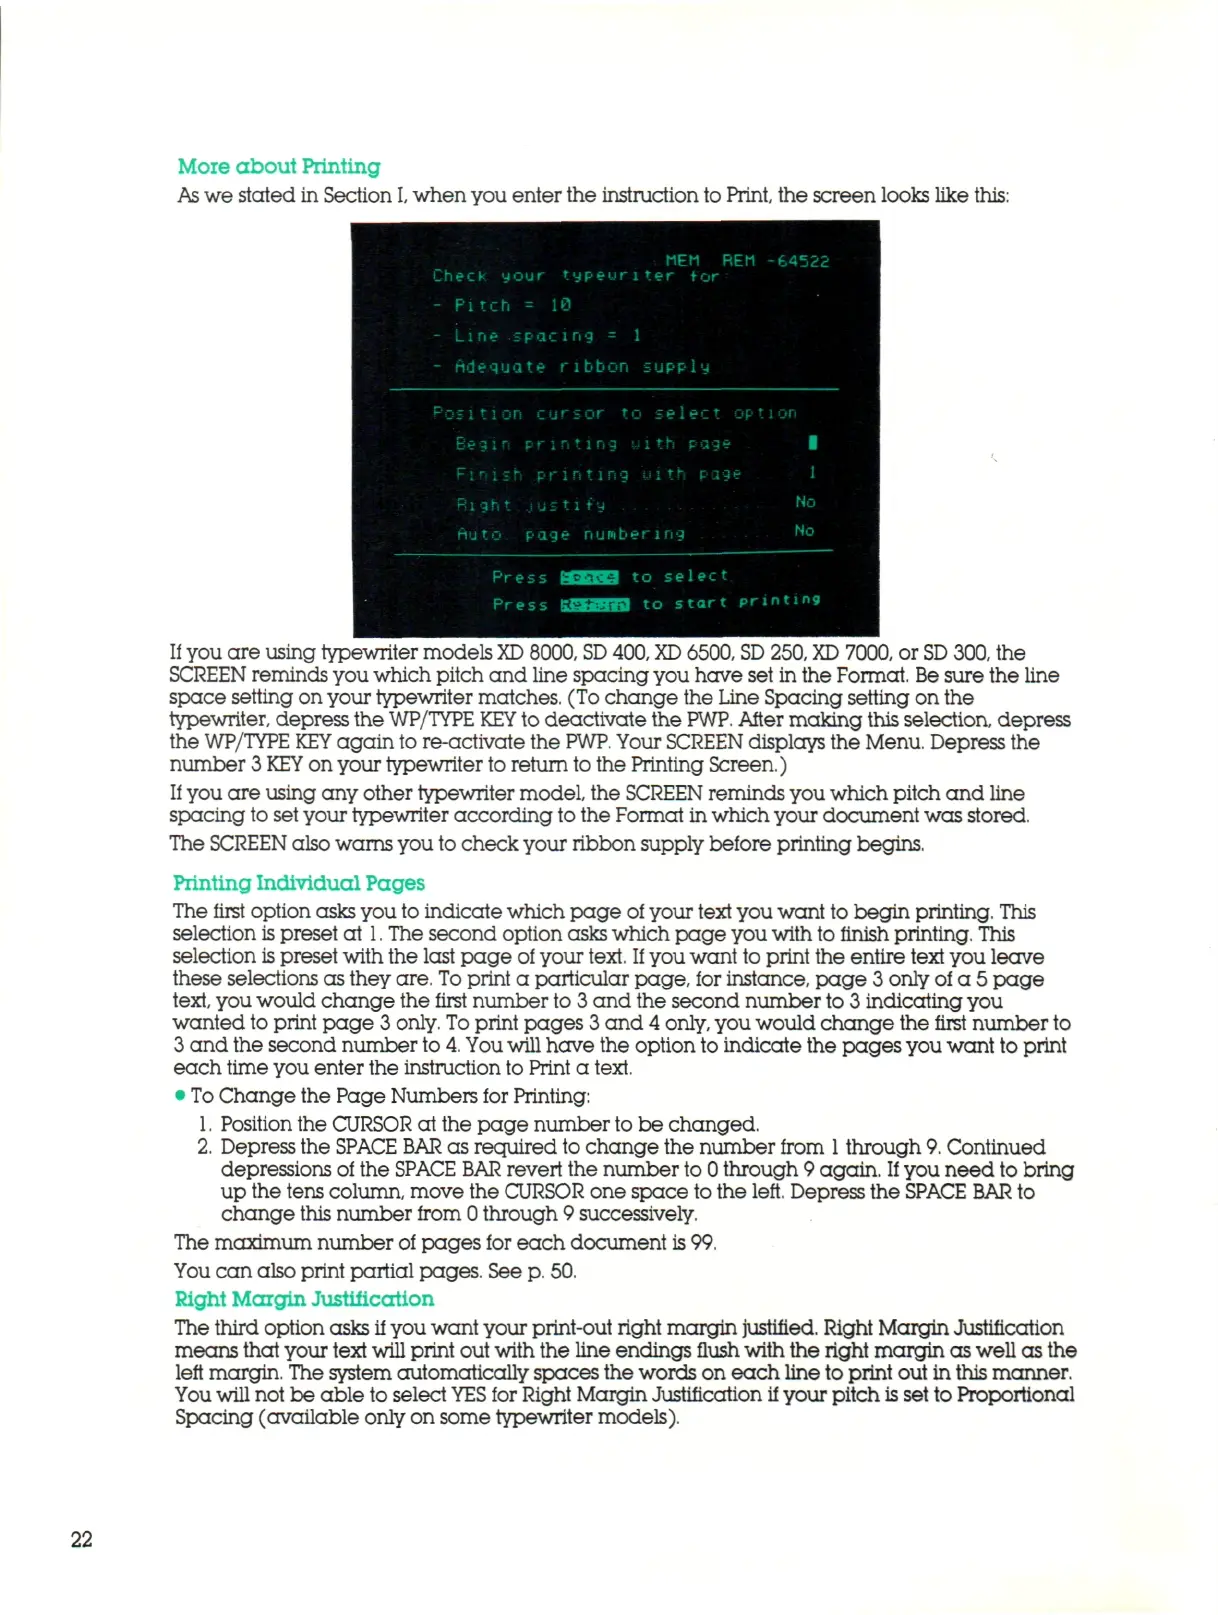
we stated in Section
I,
when you enter the instruction to Print, the screen looks like this:
MEM REM -84!
Check your typeuriter
for
- Pitch
= 19
- Line spacing
= 1
- Adequate ribbon supply
sir pr in ting
uith
cage
i
r
i
s
K
:
printing ui th
Rig-ht.Justify No
Hu
t
o pay e num beri ny
No
Press
3 3 B to
s e l e c t
Press KSOraa
to
s t a r t printms
If
you are using typewriter models
XD
8000,
SD
400,
XD
6500,
SD
250,
XD
7000, or
SD
300, the
SCREEN reminds you which pitch and line spacing you have set in the Format.
Be
sure the line
space setting on your typewriter matches. (To change the Line Spacing setting on the
typewriter, depress the
WP/TYPE KEY
to deactivate the
PWP.
After making this selection, depress
the WP/TYPE
KEY
again to re-activate the
PWP.
Your
SCREEN
displays the Menu. Depress the
number
3 KEY
on your typewriter to return to the Printing Screen.)
If
you are using any other typewriter model, the SCREEN reminds you which pitch and line
spacing to set your typewriter according to the Format in which your document was stored.
The SCREEN also warns you to check your ribbon supply before printing begins.
Printing Individual Pages
The first option asks you to indicate which page of your text you want to begin printing. This
selection is preset at
1.
The second option asks which page you with
to
finish printing. This
selection is preset with the last page of your
text.
If
you want to print the entire text you leave
these selections as they
are.
To
print a particular page, for instance, page 3 only of a 5 page
text, you would change the first number to 3 and the second number to 3 indicating you
wanted to print page 3 only.
To
print pages 3 and 4
only,
you would change the first number to
3 and the second number to
4.
You will
have the option to indicate the pages you want to print
each time you enter the instruction to Print
a
text.
•
To
Change the Page Numbers for Printing:
1.
Position the CURSOR at the page number to be changed.
2.
Depress the
SPACE BAR
as required to change the number from
1
through
9.
Continued
depressions of the SPACE
BAR
revert the number to 0 through 9 again.
If
you need to bring
up the tens column, move the CURSOR one space to the left. Depress the
SPACE BAR
to
change this number from 0 through 9 successively.
The maximum number of pages for each document
is
99.
You c a n also print partial pages. See
p.
50.
Right Margin Justificcrtion
The third option asks if you want your print-out right margin justified. Right Margin Justification
means that your text will print out with the line endings flush with the right margin as well as the
left margin. The system automatically spaces the words on each line to print out in this manner.
You will
not be able to select
YES
for Right Margin Justification if your pitch
is
set to Proportional
Spacing (available only on some typewriter models).
22