29.
Type a name for the Mailing List.
30.
Insert a MicroDisk if one is not inserted already.
31.
Depress the
RETURN
KEY.
The Mailing
List
is stored to MicroDisk. The SCREEN returns to
the Mailing List/Merge menu.
32.
Proceed with another Mailing
List
function
—
OR
—
exist the Mailing List/Merge feature
by depressing the
MENU
KEY.
The SCREEN returns to the Main menu.
How
to Print the Mailing
List
Only
You can print the Mailing List alone for filing purposes or to easily proofread the
ID
labels and
variable information.
• To Print the Mailing
List:
1.
Insert the appropriate disk.
2.
Bring up the Main menu on the
SCREEN
by depressing the
MENU
KEY
on the Keypad.
3.
Depress the number
7 KEY
(indicating Mailing List/Merge).
If text currently exists in memory, the
SCREEN
warns you that all text will be erased and
asks if you want to continue. The preset answer
is YES.
Depress the
RETURN
KEY
to answer
yes.
(You would depress the Space Bar to change the
answer to NO
if
you first wanted to store the text in memory. After depressing the Return
Key the Screen would return to the Main menu.)
The Mailing List/Merge menu
is
displayed.
4.
Select number
2
(Print mailing list) by depressing the number
2 KEY
on your typewriter.
The Recall screen
is
displayed.
5.
Type the name of the Mailing List to be printed
—
OR
—
position the CURSOR at the name
in the listing.
6. Depress the
RETURN
KEY
to enter the name. When Recall
is
completed, the pre-print
screen
is
displayed.
7.
Check pitch, line spacing, and ribbon supply. Insert paper.
8. Depress the
RETURN
KEY
to begin printing. Printing pauses at the end of each page to
allow you to insert another sheet of paper. Continue printing by depressing the RETURN
KEY.
9. When all frames have been printed, the SCREEN returns to the Mailing List/Merge menu.
10.
Proceed with another Mailing List function
—
OR
—
exit the Mailing List/Merge feature
by depressing the
MENU
KEY.
The SCREEN returns to the Main menu.
How
To
Create
A
Basic Letter
1.
Bring up the Main menu by depressing the
MENU
KEY
on your Keypad.
2.
Depress the number
1
KEY
(indicating Create, View, or Edit
Text).
Clear existing text in
memory- if necessary.
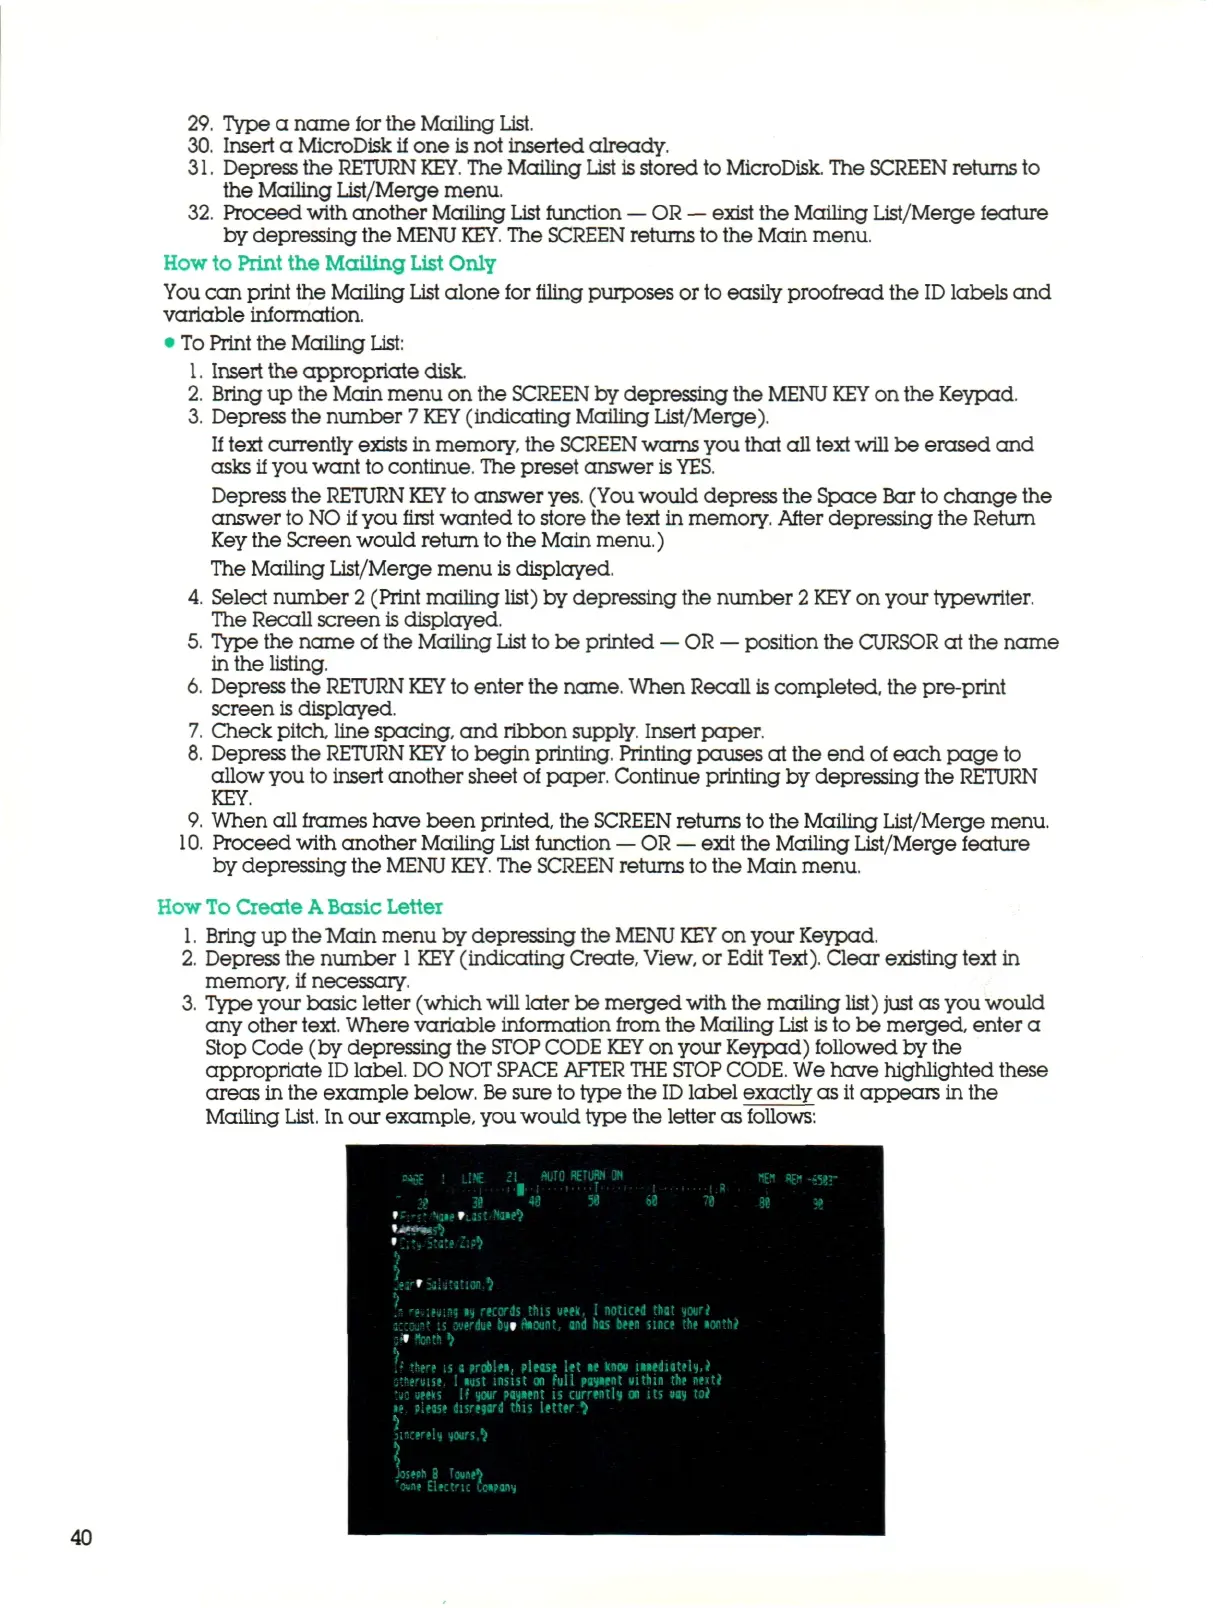
3.
Type your basic letter (which
will
later be merged with the mailing
list)
just as you would
any other
text.
Where variable information from the Mailing
List
is
to be merged, enter a
Stop Code (by depressing the
STOP CODE
KEY
on your Keypad) followed by the
appropriate
ID
label.
DO NOT
SPACE AFTER
THE
STOP
CODE.
We have highlighted these
areas in the example below.
Be
sure to type the
ID
label exactly as it appears in the
Mailing
List.
In our example, you would type the letter as follows:
mm RETURN ON
ustmA
\
.er'-aUf.tion,^
U rttiHiif «y records this
ueek,
I noticed that your*
-i,--0iis? is overdue bytrtiount, and has been since the «onth*
s» ftenth t
f
j
it" there
is a
problen, please
let le
knew mediately,*
otfteniise.
I
»ust insist
on
full parent utthin
the
next*
!so ueeks
If
your payient
is
currently
on its uay to*
•» siease disregard this letter
^
3;»cerel| yours,? sincerely yours,^
\
Joseoh
8
Towtrt
T
oune Electric uxpany
40
 Loading...