4-22
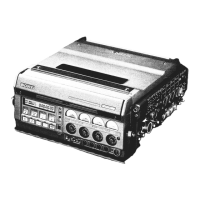
BVW-55 P2
Preparations
1. Put the unit into the unthreading end state.
2. Turn off the power.
3. Remove the upper frame.
(Refer to the maintenance manual Part 1, Section 1-6.)
4. Remove the cassette compartment.
(Refer to the maintenance manual Part 1, Section 1-7.)
Tools
. Stop washer fastening tool: J-6323-530-A
. Torque screwdriver (3 kg.cm): J-6325-400-A
. Torque screwdriver bit (for M1.4): J-6325-110-A
. Torque screwdriver bit (for M2): J-6325-380-A
. Parallel pin (d = 1.6 mm): 3-649-266-01
. Parallel pin (d = 2.0 mm): 3-703-358-04
. Oil: 7-661-018-18
. Cleaning cloth (15 cm x 15 cm): 3-184-527-01
. Cleaning liquid: 9-919-573-01
Replacement
1. VH cleaner assembly removal
Remove the VH cleaner assembly.
(Refer to Section 3-6.)
2. Pinch arm assembly removal
Remove the pinch arm assembly.
(Refer to Section 3-7.)
3. Drum assembly removal
Remove the drum assembly.
(Refer to Section 3-5.)
4. T tension regulator arm removal
Remove the T tension regulator arm.
(Refer to Section 3-9.)
5. Tension regulator band removal
Remove the tension regulator band.
(Refer to Section 3-9.)
6. S tension regulator arm removal
Remove the S tension regulator arm.
(Refer to Section 4-10.)
7. Full top sensor removal
Remove the full top sensor.
(Refer to step 7 in Section 4-5.)
4-6. S/T Threading Gear Replacement





 To Next Page