4-62
BVW-55 P2
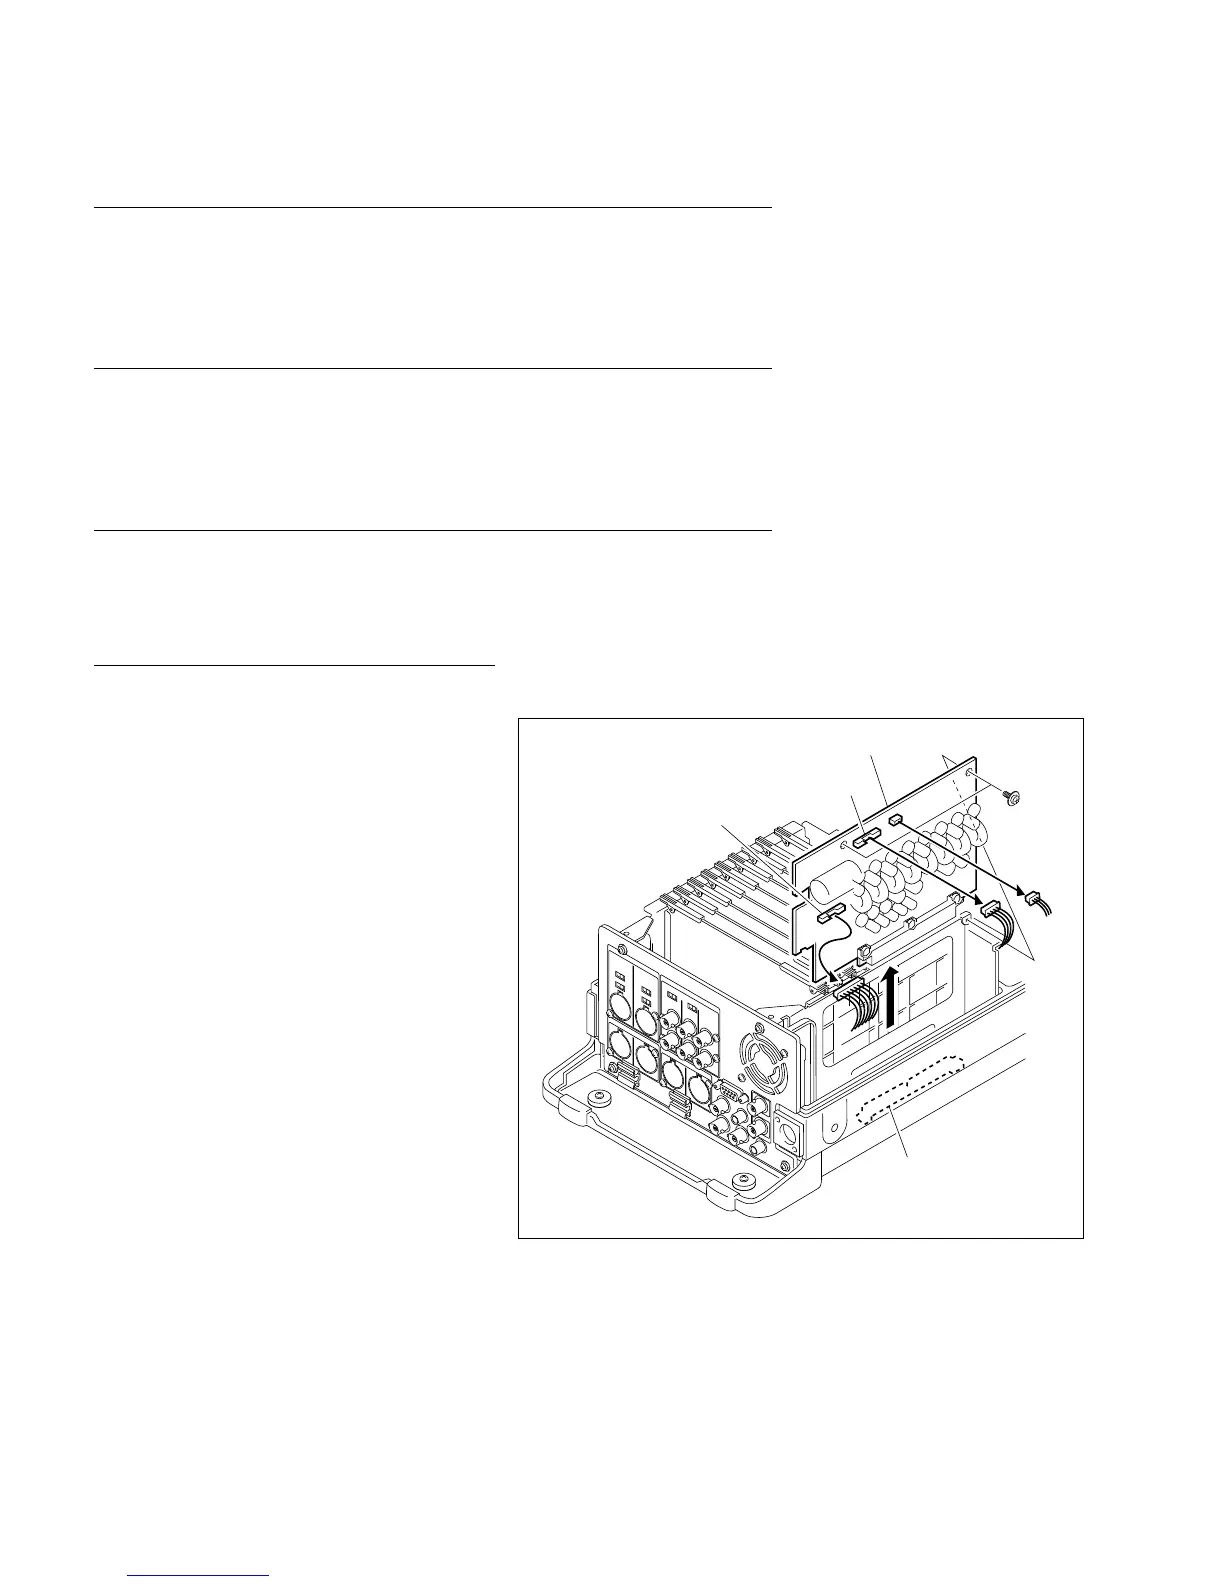
CN1
CN2
PWH3 x 5
RE-174 board
Connector
(MB-838 board)
4-18-2. RE-174 Board Replacement
Outline
Replacement
RE-174 board removal
RE-174 board installation
Preparations
1. Turn off the power.
2. Remove the upper frame.
(Refer to the maintenance manual Part 1, Section 1-6.)
Tools
. Torque screwdriver (3 kg.cm): J-6325-400-A
. Torque screwdriver bit (for M2): J-6325-380-A
Replacement
1. RE-174 board removal
(1) Disconnect the connector (CN1 and CN5) on
the RE-174 board.
(2) Remove the two screws.
(3) Lift the RE-174 board up and disconnect it
from the MB-838 board.
(4) Disconnect the harness connector (CN2)
connected from the DC IN connector.
2. RE-174 board installation
(1) Connect the harness connector to connector
CN2 on a new RE-174 board.
(2) Push the RE-174 board downward and
connect it firmly to the connector (CN900) on
the MB-838 board.
(3) Fix the RE-174 board to the chassis with the
two screws.
(4) Connect the harness connector to connector
CN1 and CN5.
4-18-2. RE-174 Board Replacement