4-3
HDS-7150/7100
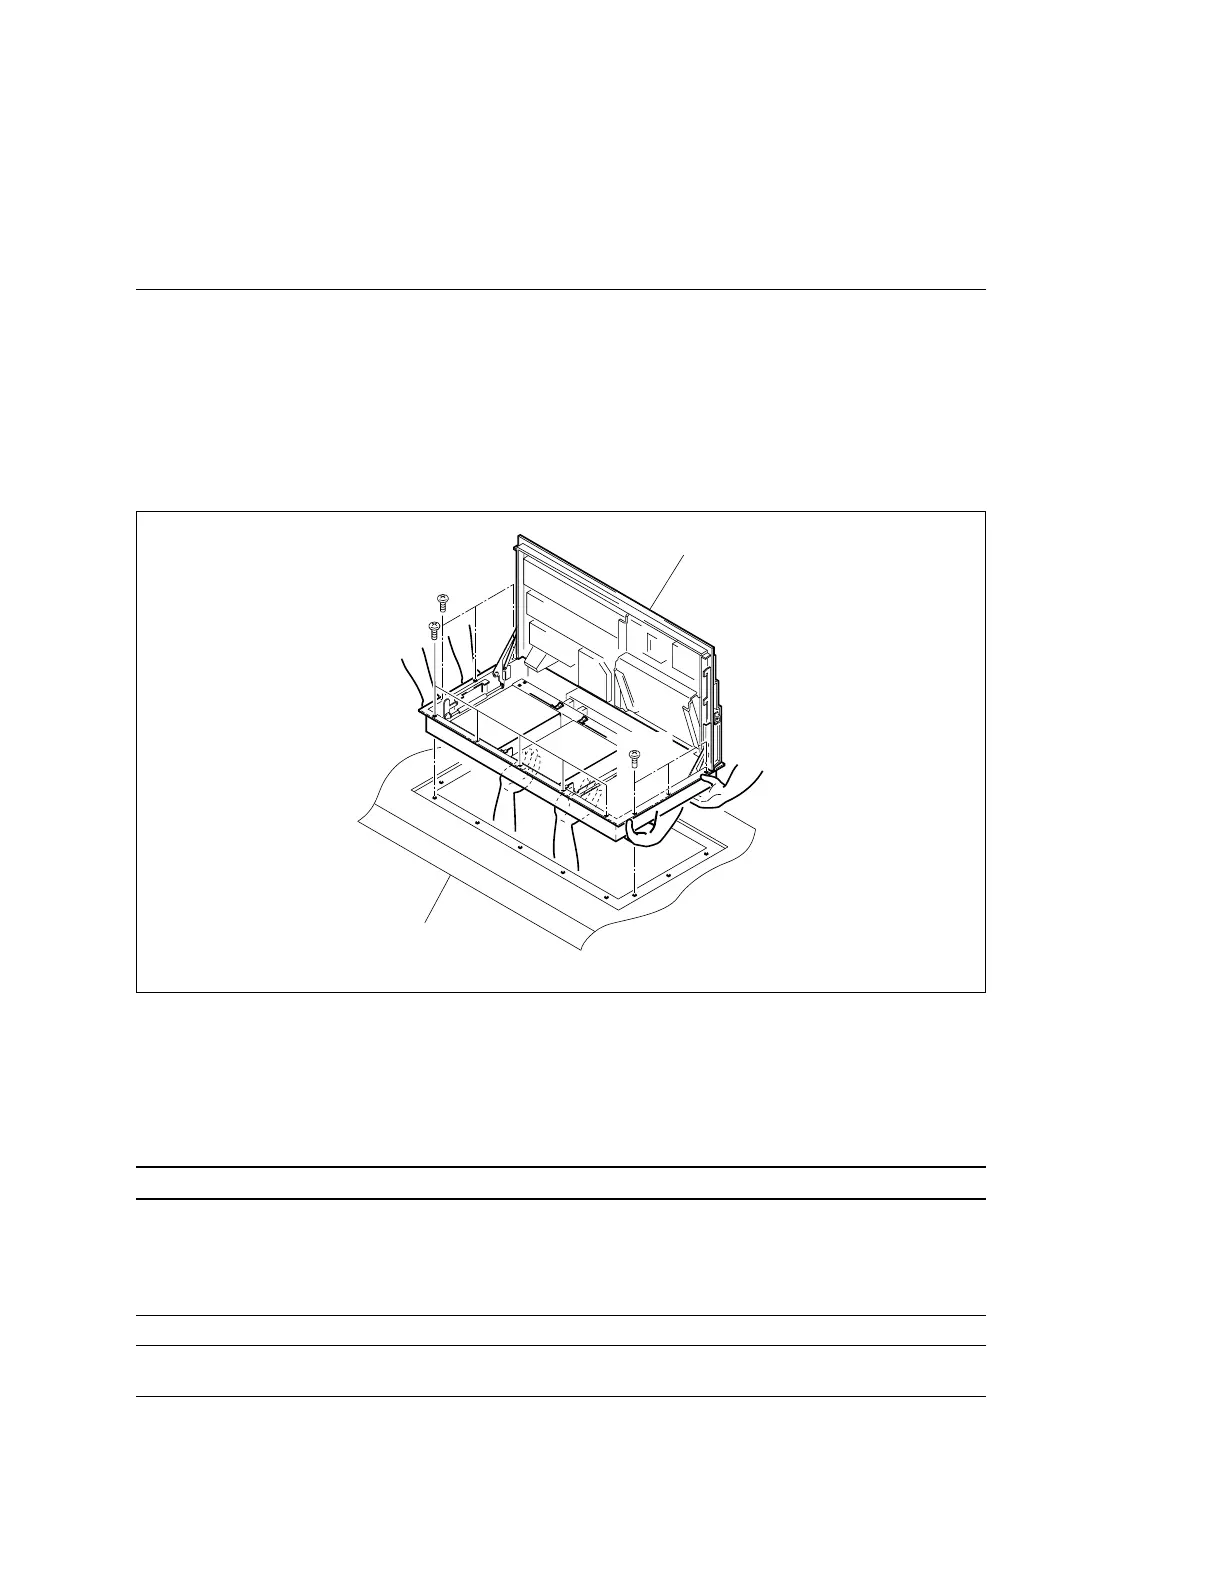
4-3. Installation in Console
c
Be sure to install the control panel in the rack with three-person or more.
Prepared Parts
Screws (B4 x 6) : 11 pcs
(1) Lift the control panel with two-person or more. Then install the control panel in console while
supporting the control panel under the console with the other one person.
(2) Open the control panel. (Refer to Section 4-6.)
(3) Fix the control panel on the console by the screws (B4 x 6).
4-4. Matching Connectors
When connecting cables to various connectors on the rear panel at the time of installing, connecting or
servicing, connect the following connectors or their equivalents.
Connector indication on rear panel Connector parts No. and name (cable side)
SWITCHER D-sub 9-pin,Male
DME
Connector 9-pin, Male : 1-560-651-00
*1
TERMINAL 1, 2
Junction Shell 9-pin : 1-561-749-00
REMOTE 1 to 4
OPTION PANEL BVS Cable : 1-574-993-11
AC IN Power Supply Cord
(For the details of the power supply cord, refer to Section 1-2-3.)
*1 : The following solderless contact must be used for the plug.
AWG #18 to #22 : 1-566-493-21
AWG #22 to #24 : 1-564-774-11
AWG #24 to #30 : 1-564-775-11
BKDS-7017
4-3. Installation in Console
4-4. Matching Connectors
BKDS-7017
Console
B4 x 6
B4 x 6
B4 x 6