STR-DA2800ES
15
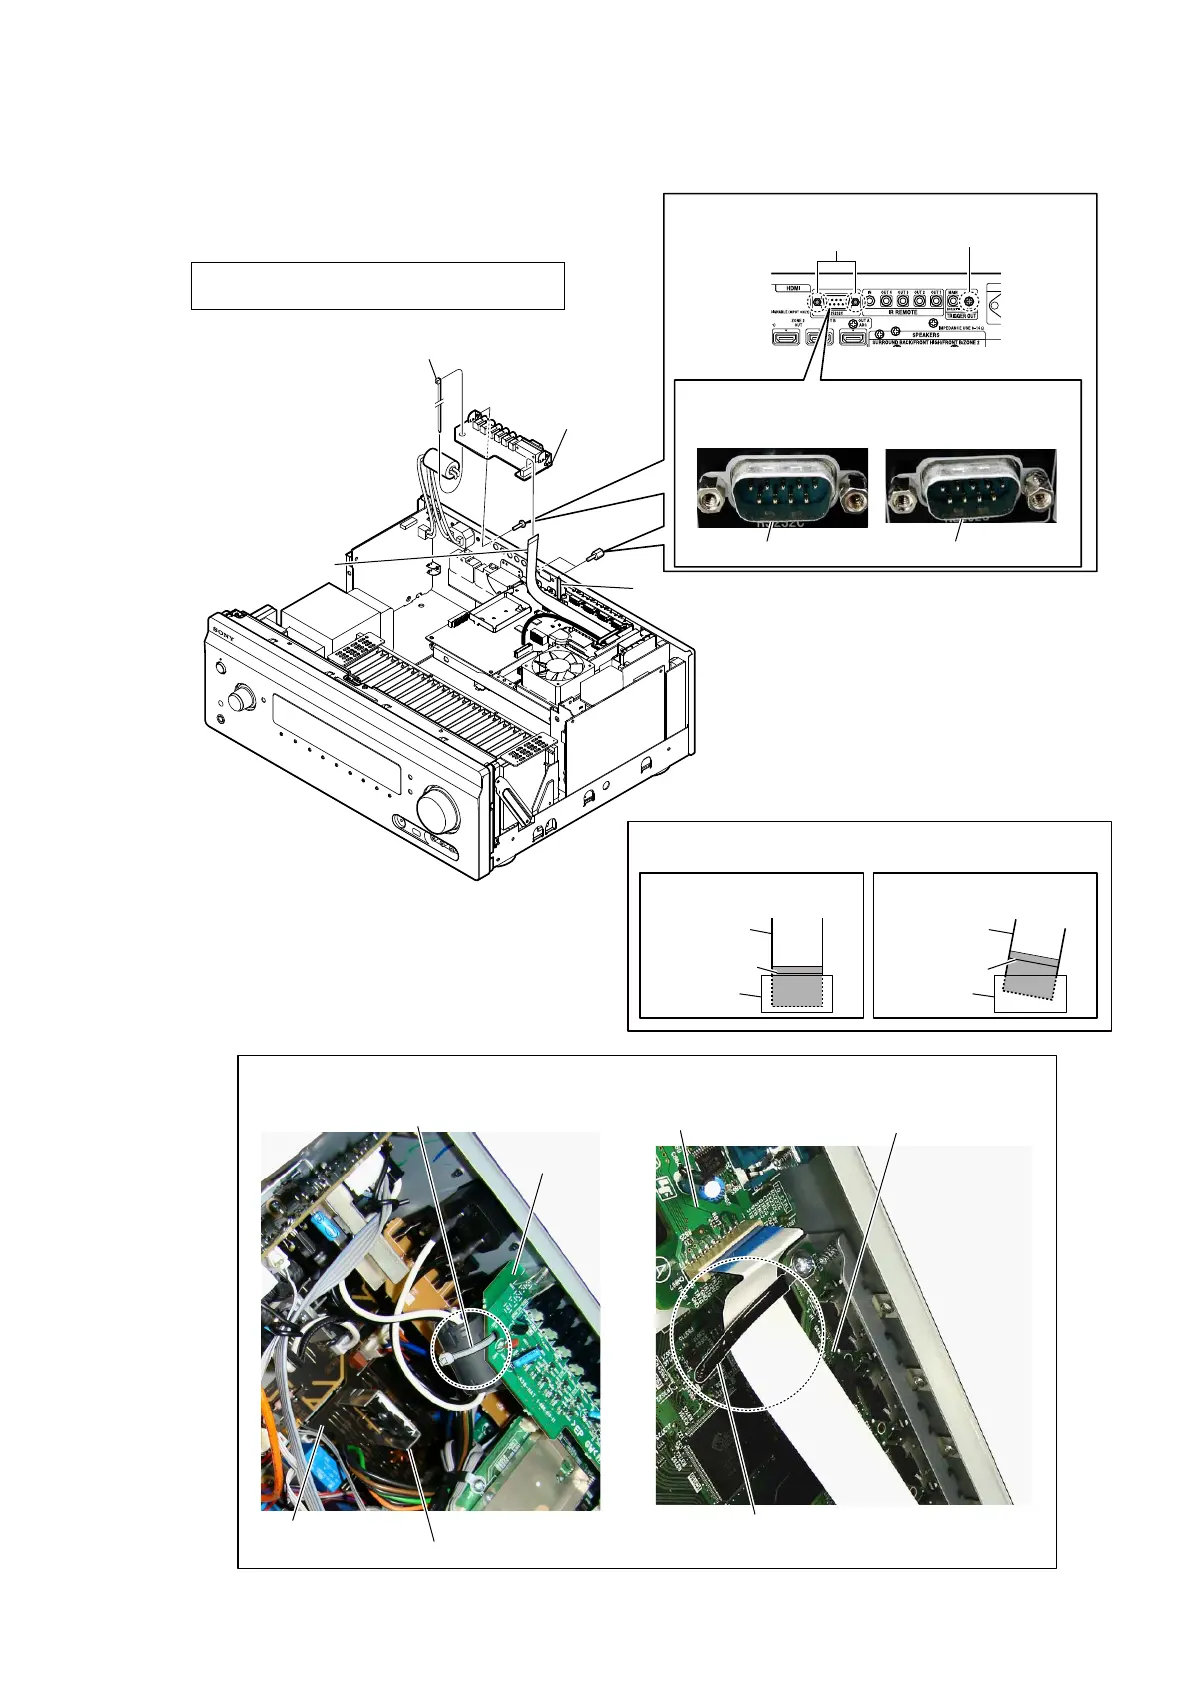
2-5. HAT BOARD
3 wire (flat type) (17 core)
(CN807)
6 HAT board
colored line
colored line
Insert is straight to the interior. Insert is incline
wire (flat type)
wire (flat type)
connectorconnector
OK
NG
Note 2:
When installing the wire (flat type),
ensure the colored line.
No slanting after insertion.
5 screws
(BVTP3 u 8)
4 two nuts
(supplied with J861)
Note 1:
In reassembling, use new binding band (taiton)
to fasten the clamp same as before.
1 Cut the binding band (taiton).
(See Fig. C)
J861 is not slanting.
OK NG
Note 3:
When installing the HAT board, check that J861 is
installed correctly.
J861 is slanting.
– Rear side view –
wiring stopper
HAT board
HAT board
SUB D-VIDEO board
binding band (taiton)
< Fig. C > < Fig. D >
Wire setting
MAIN board
Note 4:
The wire must not touch heat sink.
2 Remove wire from wiring stopper.
(See Fig. D)