Chapter 2: Installation and Setup
Procedure 9: Confirm the Ethernet Link
54 | SmartBits 600x/6000x Installation Guide
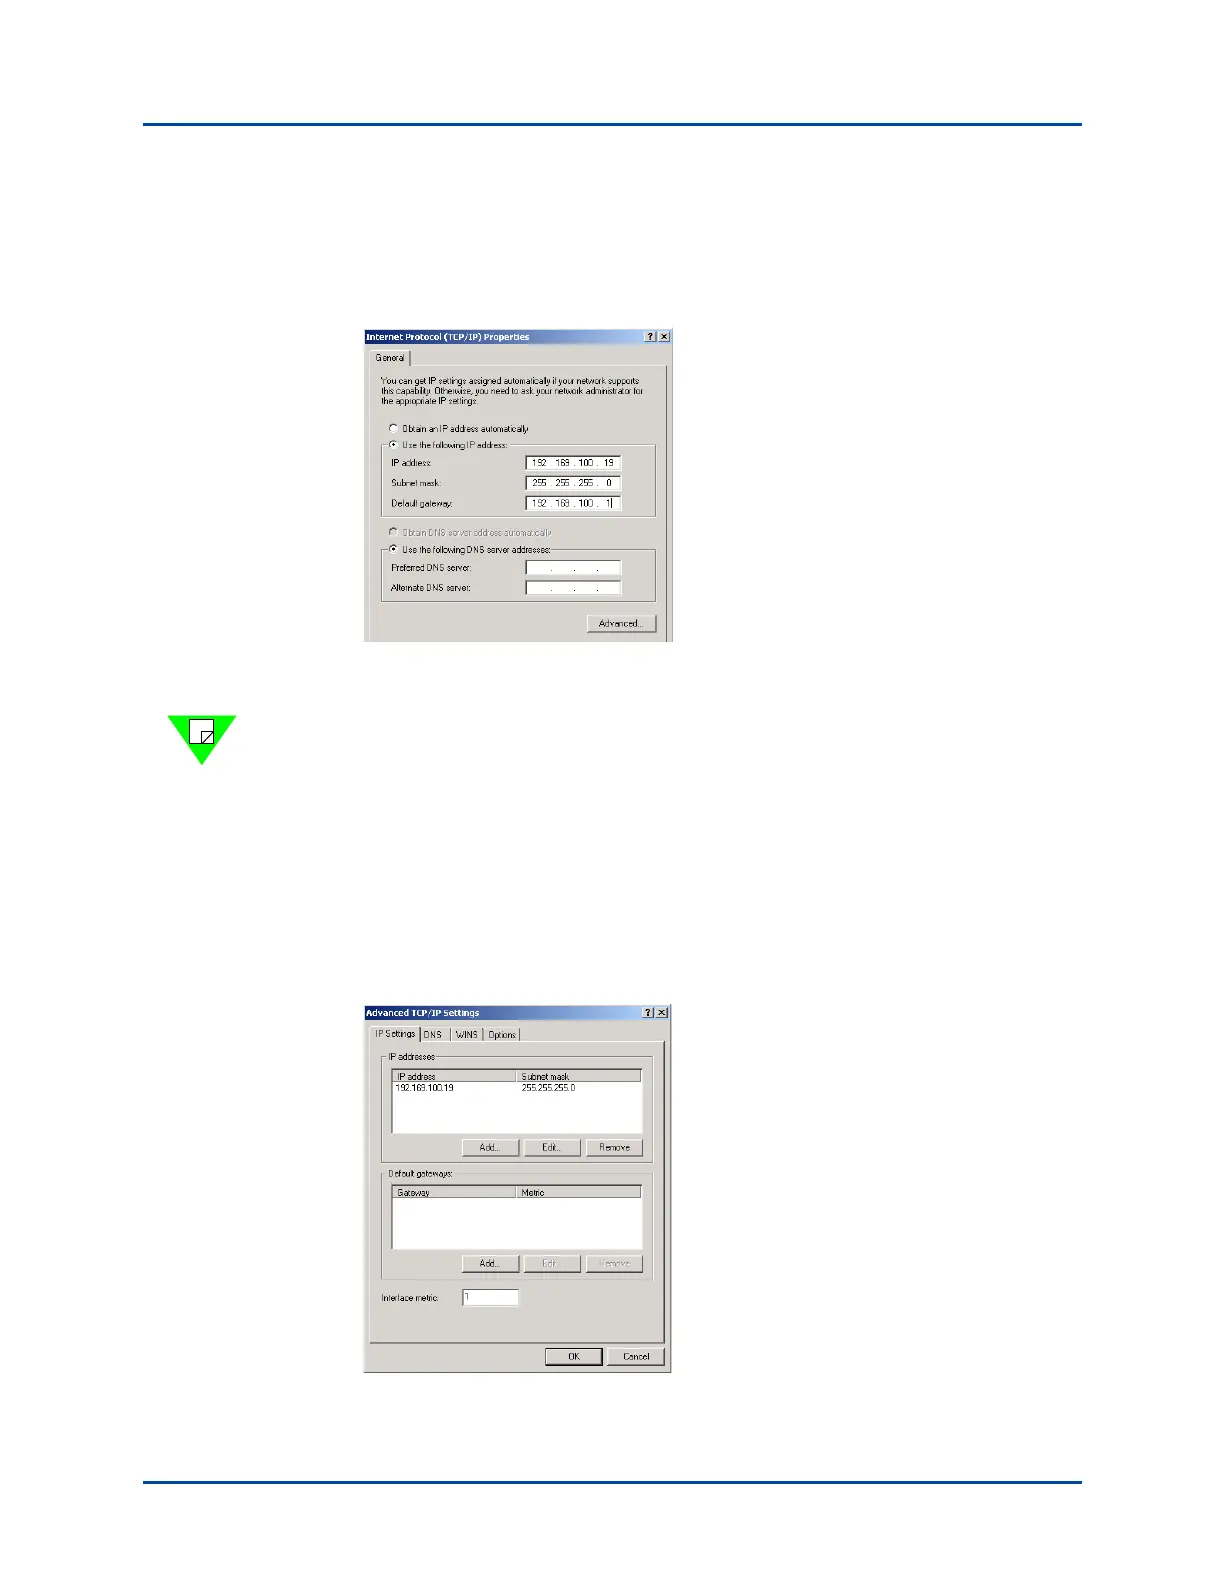
5 Using the radio buttons, specify a new IP address for the PC if needed. For example,
you can set an IP address of 192.169.100.19 and a subnet mask of 255.255.255.0.
This means that systems on this same subnet will all have IP numbers that start with
192.169.100.
6 Set the Netmask and Gateway addresses (default for Netmask is 255.255.255.0 –
default for Gateway is 192.169.100.1). Click Apply.
Note: The screens and procedures listed here may differ slightly depending on the
SmartWindow version that you are running. You may see a different window after
selecting Start > Settings > Control Panel > Network. For example, a PC Configuration
window may appear. In this case, click on the TCP/IP Adapter card, and then click on
the IP Address Add tab.
7 If your PC is on the same subnet as the subnet of your SmartBits chassis, proceed to
step 9.
8 If your PC is on a different subnet from the subnet of your SmartBits chassis, you also
need to add a gateway, which is the address of the connecting router. Select the
Advanced tab in the window. The following window appears.
Artisan Technology Group - Quality Instrumentation ... Guaranteed | (888) 88-SOURCE | www.artisantg.com