MDG 1
English
18
Sequence
It is essential to observe the sequence of
the steps described. Only then will the
STIHL diagnostic software be properly
installed on the computer and the engine
analyzer connected to the computer.
1 Check system requirements – see
"Diagnostic Software".
2 Place CD-ROM in the compueter's
CD-ROM or DVD drive and start the
setup program – see "Installation of
STIHL Diagnostic Software".
3 Connect engine analyzer to power
supply – see "Connecting Analyzer
to Power Supply".
4 Plug in and connect the Bluetooth
USB stick – see "Connecting
Analyzer to Computer".
5 Start STIHL diagnostic software –
see "Connecting Analyzer to
Computer".
Installation of STIHL Diagnostic
Software
Place the CD-ROM in the computer's
CD-ROM or DVD drive.
Automatic start
The automatic start functions only if the
computer supports automatic starting of
a program from a CD-ROM
(AUTORUN). If the setup program on
the computer does not start
automatically, start it manually.
Manual start
Open "My Computer" and select
computer's CD-ROM or DVD-ROM
drive. Launch installation with double-
click on "SDSSetup.exe".
MDG 1 Engine Analyzer
Mains voltage and the operating voltage
of the power supply unit must be the
same.
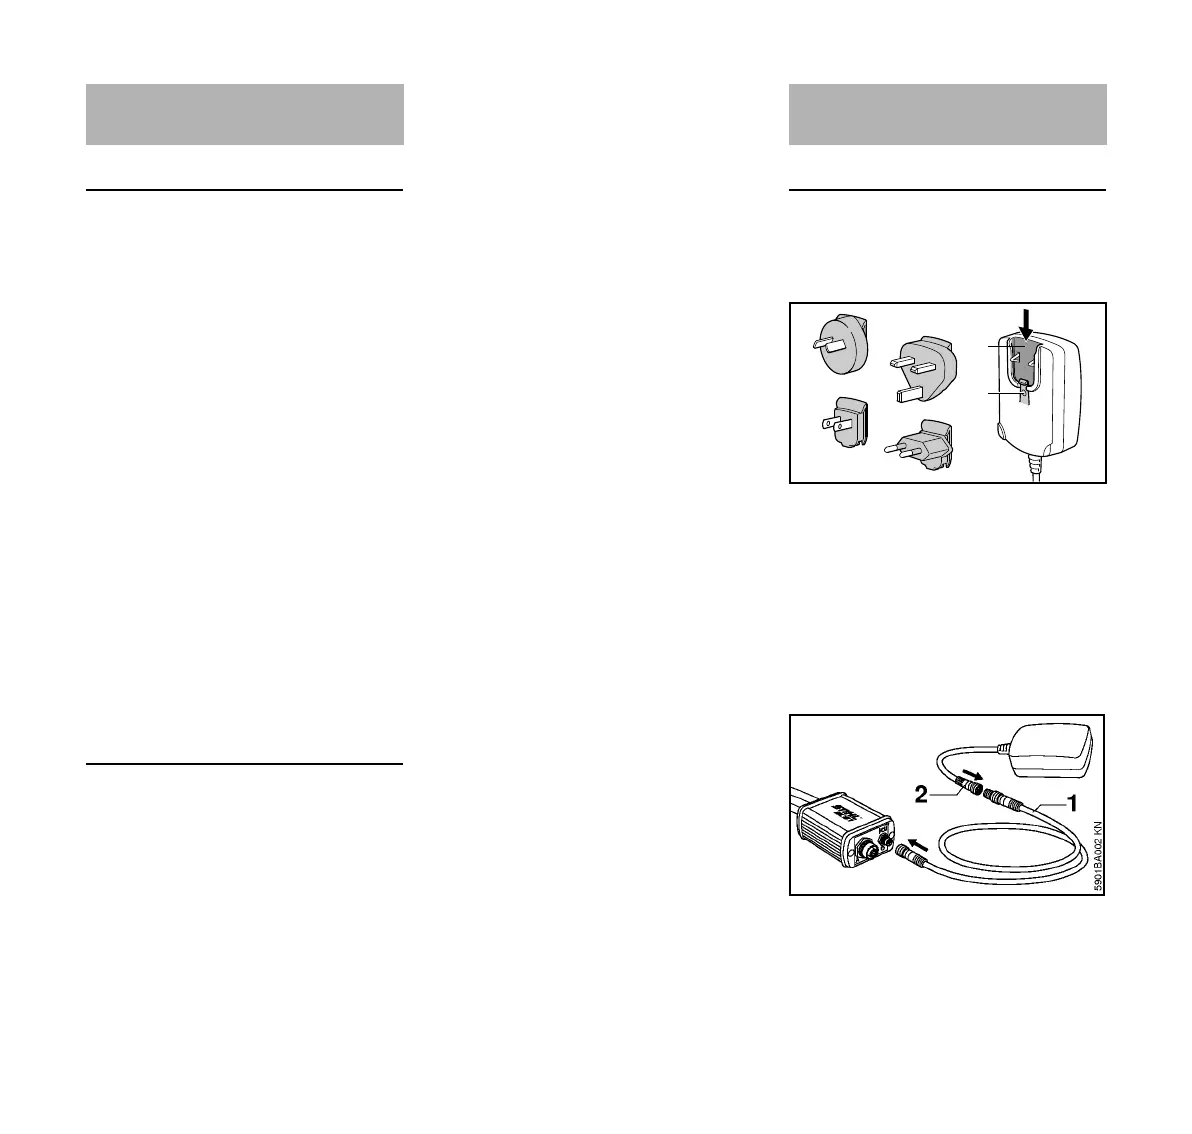
N Select mains plug adapter that suits
wall outlet.
N Slide the adapter into the power
supply unit's slot (1) – the adapter
must snap into position.
To remove the adapter:
N Depress the latch (2) and pull out
the adapter.
N Connect cord (1) to engine
analyzer's socket (B) and the power
supply unit's receptacle (2) – note
coding of connections.
N Screw the connections together.
Installing Diagnostic
Software
Connecting Analyzer to
Power Supply
 Loading...