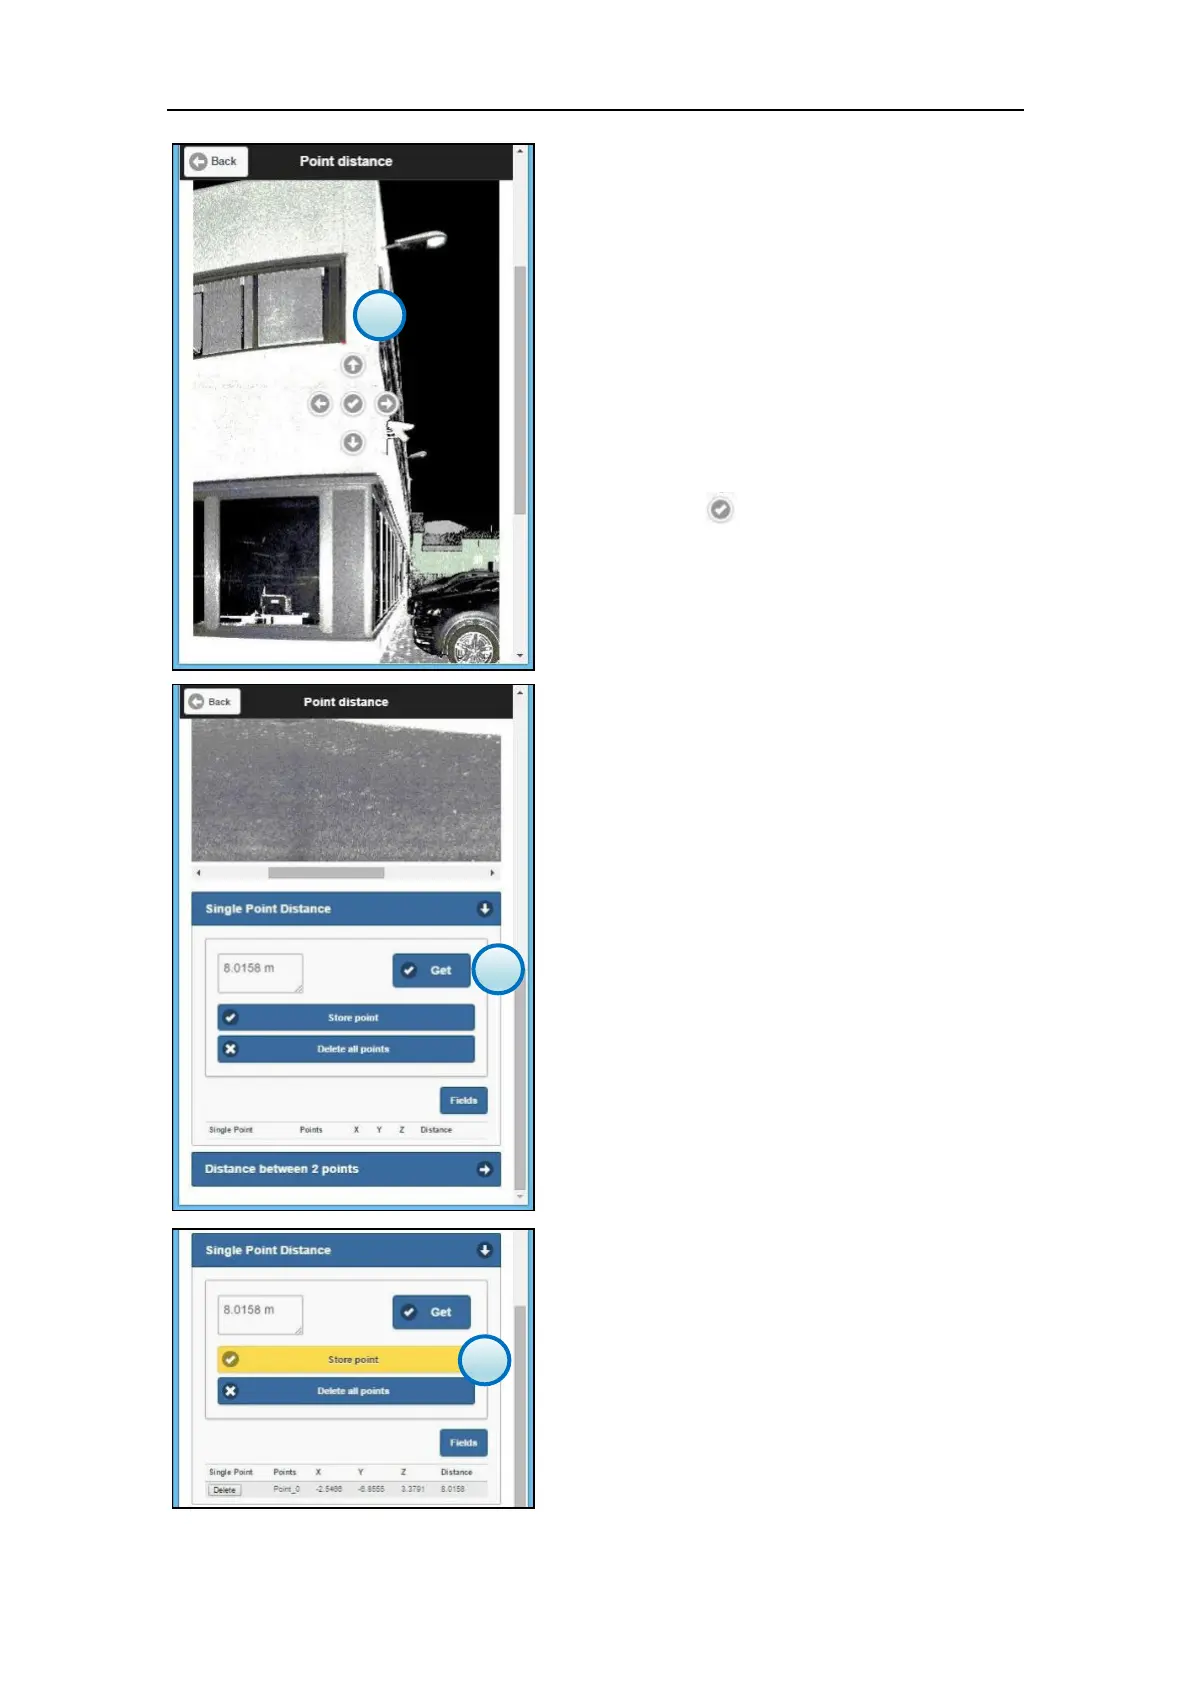
2. Select the point to measure
Select the point on the preview using the finger
(touchscreen) or the mouse (pc).
The point will be marked with a red spot
(visible in the bottom-right corner of the
window).
An arrow pad is visible on top of the image,
allowing to increase the accuracy of the
selection. Use the arrow to move the red spot
along X and Y direction until the position is
correct, then confirm the point using the
Confirm icon
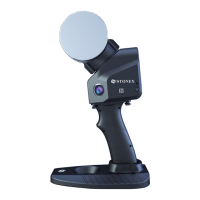
3. Get the point distance
Tap on the Single Point Distance to scroll-down
the menu and press the Get button to calculate
the measure.
The distance measure (in meter units) is
displayed in the box on the left.
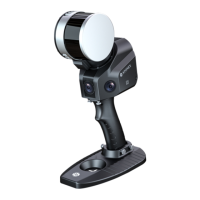
4. Save the measure
Tap the Store point button to save the point
and add it to the point list.
The measure is stored in the X300 internal
memory and it is linked to the point cloud, so
that the points are reloaded and displayed
each time that the scan file is opened in the File
Management menu.
Repeat the steps from 1 to 4 to measure other
points and add them to the point list.