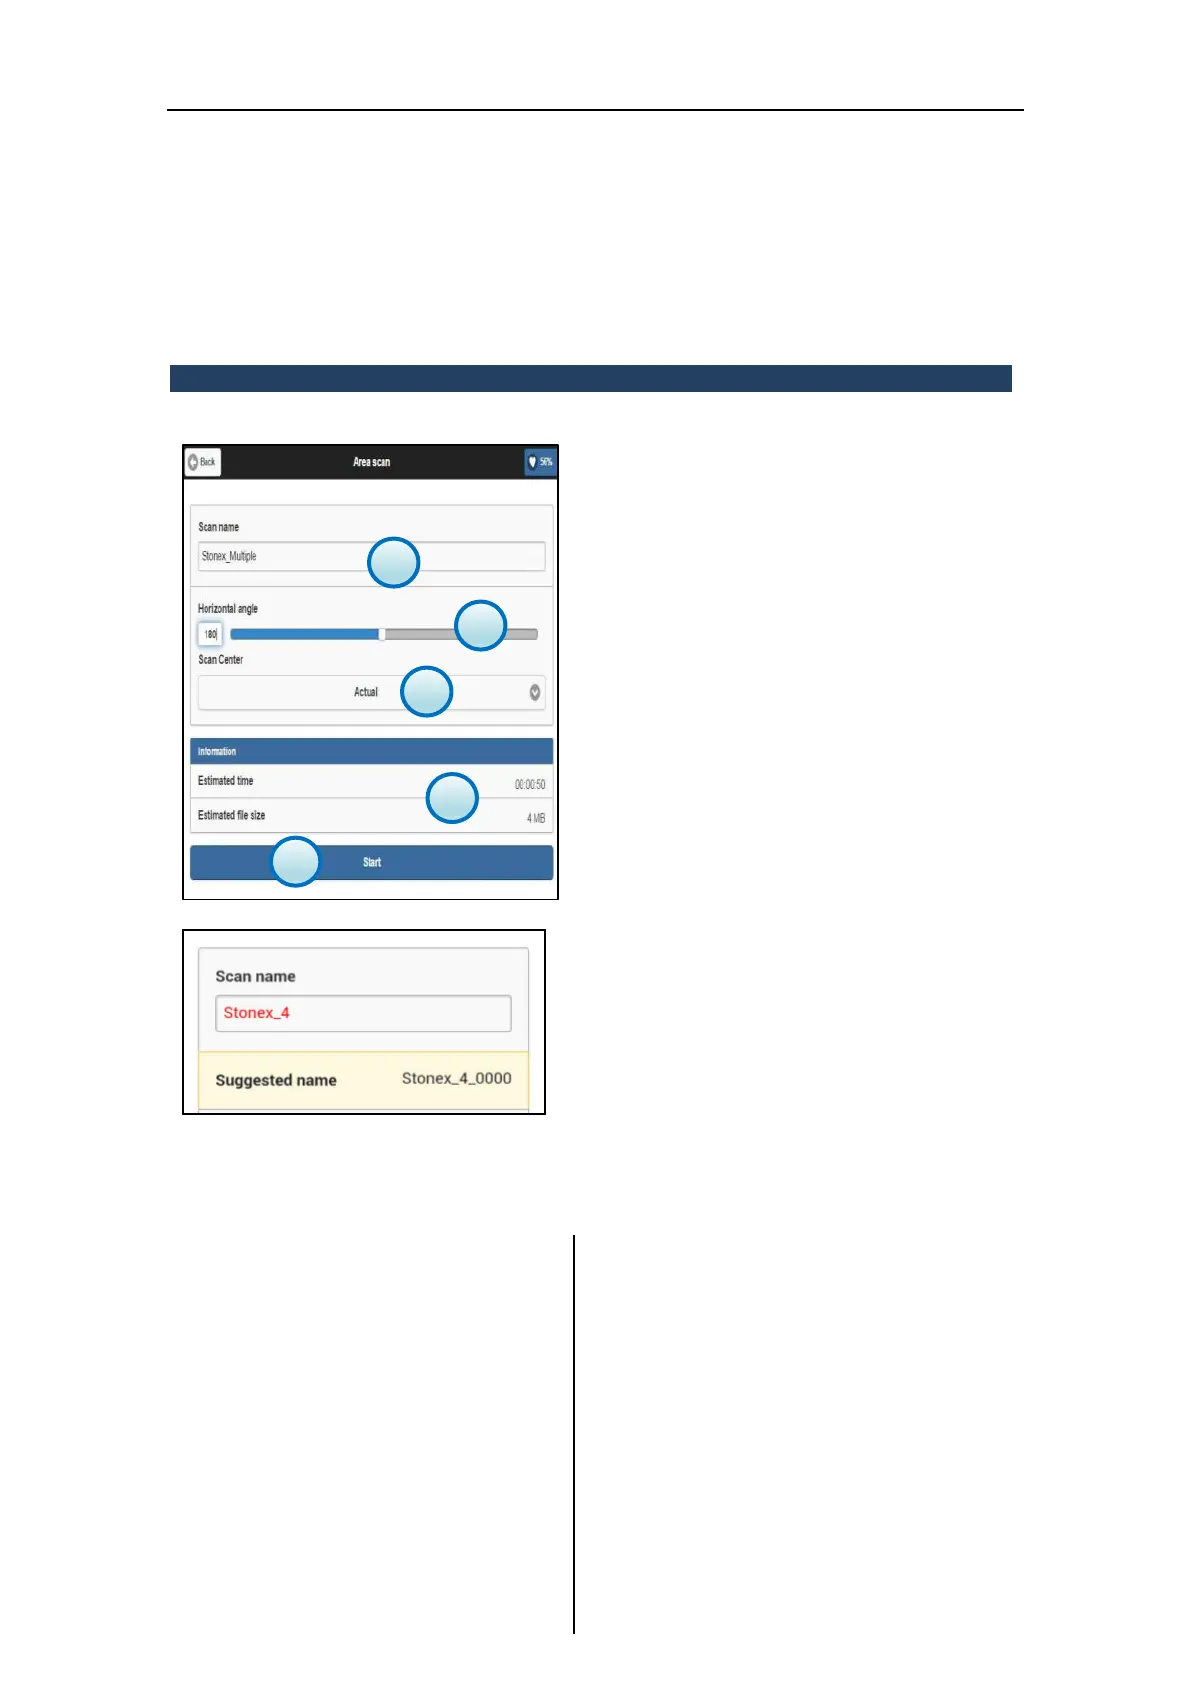
3.5.3 Multiple scan
1. Scan name
Enter the name of the preview scan to used as
reference for the sub-scans.
2. Horizontal angle
Set the angle for the horizontal rotation of the
scanner (unit: °deg).
3. Starting Position of Scan
Set the starting position of Laser X300 (Index or
Actual Position)
4. Information
It displays scan estimated time and file size
information depending on the settings (photos
included).
5. Start
Press the Start button to start scanning,
according to the given settings.
Renaming the new scan, if the scan file already
exist in the Files management archive or the
file name is invalid, the scan name will be
colored in red and a message with a suggested
name will appear in a yellow box.
Click on it to accept the suggestion.
If advised name is not accepted and the invalid
or existing one is not modified, clicking on Start
button, a system message will appear, asking
for continuing with rename procedure:
Yes: the scan will be renamed as
suggested.
No: it return to the Simple Scan page
and the user must rename the current
new scan.