84 EN
Follow the instructions below to install the Sidne™ Telephone Installation
2.0 upgrade on the Sidne™ console:
1. Power on the Sidne™ console and wait until Sidne™ says
“Sidne™ ready.”
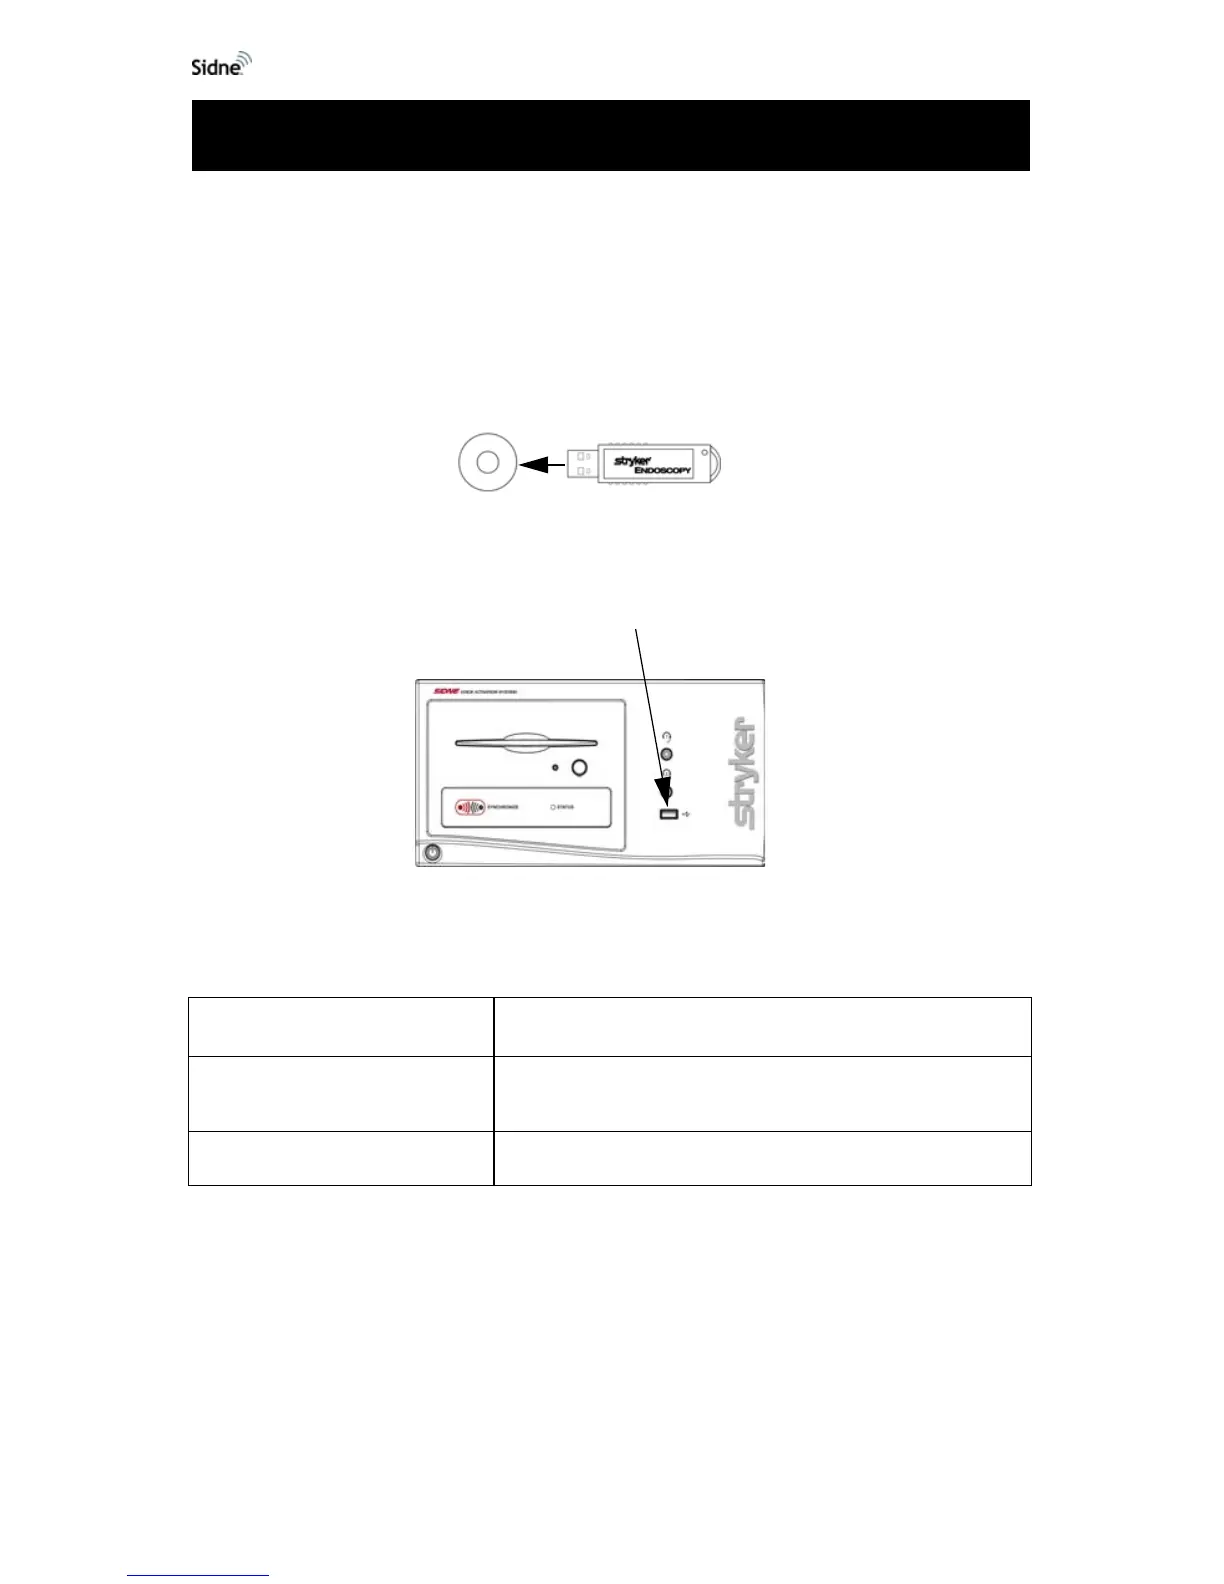
2. Remove the cap from the telephone driver dongle (see the
figure below).
Figure 1: The Telephone driver dongle
3. Insert the dongle into the device-driver dongle port on the
front Sidne™ panel (see the figure below).
Figure 2: The device-driver dongle port on the SIDNE front panel
4. Follow the voice instructions given by Sidne™:
5. Wait as Sidne™ restarts. When the console says, “Sidne™
ready; telephone connected,” the driver is installed and
ready for use.
Note After installation, the driver dongle will work only with the
system on which it has been installed. It can be reinstalled
on that system, but it will not work with other systems.
Sidne™ Says Meaning
“Software card detected. Please
stand by.”
Wait for the next instruction.
“Please remove card.” Remove the driver dongle from the Sidne™ console.
Installing the Telephone Upgrade