3-56 Sun Fire X4100/X4100 M2 and X4200/X4200 M2 Servers Service Manual • August 2009
■ Bottom LED on (green): The drive is operating properly.
Note – When you replace the drives to their bays, you must return each drive to the
bay from which it was removed. Temporarily label the drives when you remove
them.
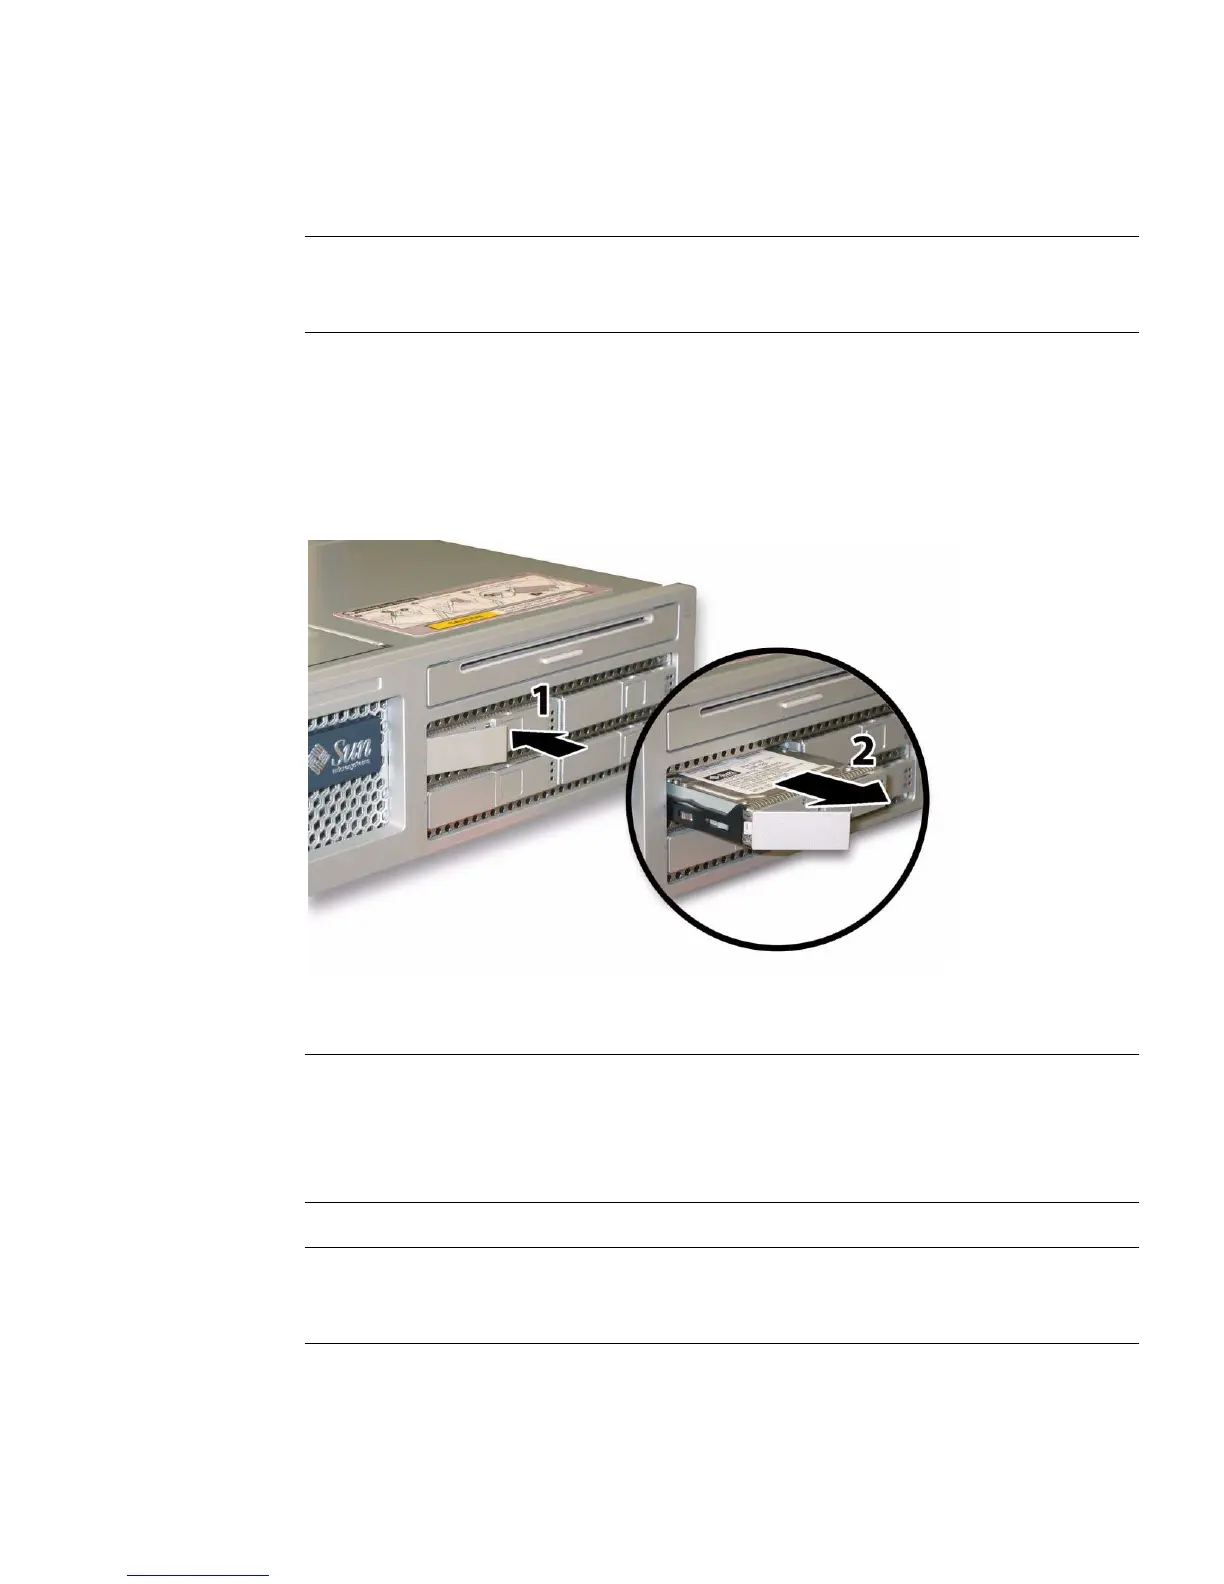
2. Press the button on the face of the drive to release the spring-loaded securing
latch. See
FIGURE 3-45.
3. Grasp the securing latch and remove the drive from the drive bay.
FIGURE 3-45 Opening the Hard Disk Drive Latch
Installation is the reverse of this procedure.
Note – If the drives were previously configured as a mirrored RAID 1 array, an
automatic resynchronization is invoked and the contents are automatically rebuilt
from the rest of the array with no need to reconfigure the RAID parameters. If the
bad drive was configured as a hotspare, the new drive is automatically configured as
a new hotspare.
Note – When you install an drive, open its securing latch before you push the drive
into the bay. Push the drive into the bay until it stops, then close the securing latch to
fully engage the connector on the drives backplane.