Page 5.3
5.3. RECOMMENDED ANTENNA SIGNAL REQUIREMENTS
All the information about the minimum requirements concerning the antenna signal
are detailed in the proper manual “Electrical and antenna requirements” you can find
and download into the Technogym Direct.
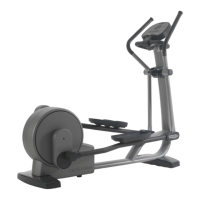
5.4. INSTALLATION
To correctly install the machine, proceed as follows:
1. Ensure that the specifications and requirements for installation have been met (see paragraph:
5.1. “Specifications and requirements”).
2. Position the machine as specified above, on a level surface that is free of vibrations and has
sufficient carrying capacity for the combined weight of the machine and user.
3. Depending on the destination country, the machine may be shipped partially disassembled,
packed inside a special carton and fixed to a pallet, or fully assembled, wrapped in clear plastic
and fixed to a wooden pallet.
Follow the assembly operations described in the instruction sheets supplied with the machines.
4. Connect the mains lead to the power inlet socket on the machine.
5. Place the on/off switch in the 0 position.
6. Plug the mains lead into the wall outlet.
7. Connect the antenna cable to the wall outlet and make sure all the technical requirements are
respected according to the specific paragraph of this manual.
5.5. FIRST POWER-ON
After completing the installation procedure, the machine is ready for use.
On power-up the machine performs a Check-Up of the High Kit and Low Kit assemblies. After
completing the Check-Up, the machine enters the Stand-By state, awaiting a command from the
keyboard.
To check the correct operation of the machine:
• Get on the machine;
• Check that exercise resistance varies when the “+” and “-“ effort level keys are pressed, or
the touch sensors, and the effort level change from 1 to 25;
• Put on the heart rate meter and check that the machine correctly reads the heart rate value;
• Grasp the sensors and check that the machine correctly reads the heart rate value;
• Carry out the “Touch Screen calibration” procedure described in the relevant paragraph of
the User menu.