Aligna
®
4D User Manual
36 / 84
9 Setting up an Aligna
®
Test System
The final laser system to be controlled by an Aligna device often involves complicated optical
setups. Therefore, we strongly recommend using the simple test setup to become familiar
with the Aligna parameters and their usage.
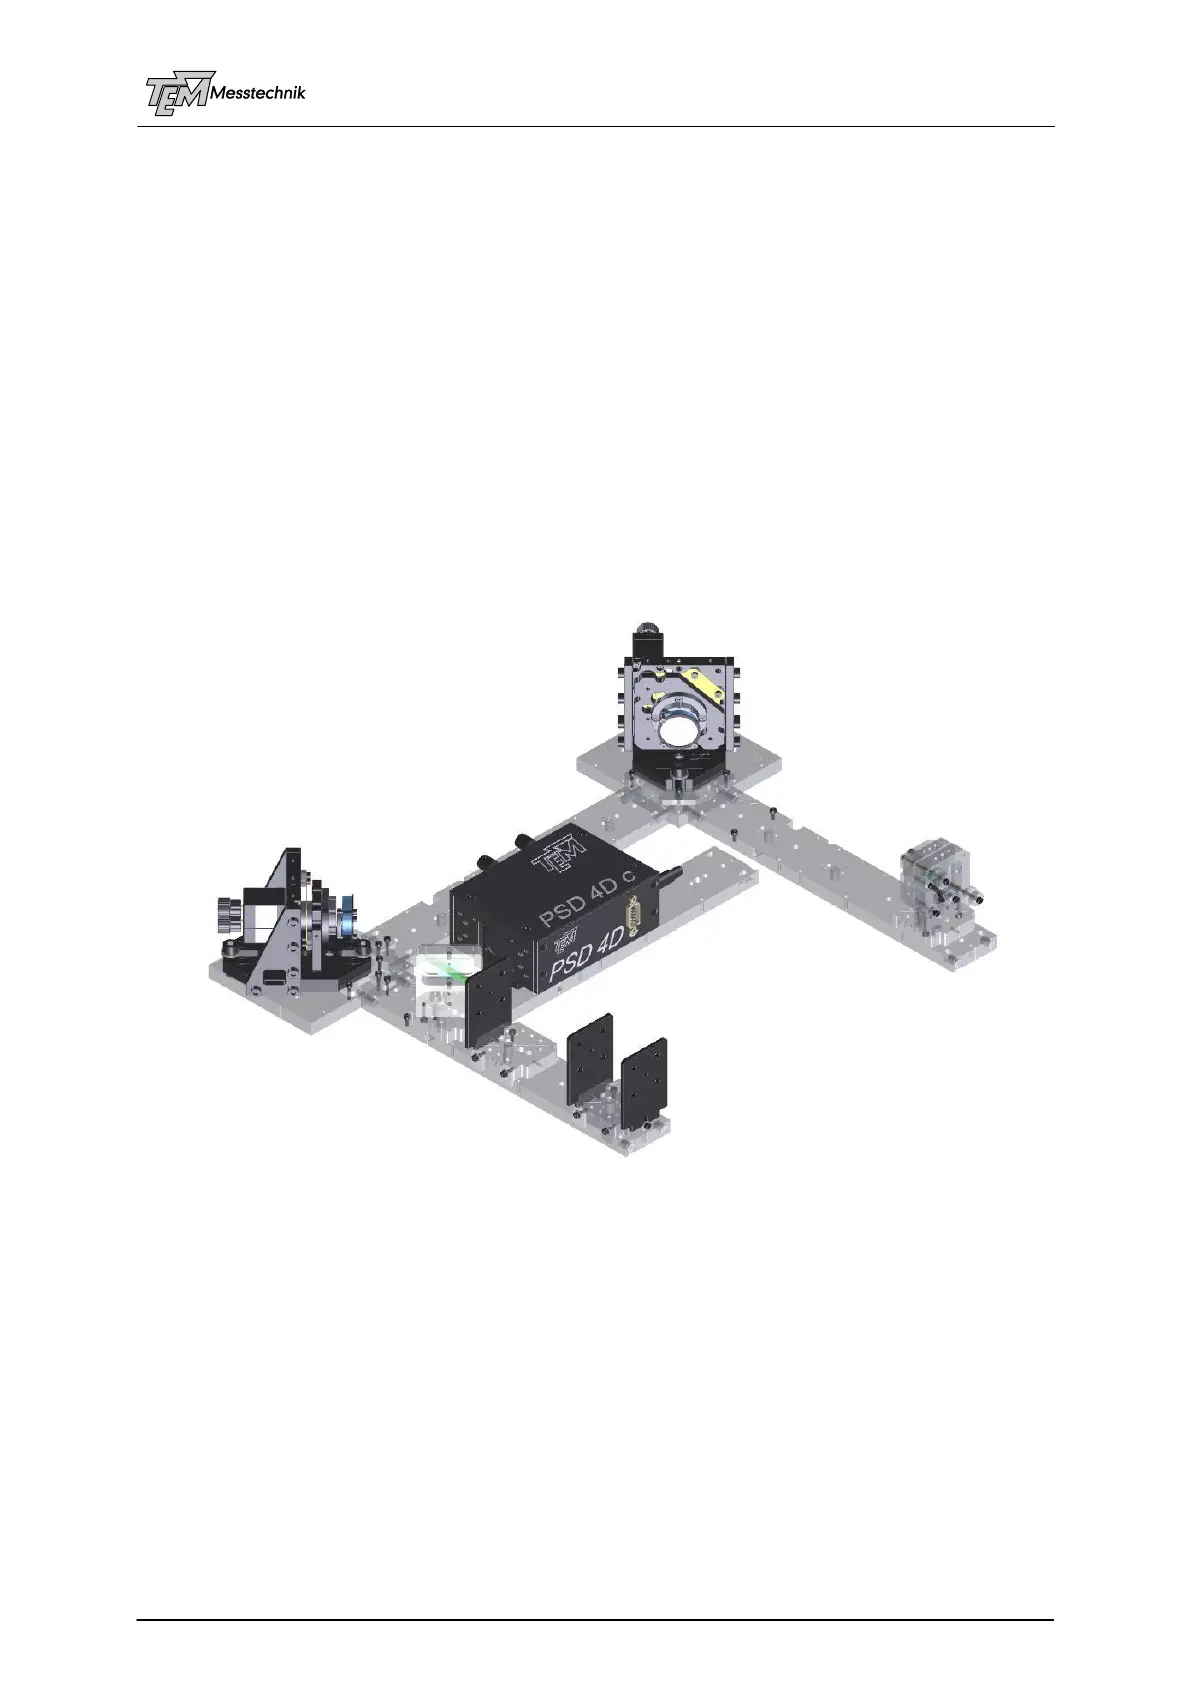
A typical test setup consists of the following items:
a small laser (of visible (!) wavelength, e.g. a laser pointer)
the two Aligna actuator mirrors (motorized and/or piezo driven)
the PSD4D detector (or equivalent, depending on the ordered version: "PSD4D e",
"PSD4D i", "PSD4D c",...)
Optionally, it also contains
a beam sampler plate to couple out a test beam for pointing measurement
two irises to define the target beam path
TEM offers the "Aligna Plug'n Play Kit", which is a test system as described above.
Aligna Plug'n Play Kit
The acrylic glass parts of the Plug’n Play Kit connect magnetically, and each connection is
individually numbered, which makes the setup easy and fast. Once assembled, you can start
working with the beam alignment and stabilization system. In a later step, you will transfer the
Aligna components (without the acrylic base plates) to the final laser system.
Setting up the test system is done in the following steps:
Cable Connections
Installation and start of the visualization software "Kangoo"
Setting and testing communication parameters between µC and PC
Coarse pre-alignment of the opto-mechanical setup (already done if you got the
Plug'nPlay Kit)