2-4
Initial Assembly and Admin Setup
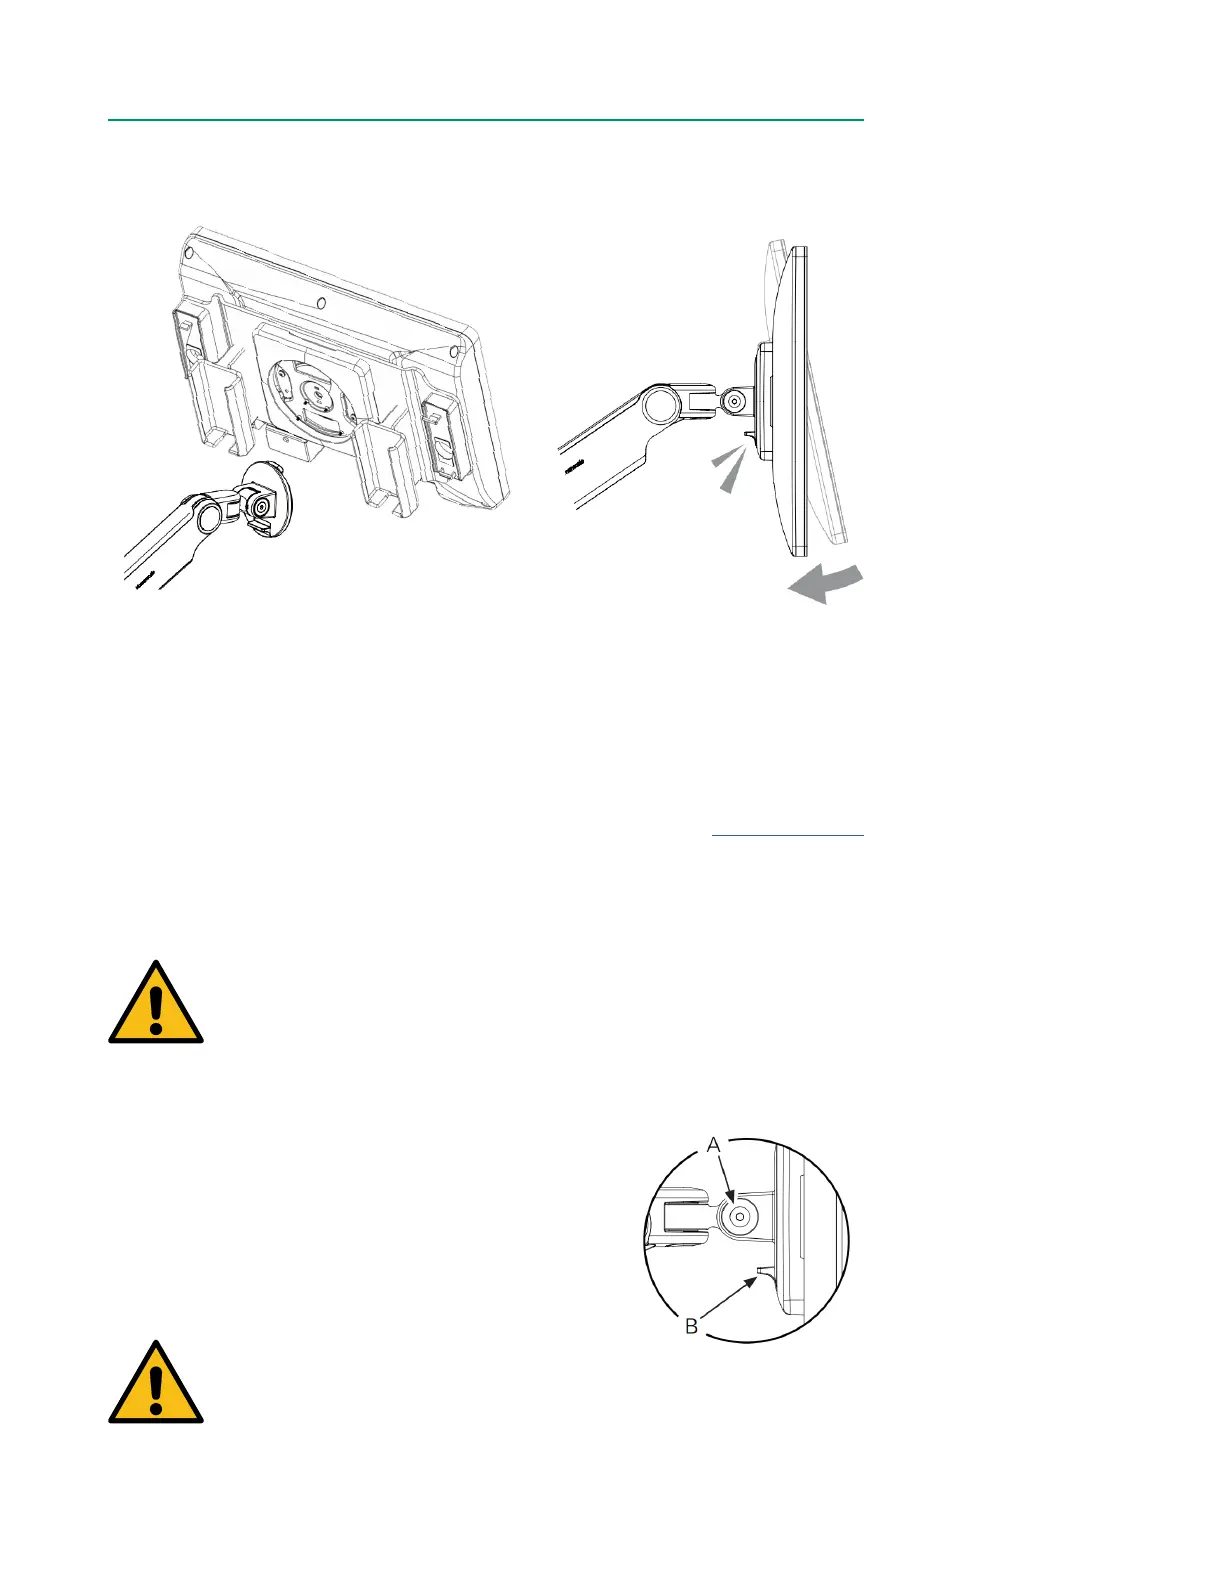
3. Tilt the Display to align the notches on the mounting disk with the Display
mount, then press the Display until it is rmly in place.
4. Ensure the Display is securely attached to the bracket before proceeding.
5. Connect the right-angle end of the Display cable to the bottom of the Display
by aligning the red alignment dots and pushing until it clicks. The Display cable
can be routed through the Display Bracket, if preferable.
6. Connect the other end of the Display cable to the Display port on the back of
Core by aligning the red dots and pushing until it clicks. See Chapter 1, “Core”
for Display port location.
• The Display can swivel and tilt freely on the bracket.
Warning
Before removing the Display from the Display Bracket, raise the
bracket to its highest position. The bracket is under tension and
may spring upward if not already at its highest position when the
Display is removed.
Do not push down on the Display Bracket while removing the
Display.
• To disengage the Display from the bracket (A), hold
the Display rmly in one hand, then squeeze the
quick disconnect lever (B) on the bottom side of the
bracket.
Warning
Do not roll equipment over the cables of the CDI OneView System.
Mishandling can cause damage and deterioration of system
performance.