4.22 North bridge (and GPU) heat sink/CPU heat sink/Fan/CPU 4 Replacement Procedures
Installing the North bridge (and GPU) heat sink/CPU heat sink/Fan/CPU
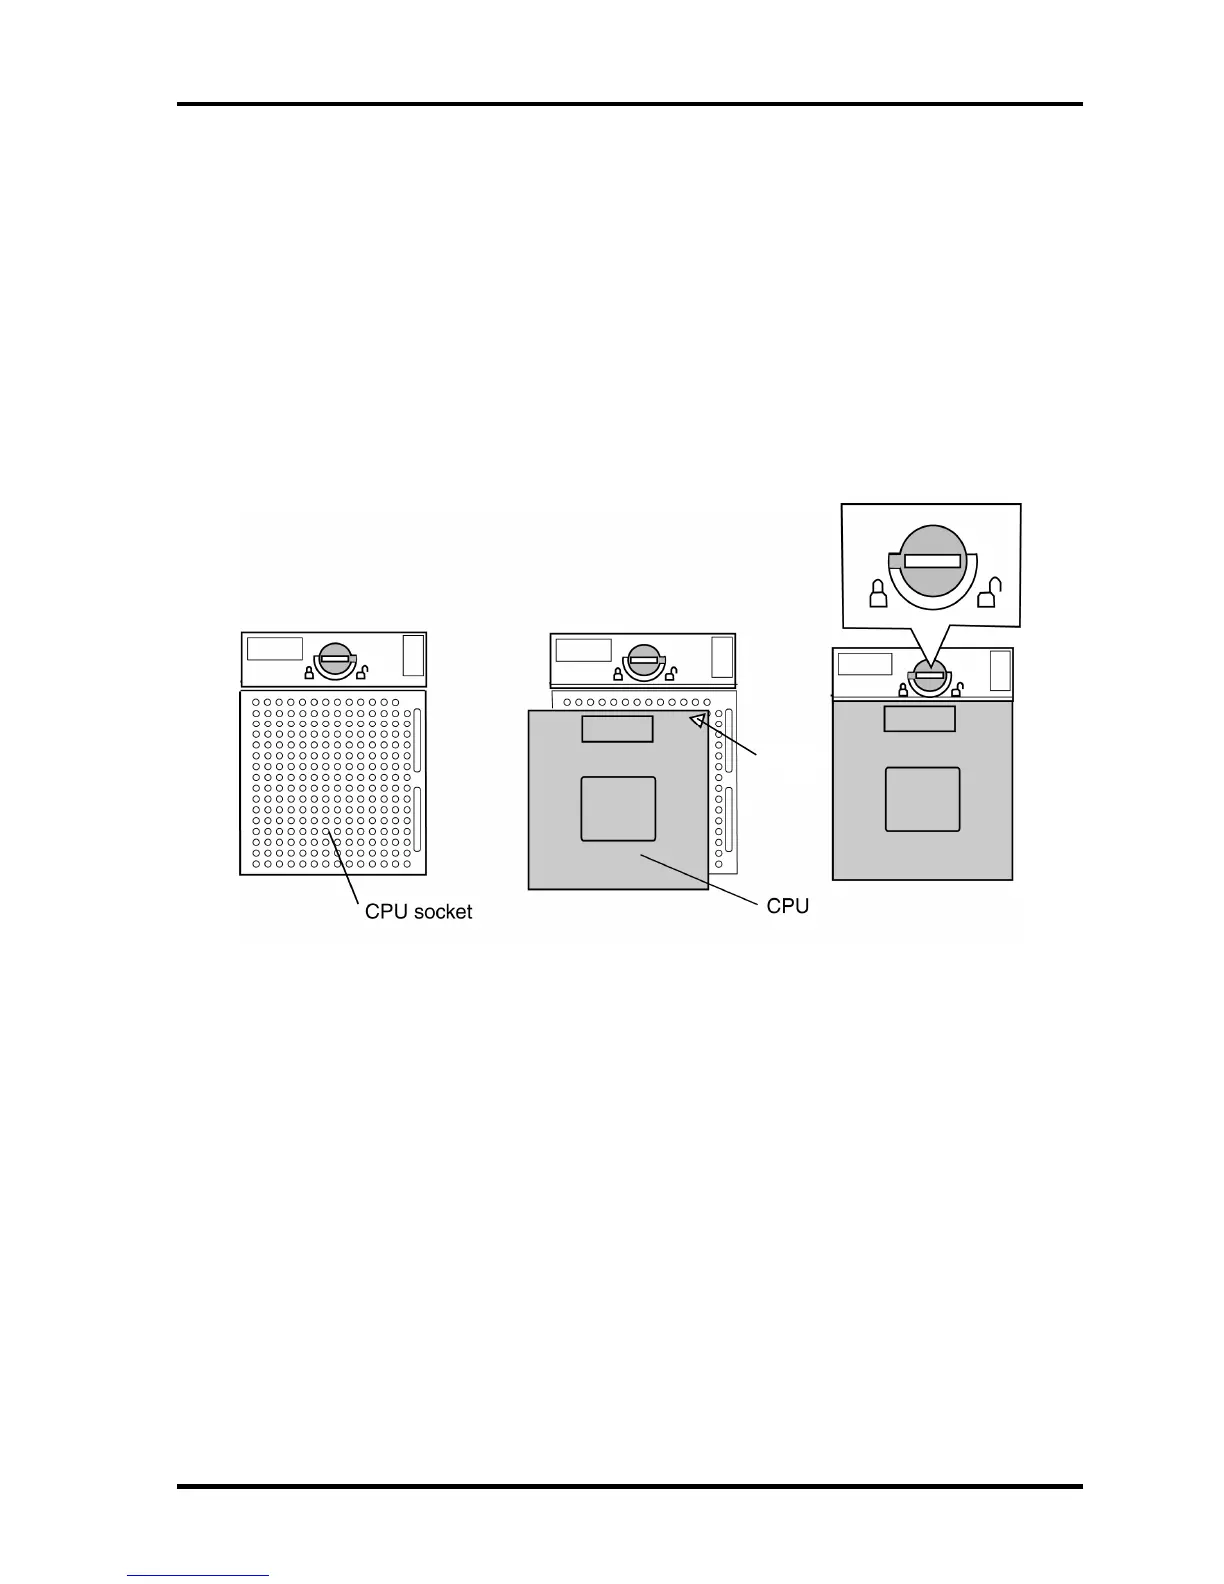
To install the North bridge (and GPU) heat sink/CPU heat sink/Fan/CPU, follow the steps
below and refer to Figure 4-36 to 4-42.
1. Make sure that the cam of the CPU socket is in the unlock (OPEN) position.
2. Install the CPU on the CPU socket and check the CPU is installed on the correct
position.
3. Lock the CPU by rotating clockwise the cam on the CPU socket by 180 degrees with
a flat-blade driver.
Mark
Figure 4-41 Installing the CPU
TECRA A9/TECRA S5/TECRA P5/Satellite Pro S200 Maintenance Manual (960-633) [CONFIDENTIAL] 4-67

 Loading...