4.24 LCD unit/FL inverter 4 Replacement Procedures
4 Replacement Procedures
4.24 LCD unit/FL inverter
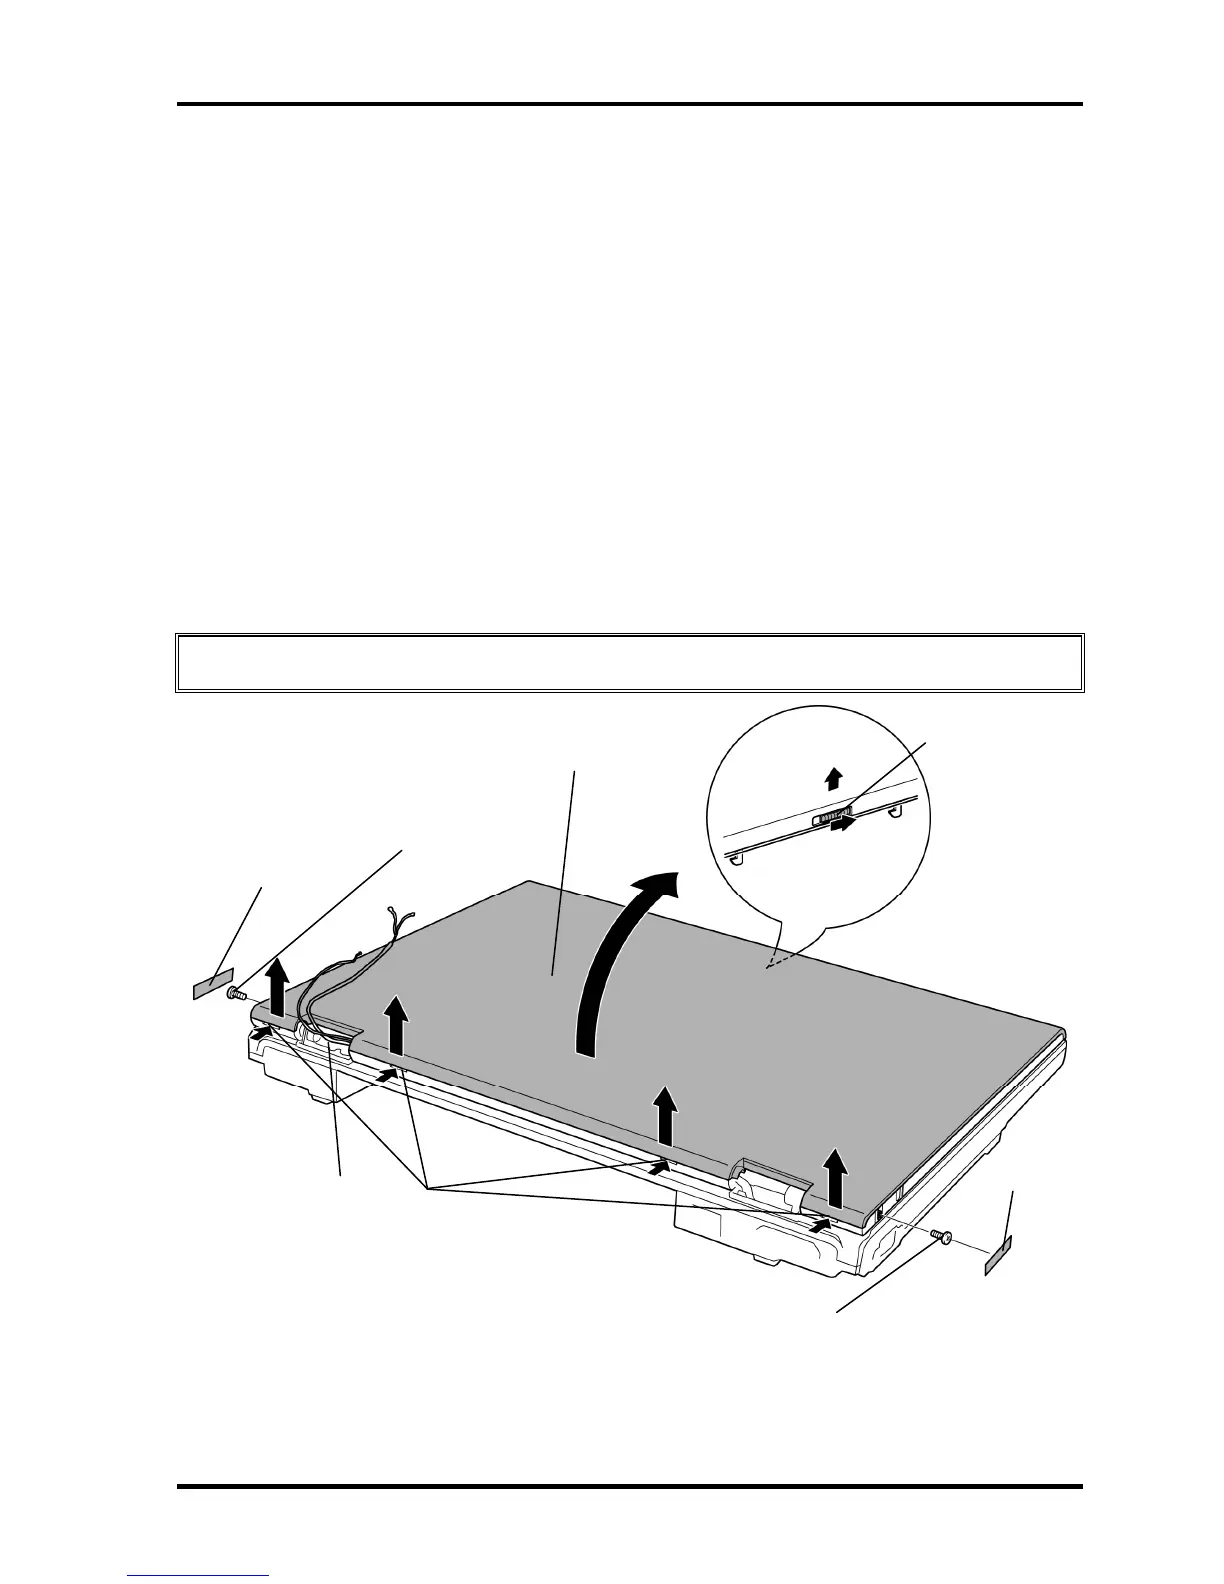
Removing the LCD unit/FL inverter
To remove the LCD unit/FL inverter, follow the steps below and refer to Figure 4-44 to 4-46.
1. Open the display and make it flat.
2. Remove the mask seals and following screws securing the LCD mask.
• M2.5×6B FLAT HEAD screw ×2
3. Close the display.
4. Insert your fingers into the slits and remove the display rear cover while releasing
latches.
CAUTION: Release the cover latch when removing the display rear cover.
Display rear cover
M2.5×6B FLAT HEAD
(Applied loctite 425)
Mask seal
Mask seal
Slit
Cover latch
Hole
M2.5×6B FLAT HEAD
(Applied
Loctite 425)
Figure 4-44 Removing the display rear cover
TECRA A9/TECRA S5/TECRA P5/Satellite Pro S200 Maintenance Manual (960-633) [CONFIDENTIAL] 4-71
 Loading...