EasyManuals Logo

Toshiba TECRA A9 Series Maintenance Manual

Toshiba TECRA A9 Series
405 pages
To Next Page IconTo Next Page
To Previous Page IconTo Previous Page
Page #308 background imageLoading...
Page #308 background image
4.24 LCD unit/FL inverter 4 Replacement Procedures
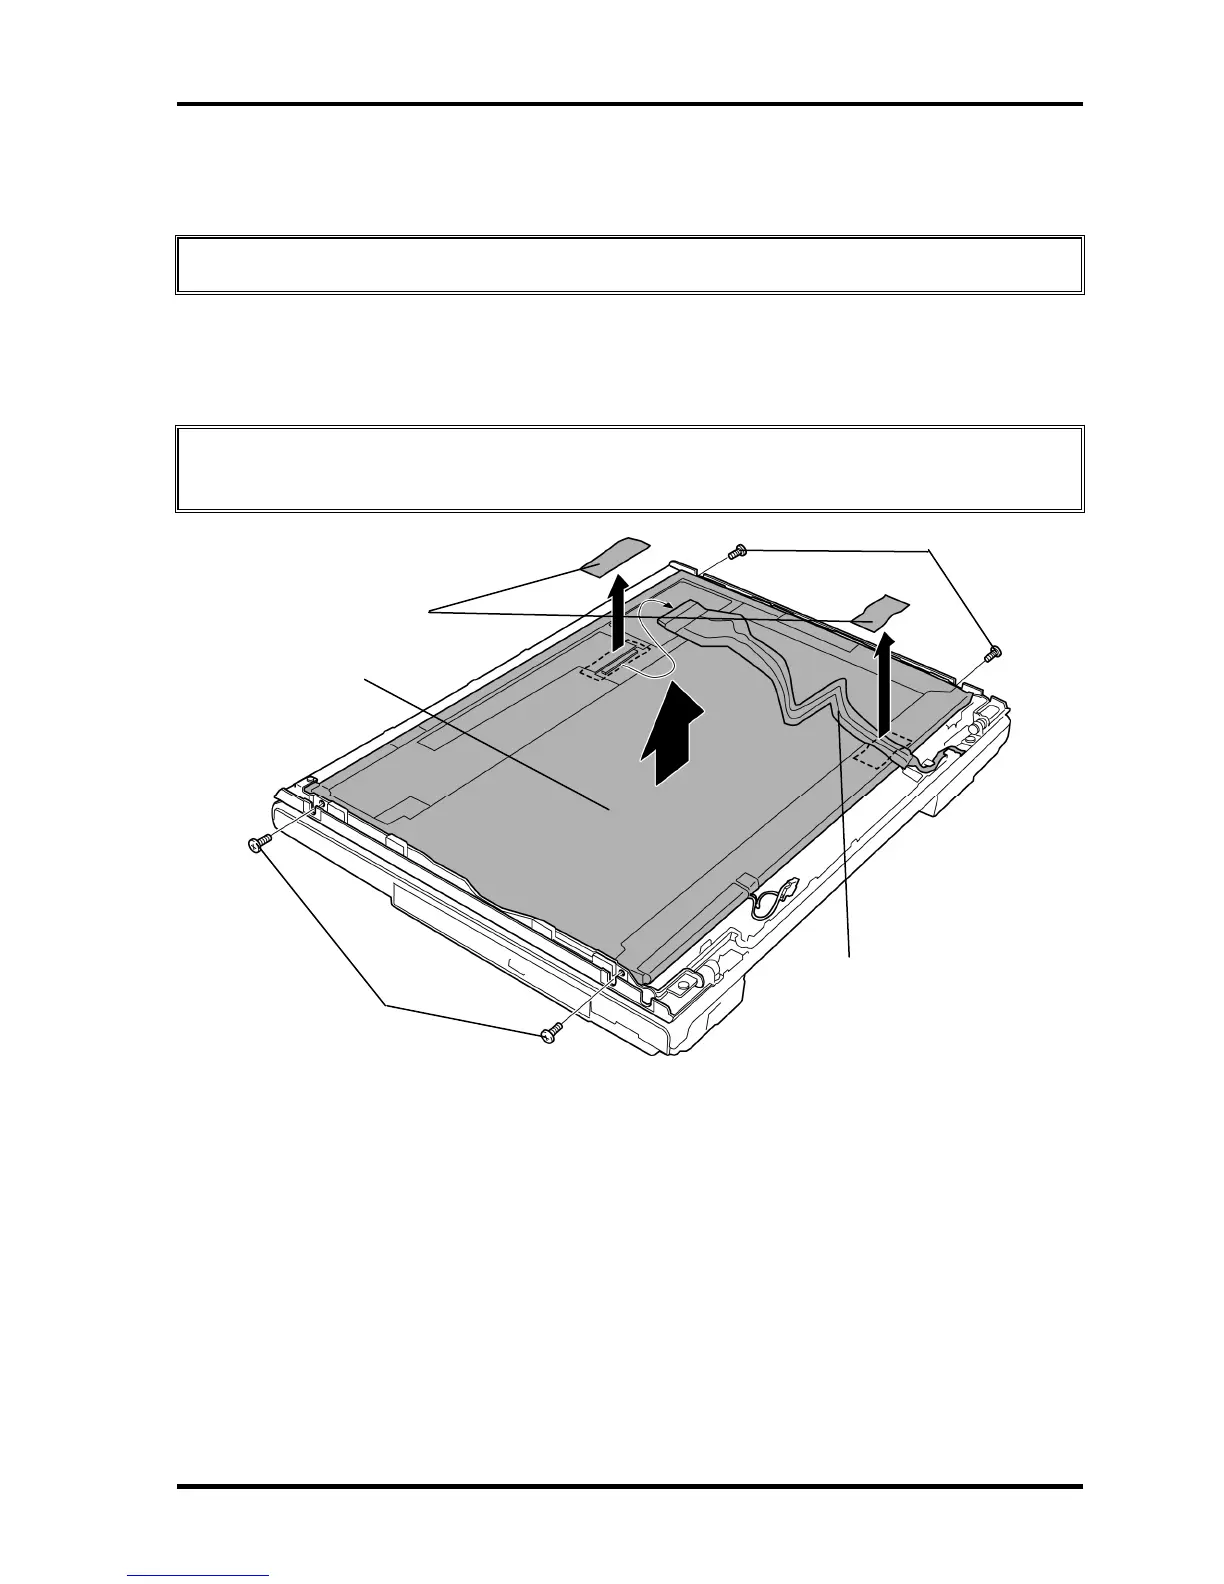
7. Remove two glass tapes securing the LCD cable and disconnect the LCD cable from
the connector on the LCD unit.
CAUTION: When removing the LCD cable, be careful not to damage the connector.
8. Remove the following screws and LCD unit.
• M2×3C BIND screw ×4
CAUTION: When lifting up the top of the LCD unit, hold the corners of the LCD unit.
The top edge of LCD unit is sensitive area.
LCD cable
Glass tape
LCD unit
M2×3C BIND
M2×3C BIND
Figure 4-46 Removing the LCD unit
TECRA A9/TECRA S5/TECRA P5/Satellite Pro S200 Maintenance Manual (960-633) [CONFIDENTIAL] 4-73

Table of Contents

Other manuals for Toshiba TECRA A9 Series

Questions and Answers:

Question and Answer IconNeed help?

Do you have a question about the Toshiba TECRA A9 Series and is the answer not in the manual?

Toshiba TECRA A9 Series Specifications

General IconGeneral
ProcessorIntel Core 2 Duo
Display15.4-inch
Display Resolution1280 x 800 pixels
RAMUp to 4 GB
Operating SystemWindows Vista
Optical DriveDVD-RW
Wireless802.11a/g/n
PortsUSB 2.0, VGA, Ethernet, Headphone

Related product manuals