126
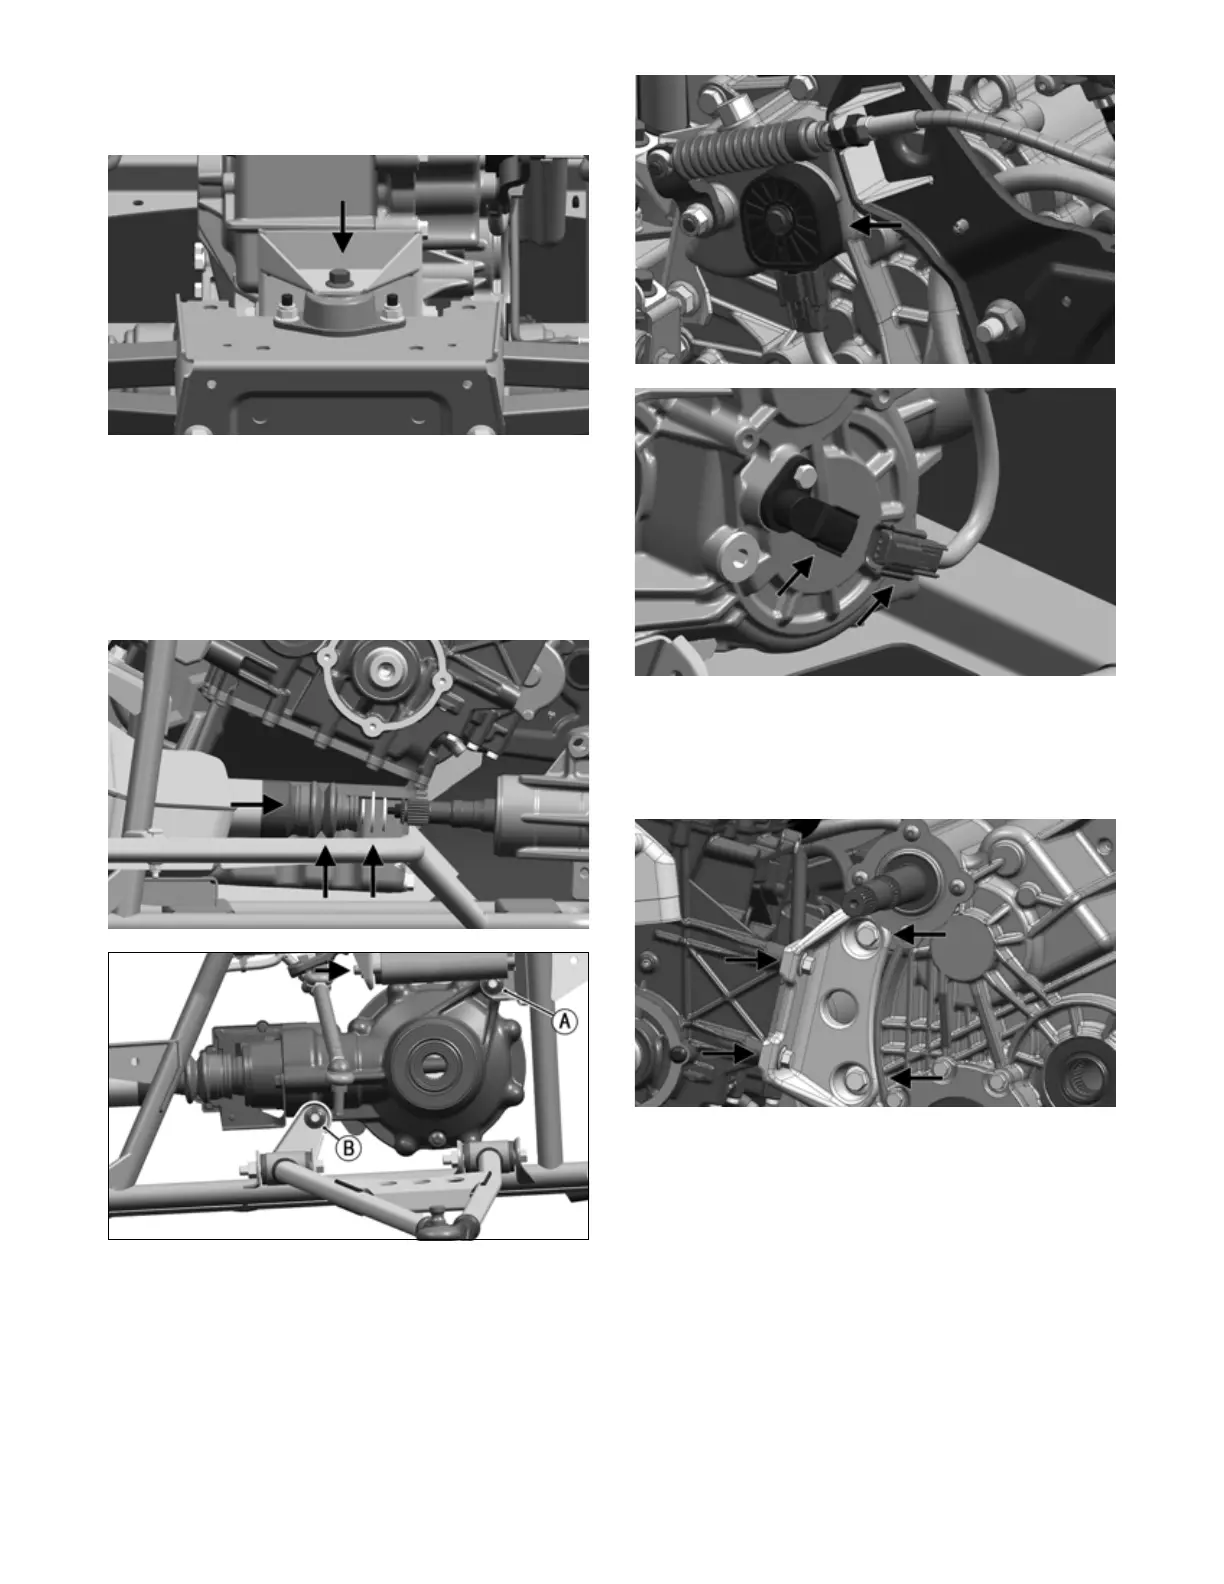
2. Place the transaxle into position on the rear mounting
studs and secure using new lock nuts. Tighten to 25 ft-lb
(34 N-m).
OHA119
3. Move driveshaft rearward to engage with transaxle.
Account for boots and seals. Install lower differential
mounting cap screw (B) with a new lock nut but do
not tighten at this time. Install the upper differential
mounting cap screw (A) with a new lock nut and
tighten to 45 ft-lb (61.2 N-m). Then tighten the lower
differential mounting cap screw (B) to 16 ft-lb (21.8
N-m).
OHA118A
OHA075
4. Install the shift cable bracket and tighten to 7 ft-lb
(9.5 N-m).
5. Connect the shift cable to the transaxle and secure
with the E-clip. Connect the speed sensor and gear
position switch.
OHA100
OHA102
6. Install engine transaxle mount and secure to the
transaxle with cap screws and new lock nuts.
Tighten to 75 ft-lb (102 N-m). Secure mount to
engine with two cap screws. Tighten to 35 ft-lb
(47.6 N-m).
OHA112
7. Place upper frame into position and secure front with
cap screws. Tighten to 35 ft-lb (47.5 N-m). Secure
rear upper frame to lower frame with four cap screws
and new nuts. Tighten to 42 ft-lb (56.9 N-m). Secure
upper rear shocks to frame with bolts and new lock
nuts. Tighten to 42 ft-lb (56.9 N-m).